Collaboration Governance
Control how users share and collaborate while protecting sensitive data through Data Loss Prevention, Retention policies, Sensitivity labels, and Teams/SharePoint governance settings.
Overview
| Section | Description |
|---|---|
| Data Loss Prevention | Prevent exfiltration or accidental oversharing of sensitive data |
| Retention Policies | Preserve data for exactly as long as required |
| Sensitivity Labels | Data classification with encryption and access controls |
| SharePoint and OneDrive | Configure default sharing options |
| Groups and Teams | Govern Microsoft 365 Groups and Teams settings |
Governance Risk Matrix
| Checklist Item | Lower Risk | Recommended for Higher Risk |
|---|---|---|
| DLP policy | Default (None) | Enabled for GLBA, HIPAA sensitive data types |
| Retention policies | Default (None) | General (1–2 years) + compliance labels (6–7 years) |
| Sensitivity labels | Default (None) | Public, General, Confidential, Highly Confidential |
| Teams: Groups creation | Allow all | Restrict to specific individuals + Expiration policy |
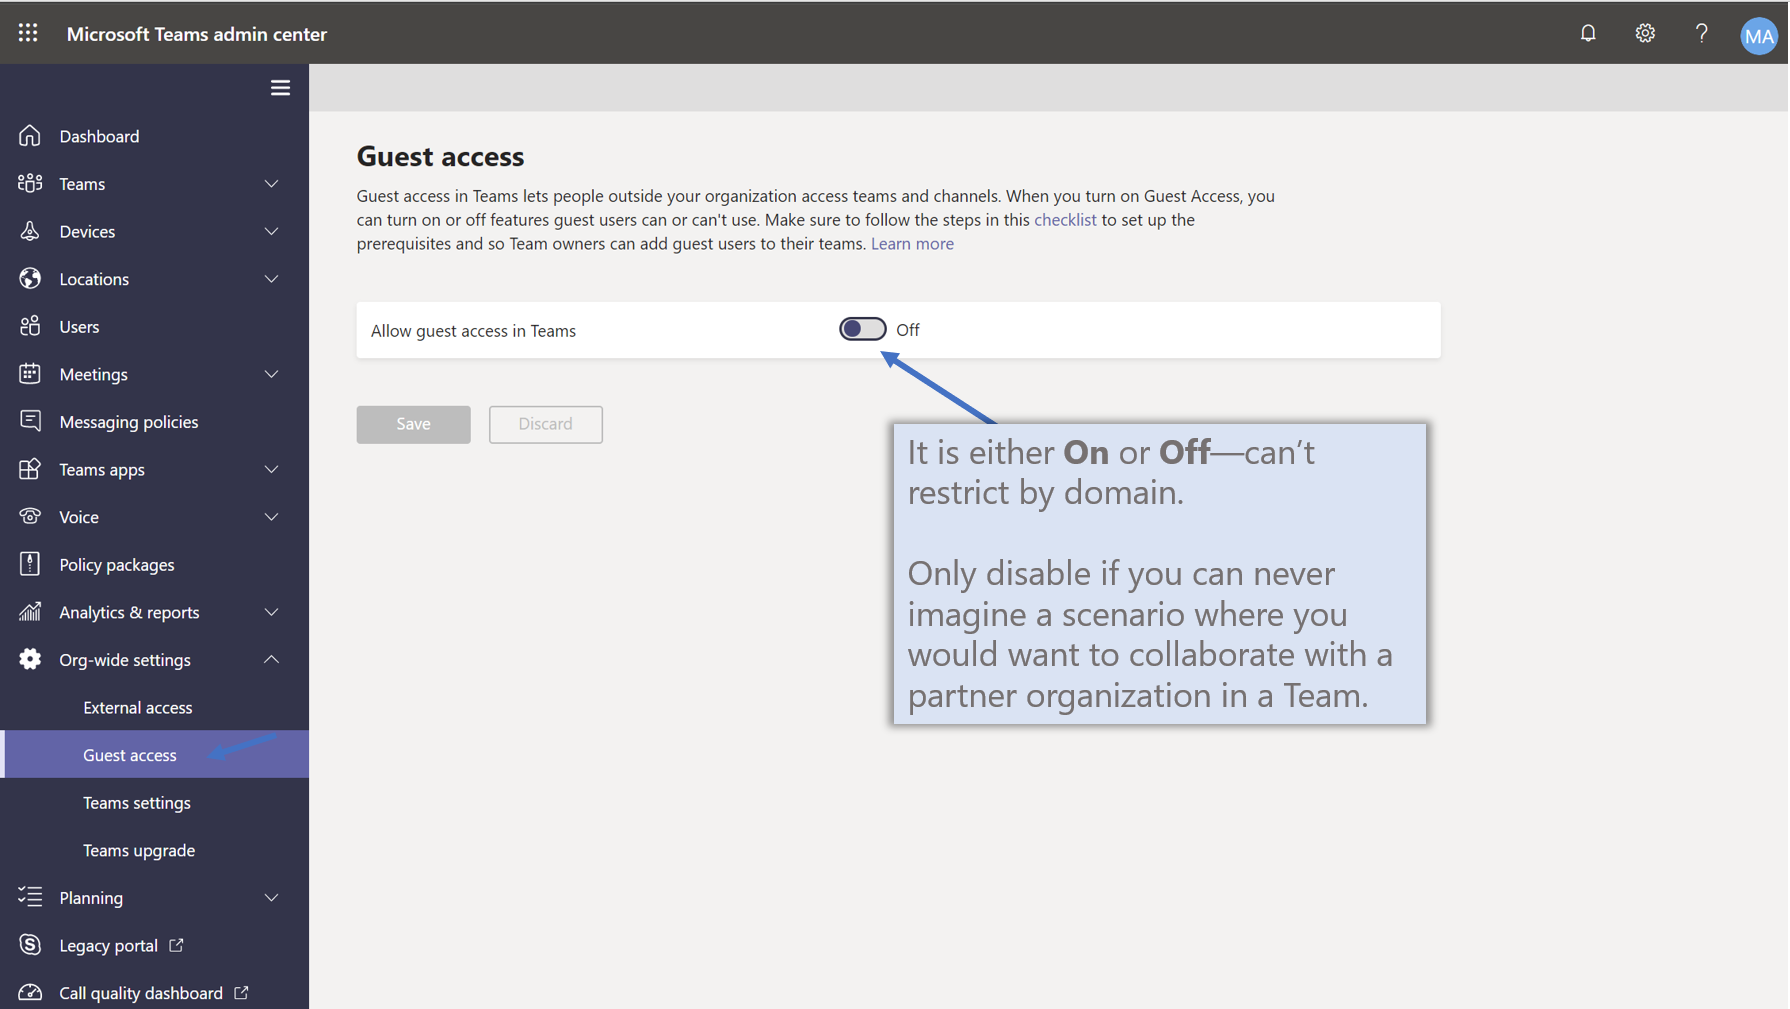
| Teams: Guest access | Enabled | Disable only if external collaboration never needed |
| Teams: External chat | Allow | Restrict by domain for specific partner orgs |
| Teams: 3rd party storage | Allow | Disable all third-party storage providers |
| SharePoint/OneDrive sharing | Allow Anyone links | Require login (New & Existing guests) |
| Guest sharing links | Allow | Disable guests from generating sharing links |
Data Loss Prevention
Prevent exfiltration or accidental oversharing of sensitive information.
| Automate with PowerShell — Install-SensitivityLabels.ps1 | Install-DataRetentionPolicies.ps1 | Install-TeamsRetentionPolicies.ps1 | Set-GroupExpirationPolicy.ps1 |
Step 1 — Deploy the Recommended DLP Policy
-
Go to Microsoft 365 Admin Center > Setup and search for DLP
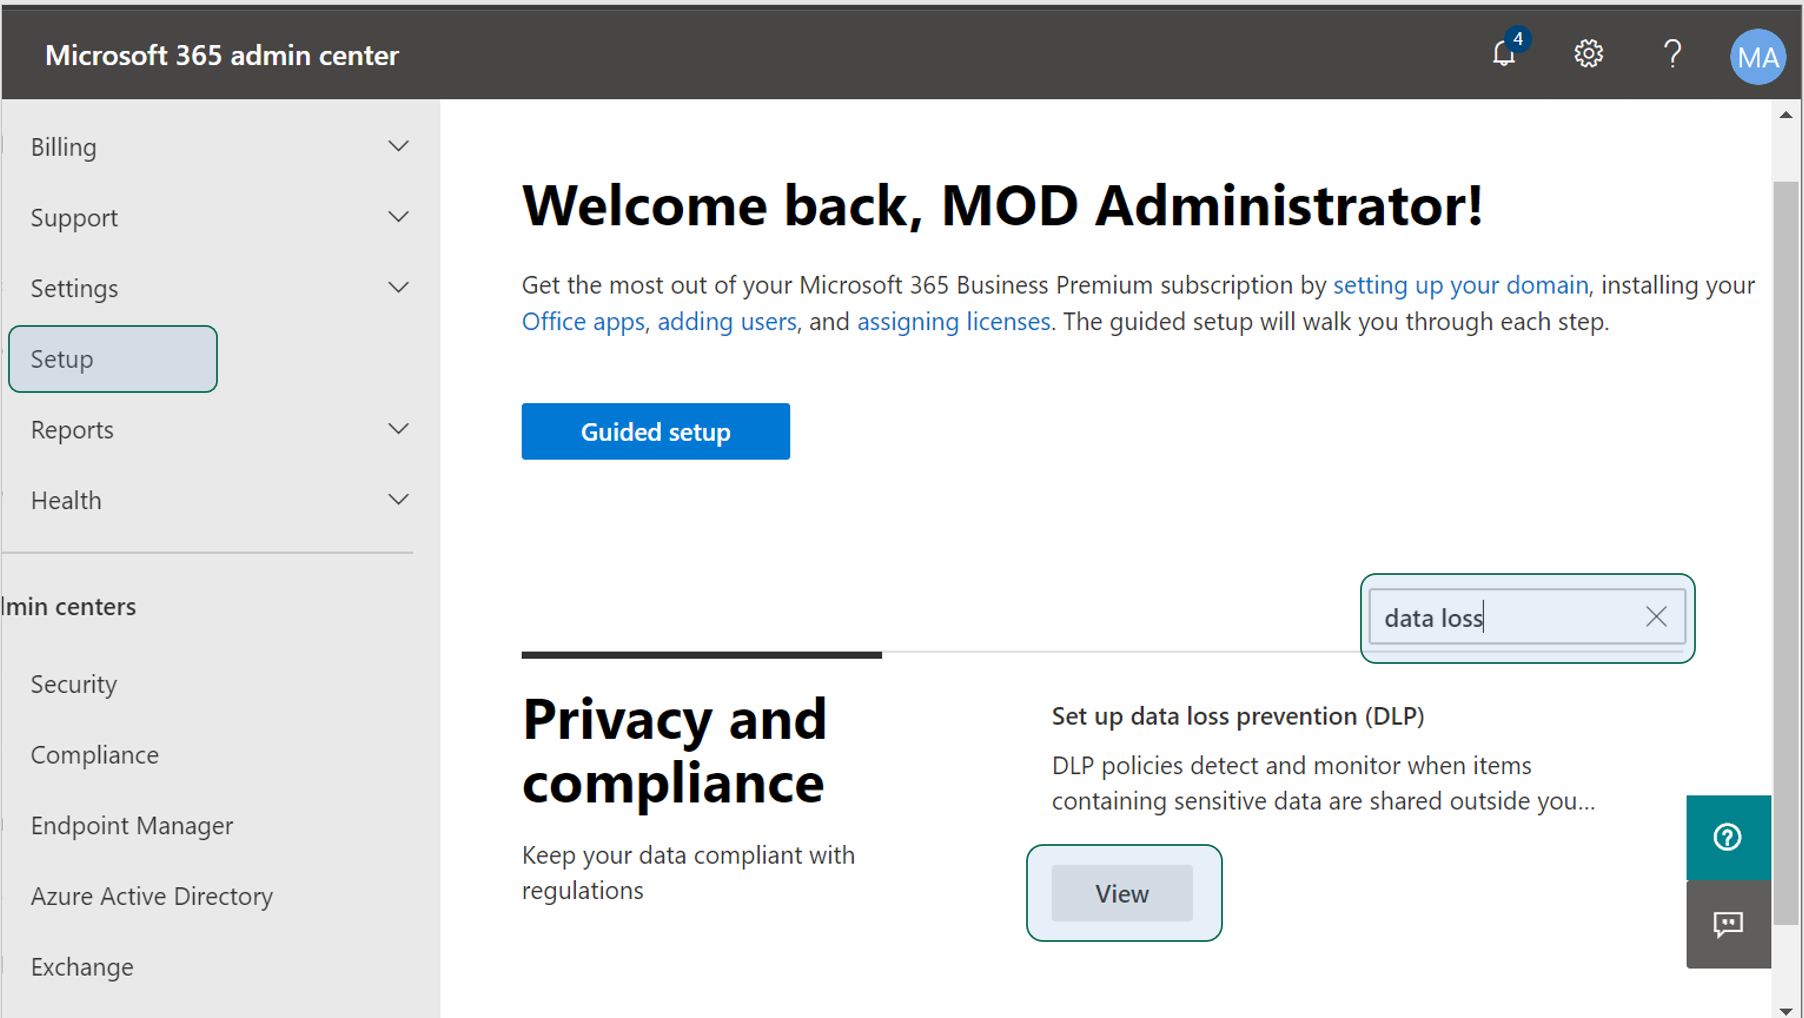
- Click Get Started and review the policy options
- Recommendation: Deselect “Show a policy tip” initially
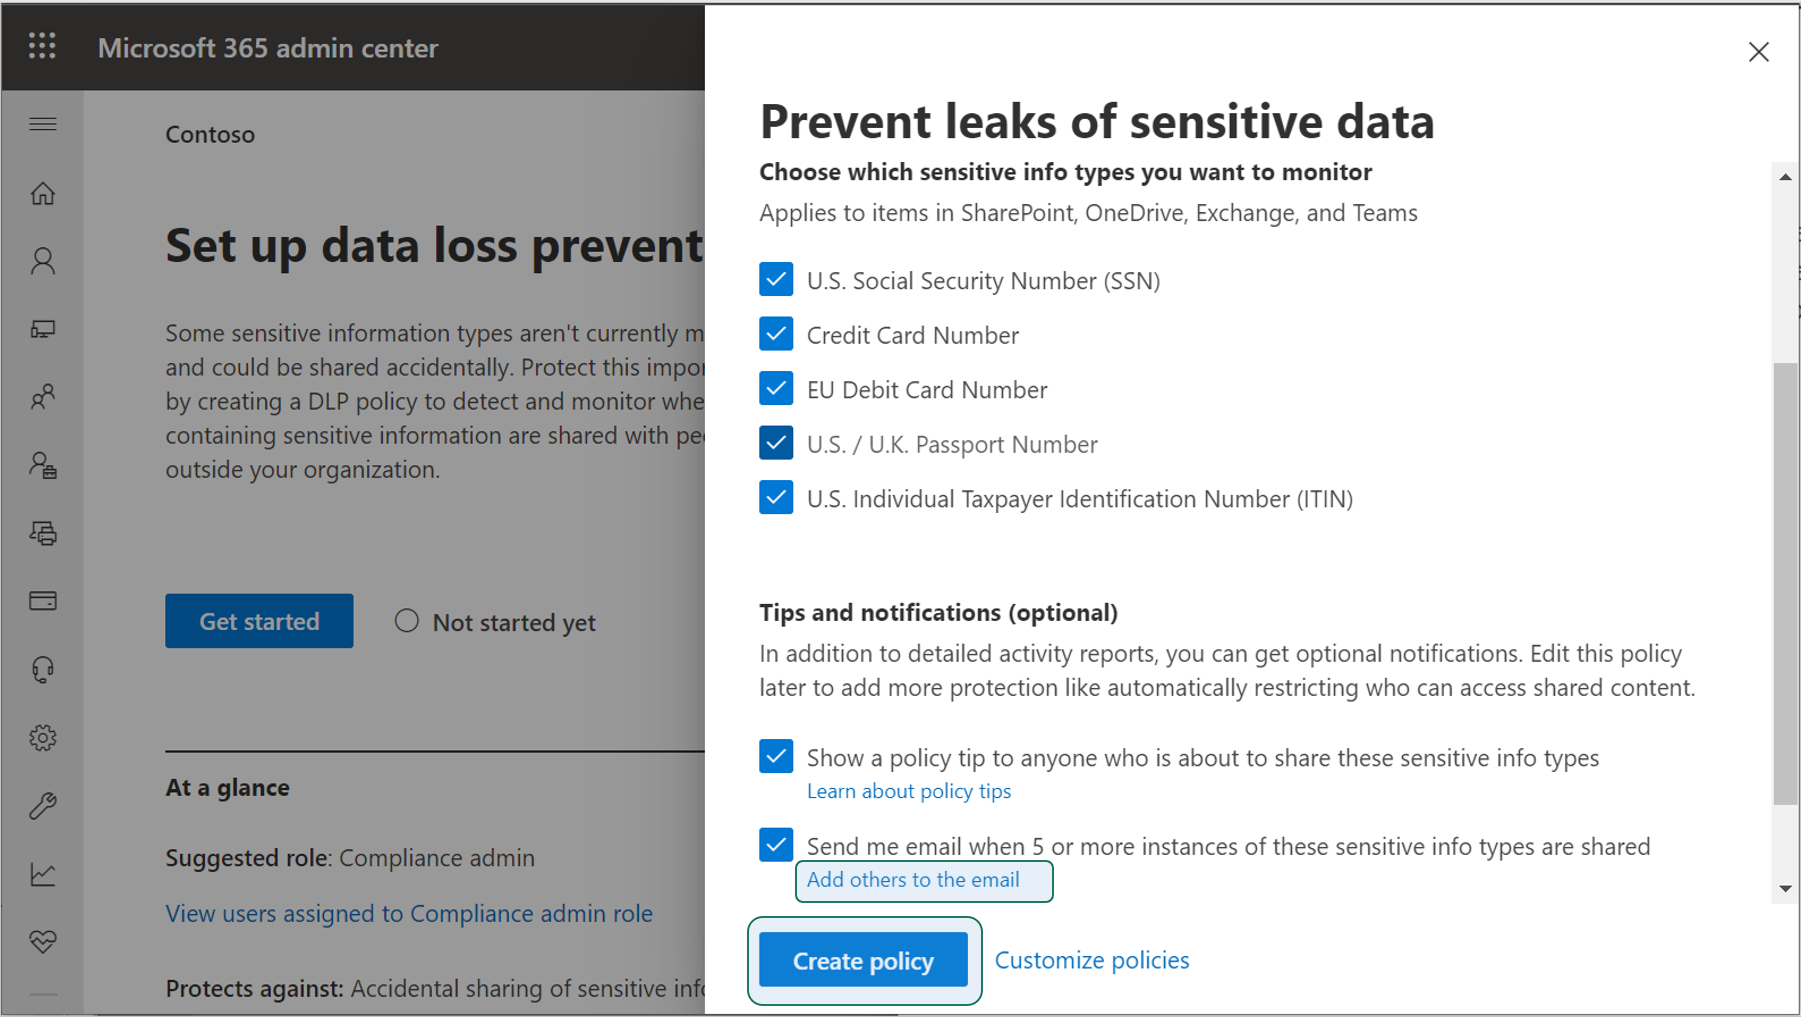
- Click Create policy to deploy the baseline recommended policy
Step 2 — Customize DLP Policies
-
Navigate to compliance.microsoft.com > Data loss prevention > Policy
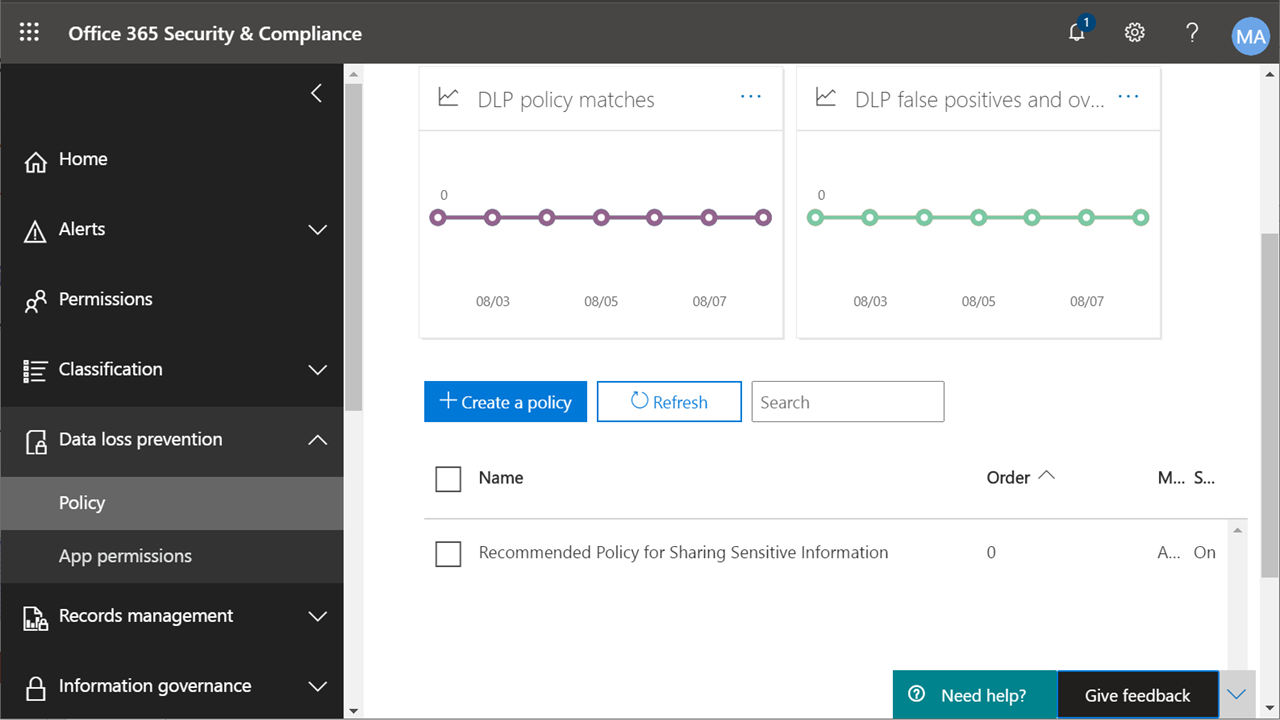
-
Customize the recommended policy or click Create a policy for custom outcomes
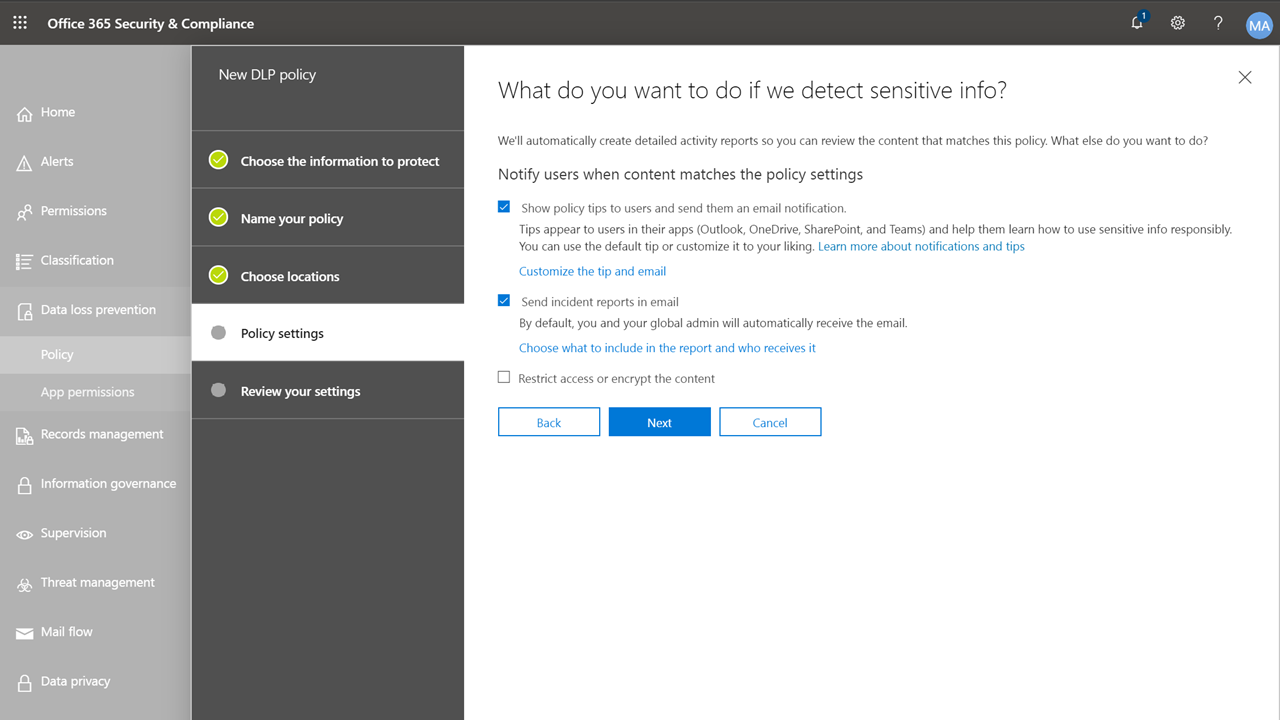
Recommended customizations:
- Configure policy tips and email notifications in plain language for end users
- Set up incident reports to go to a compliance administrator or monitored shared mailbox
- For high-risk environments: configure auto-encryption for email containing sensitive data
Start with Audit/Incident Report mode to understand your sharing patterns before implementing block or encryption controls.
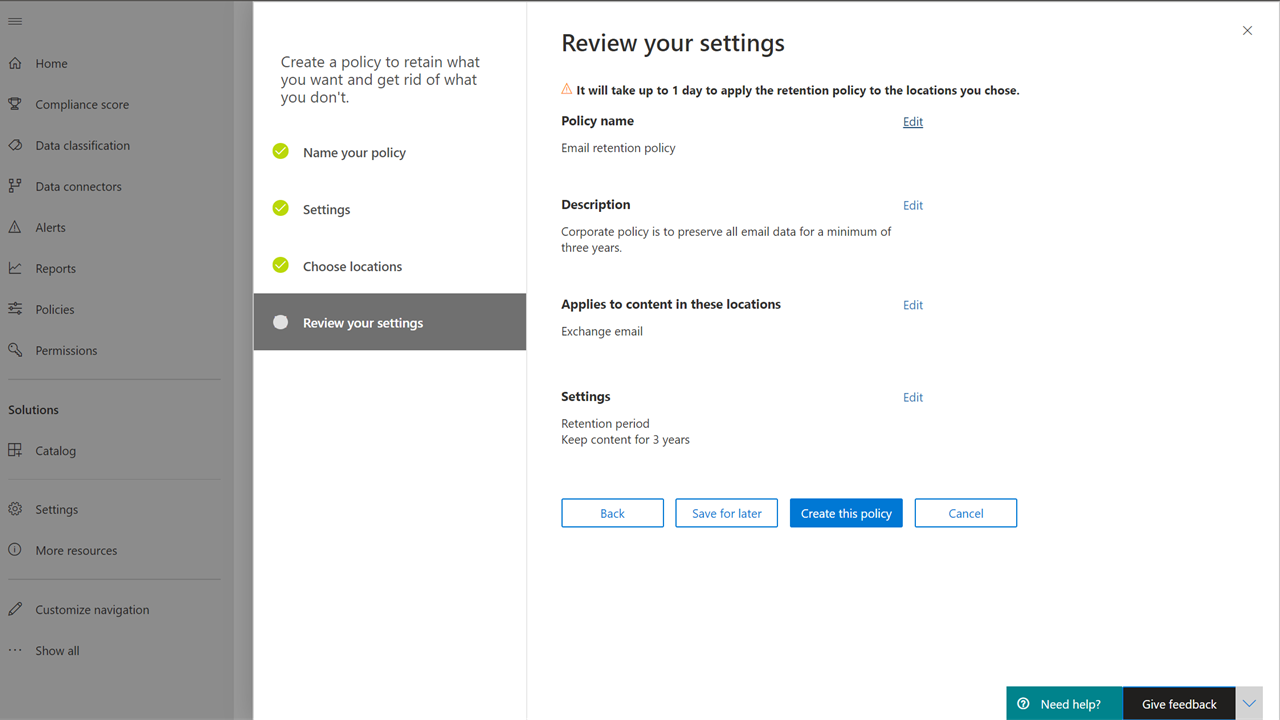
Retention Policies
Preserve data for compliance and legal hold purposes, and optionally auto-delete data that is no longer needed.
Steps
-
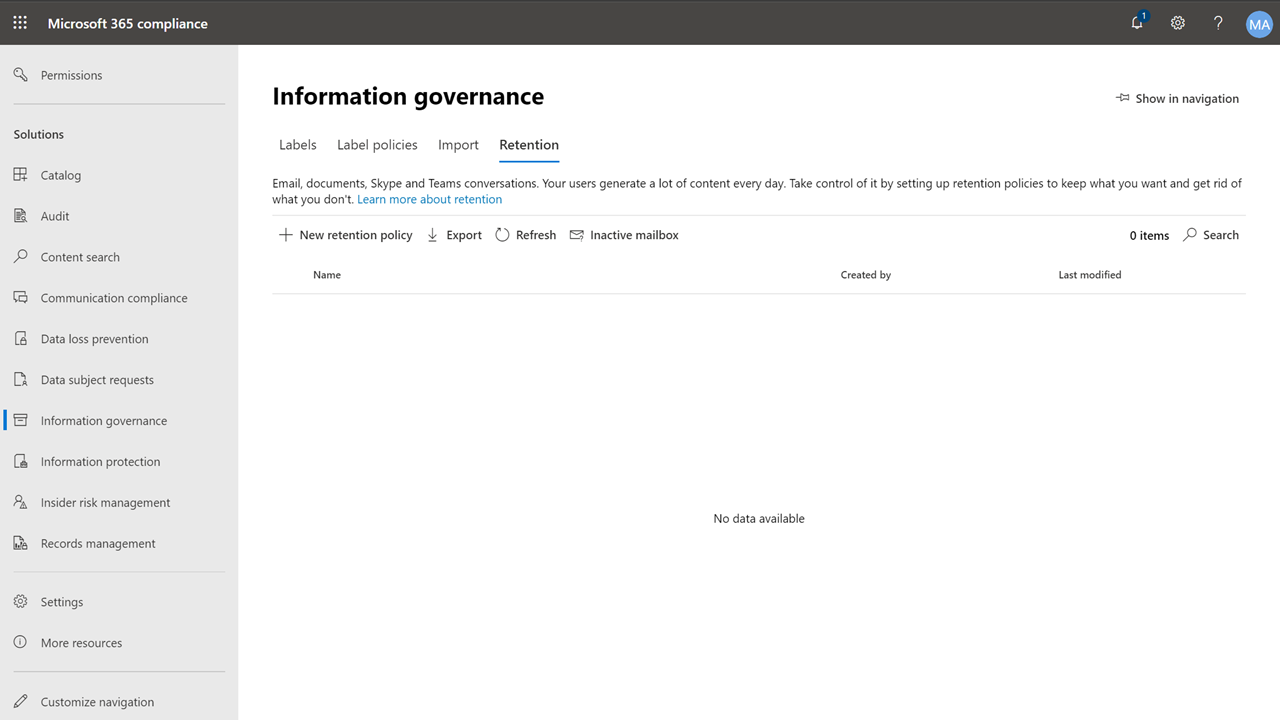
Navigate to compliance.microsoft.com > Information governance > Retention
-
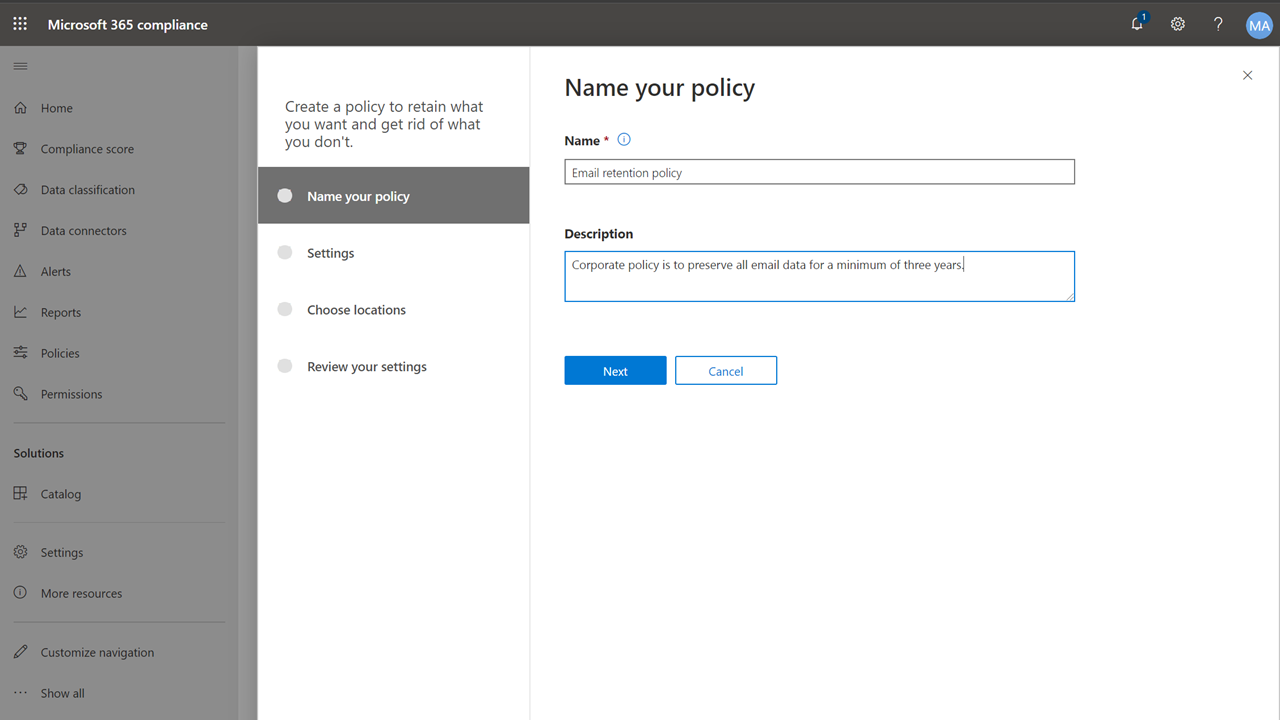
Click New retention policy — create individual policies per service
-
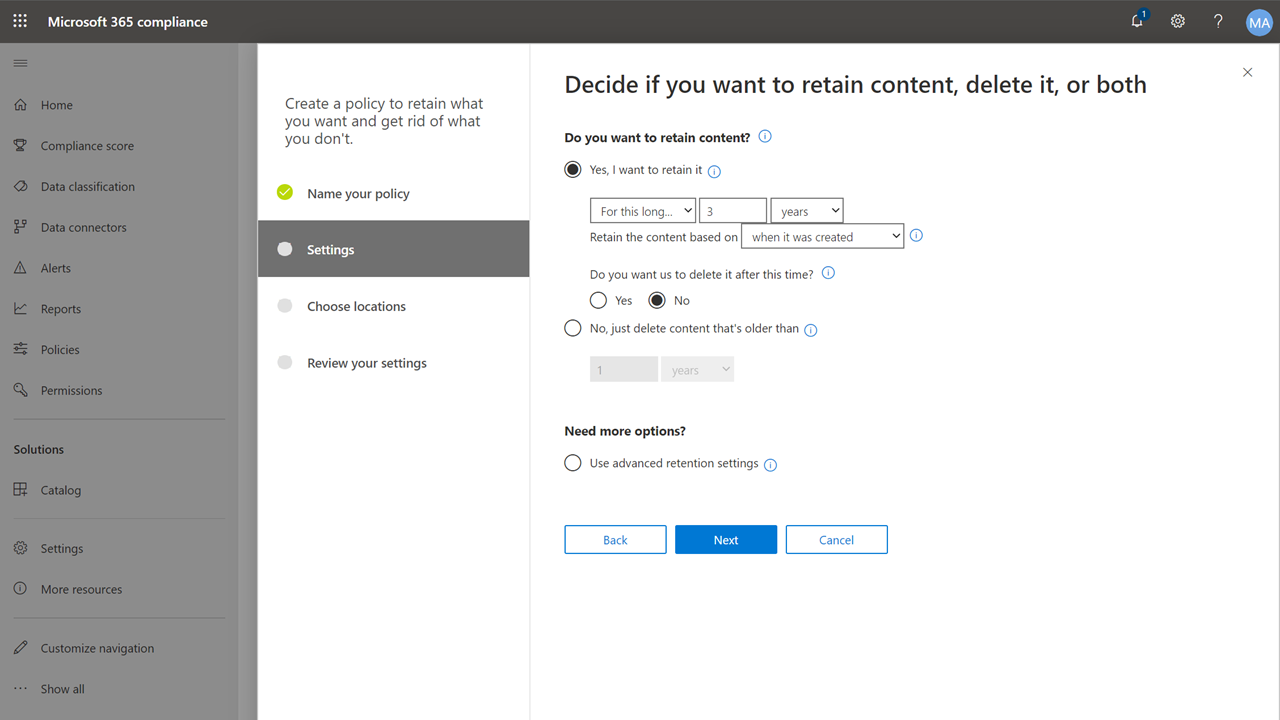
Choose retention duration and optional auto-deletion
-
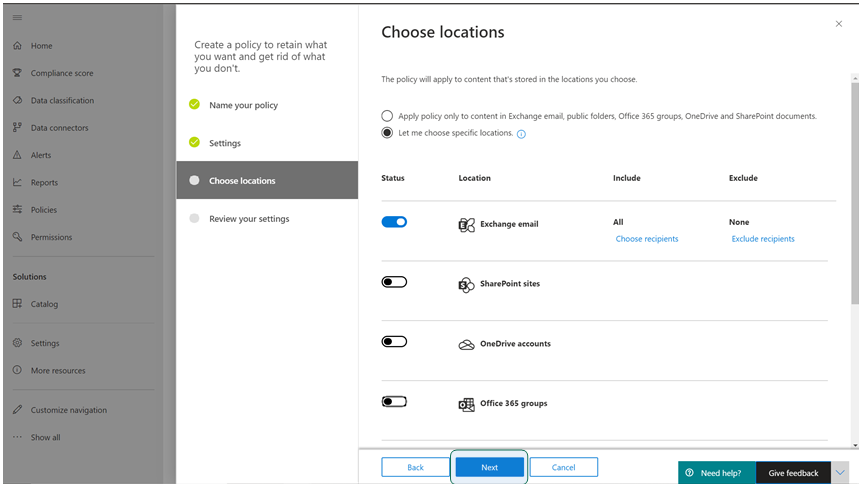
Select the location (Exchange, SharePoint, OneDrive, Teams, etc.)
-
Review settings and Create the policy
Recommended Retention Periods
| Service | Recommended Retention |
|---|---|
| Exchange Online | 2–7 years |
| SharePoint Online | 2–7 years |
| OneDrive accounts | 2–7 years |
| Teams channel messages | 2–7 years |
| Teams private chats | 2–7 years |
Retained data still counts against your storage quotas.
New retention policies can take up to 24 hours to take effect.
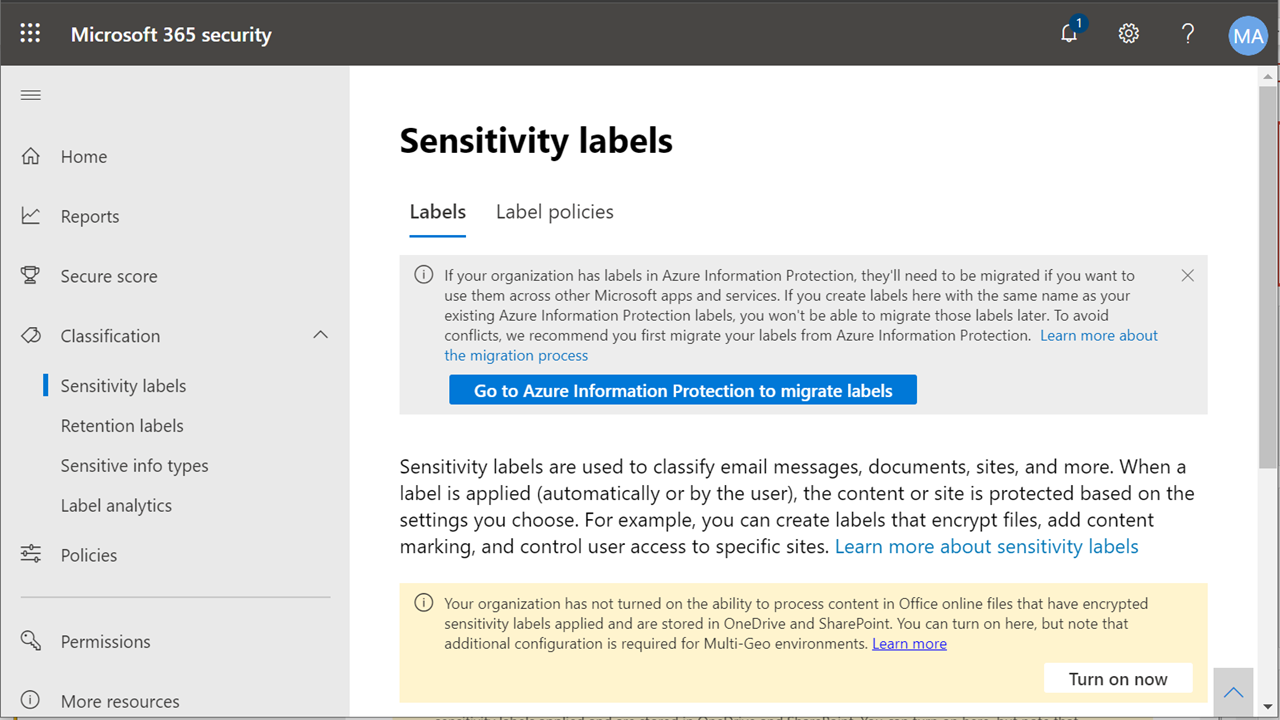
Sensitivity Labels
Define data classification labels with special protections such as encryption, watermarking, and access restrictions.
Step 1 — Navigate to Sensitivity Labels
-
Navigate to security.microsoft.com > Classification > Sensitivity labels
-
Click Go to Azure Information Protection to migrate labels (if available)
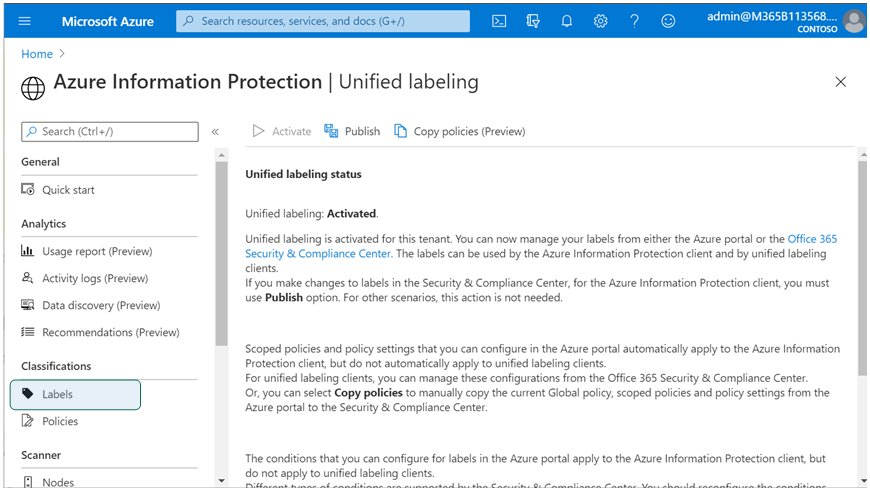
-
Verify that Unified labeling is activated
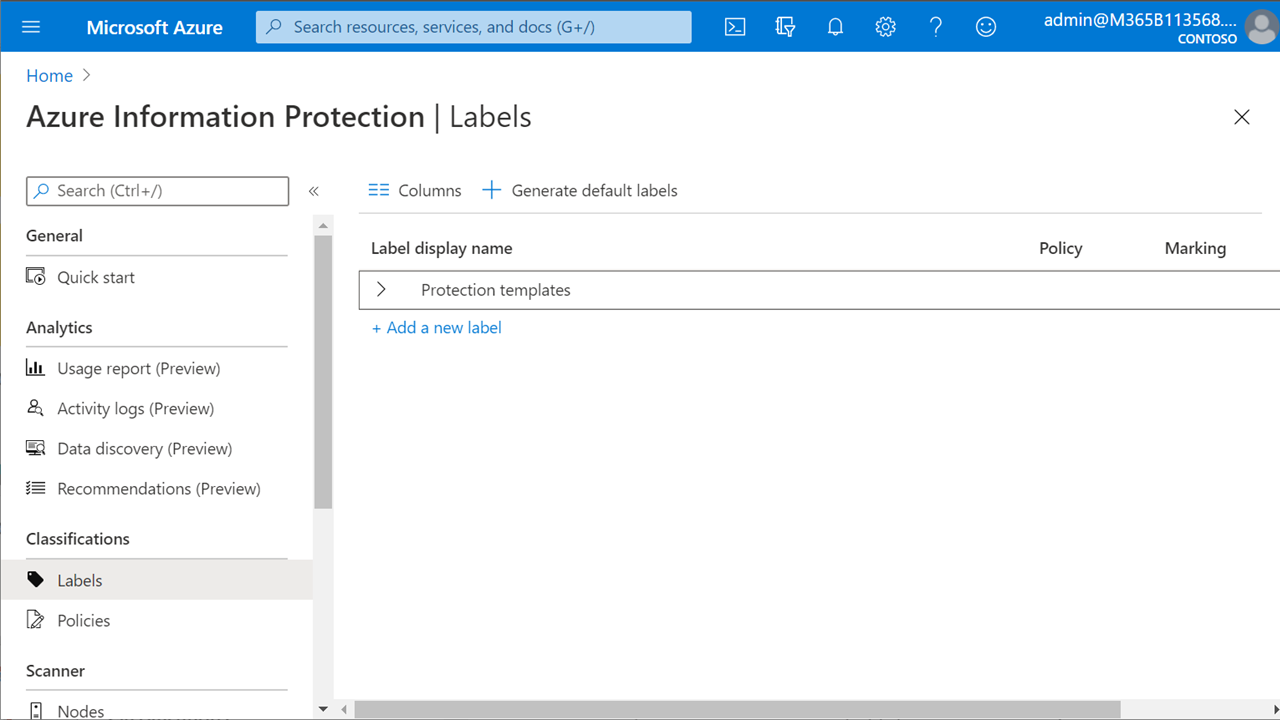
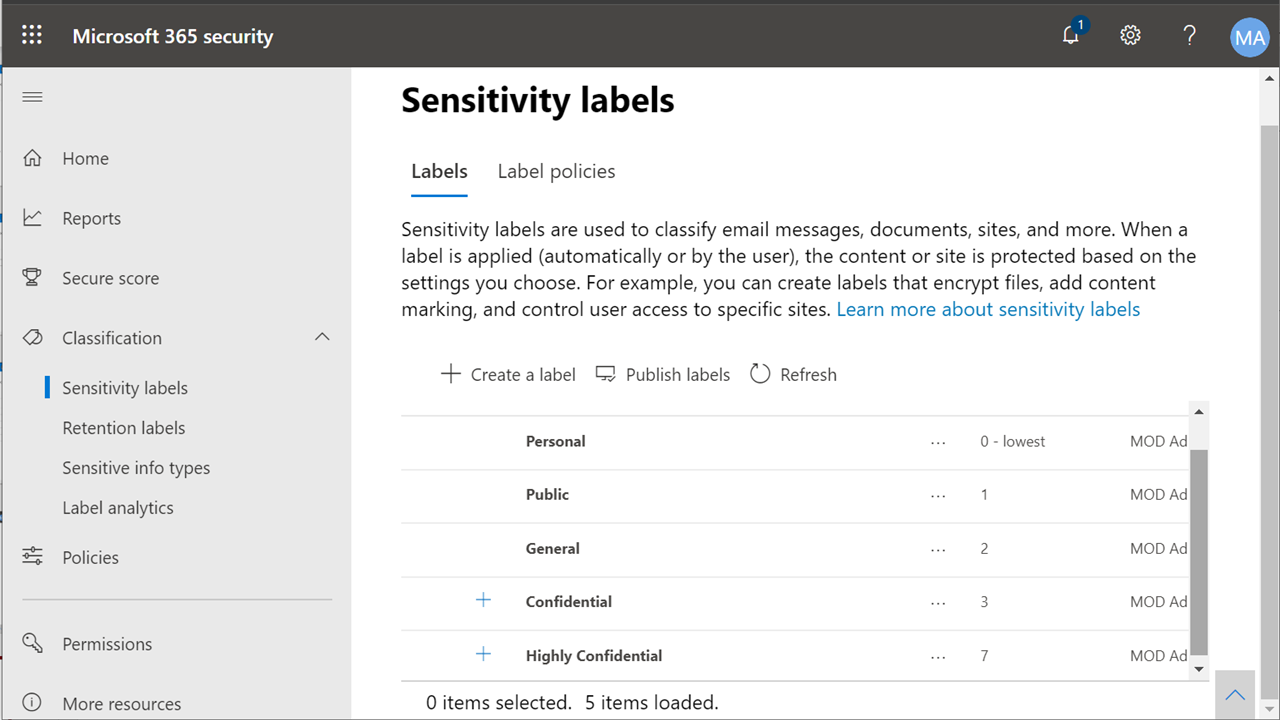
Step 2 — Generate Default Labels
-
Click Labels > Generate default labels
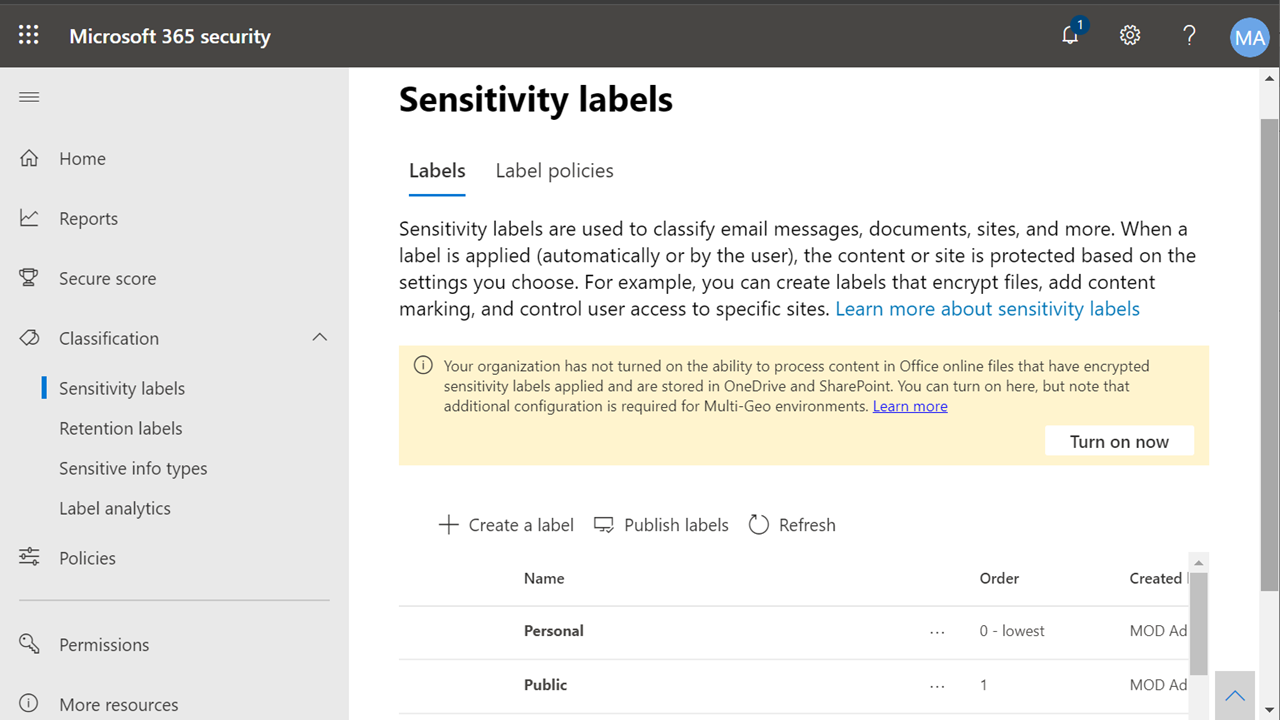
Step 3 — Enable in Office Web Apps
- Return to the Microsoft 365 security center
-
Click Turn on now if the option is available
Step 4 — Publish Sensitivity Labels
-
Click Publish labels
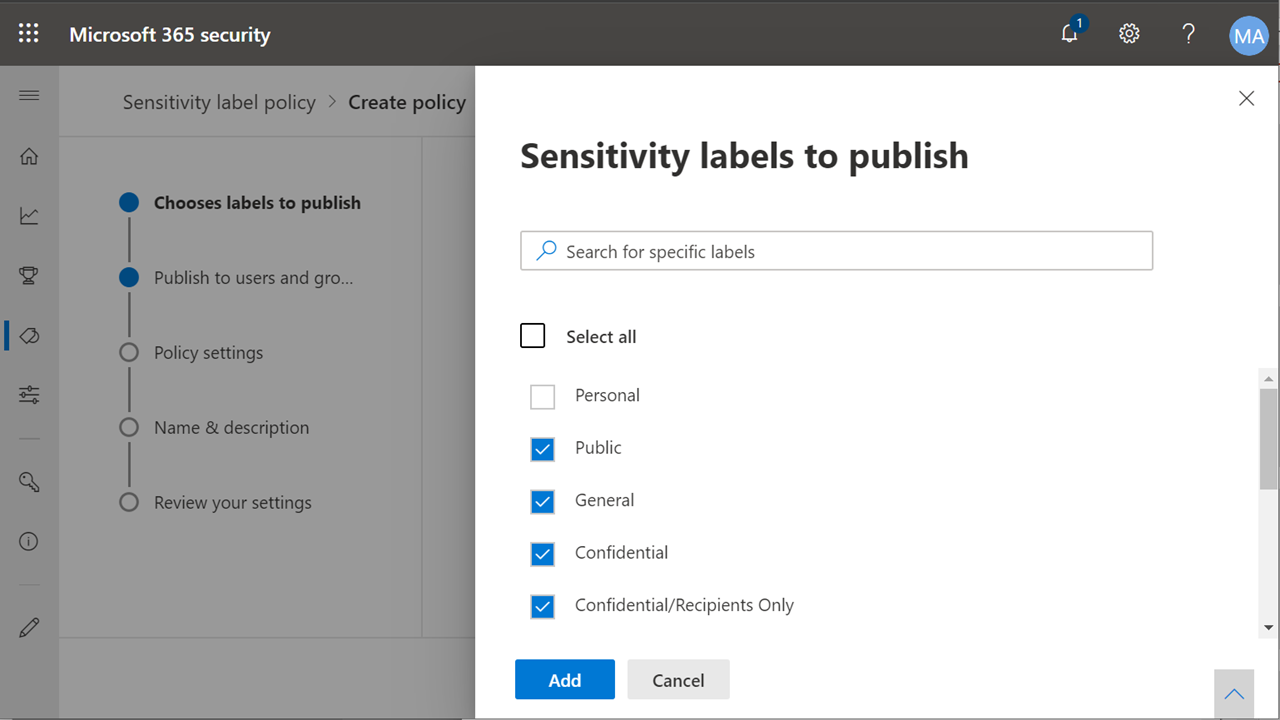
-
Select all default labels you wish to publish
Many organizations exclude the “Personal” label as they do not want to imply that personal (non-business) data is protected by the organization.
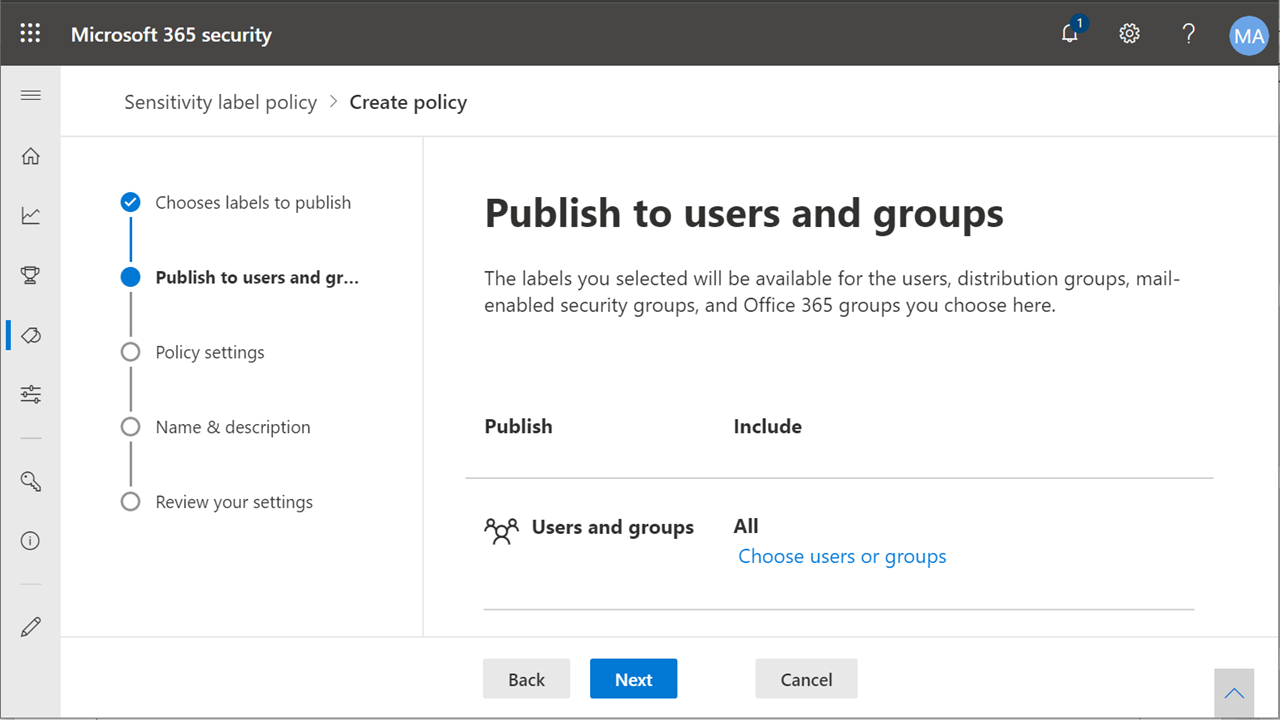
-
Target All users (recommended) or specific groups
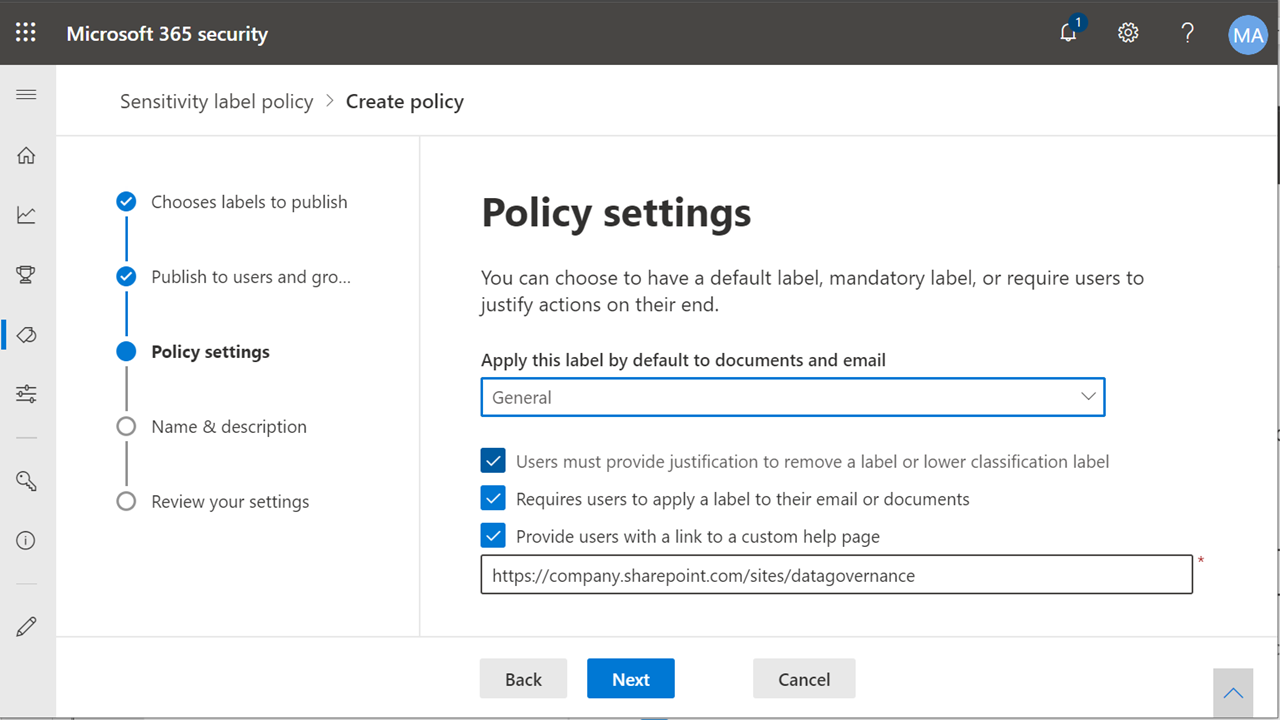
- Configure policy settings:
- Default label: Often General or Internal
- Require justification to remove or downgrade: Yes (recommended)
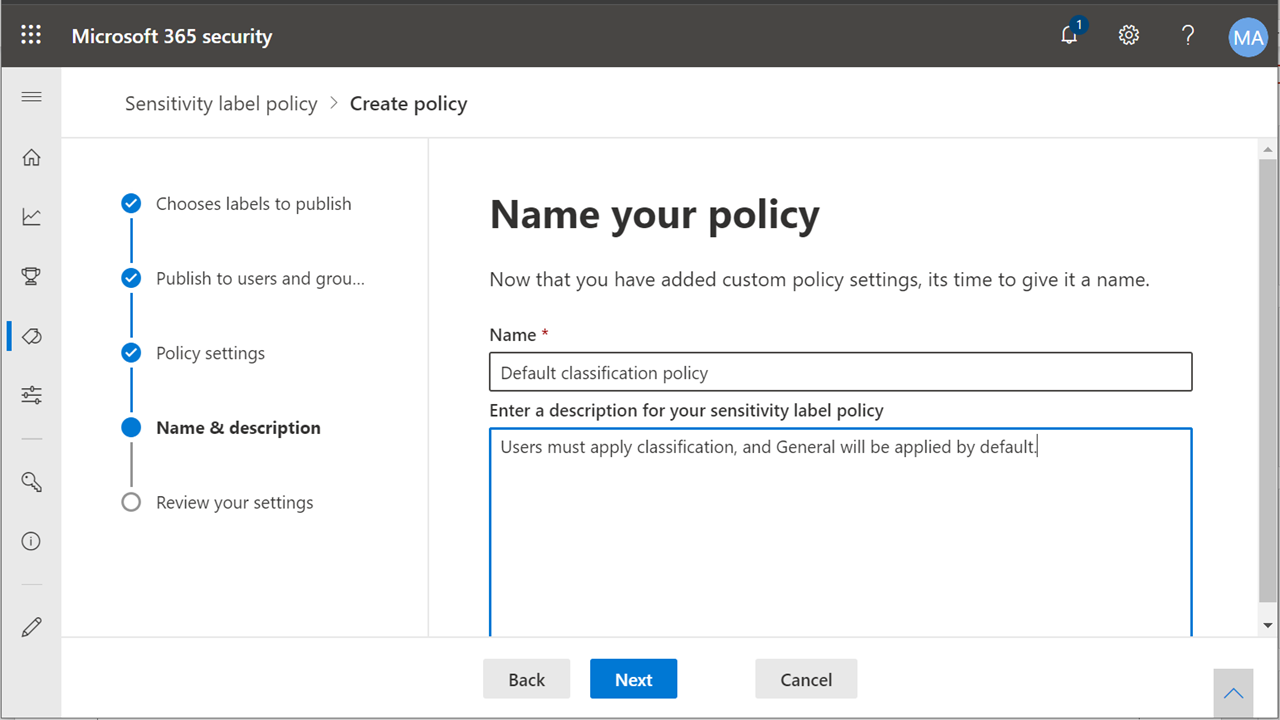
-
Name the policy (e.g., “Default classification policy”)
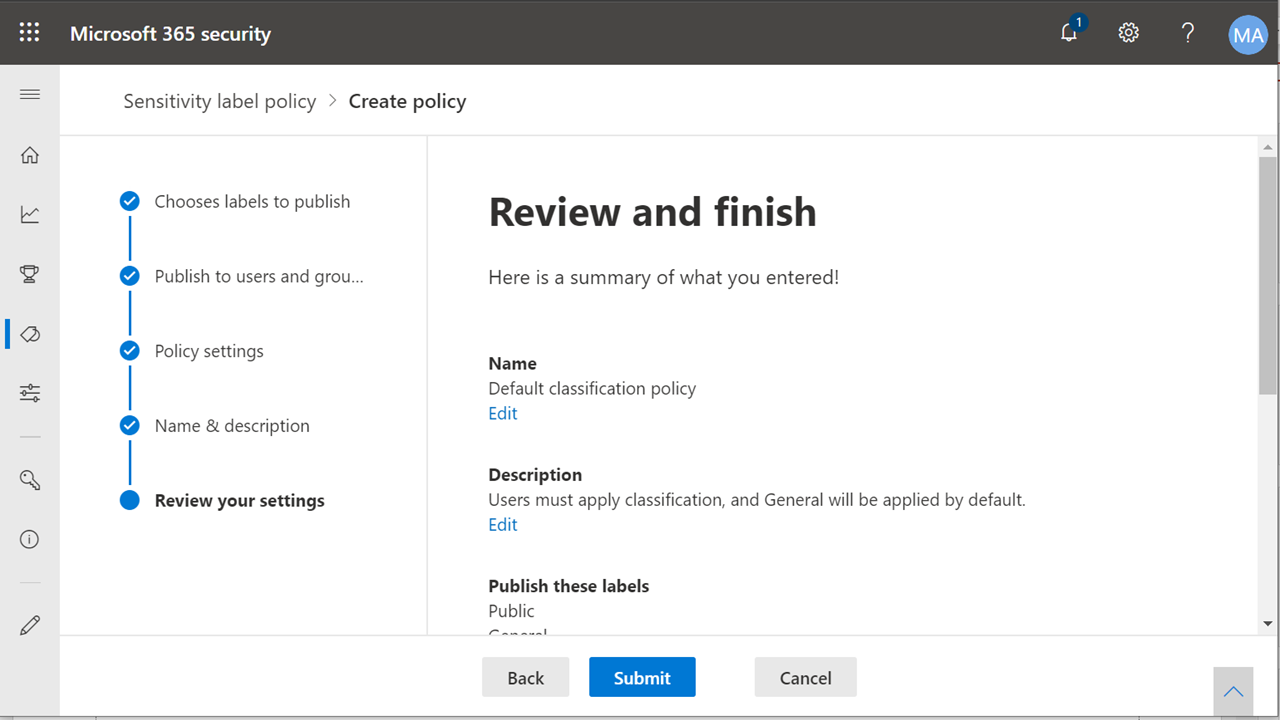
-
Review and Submit
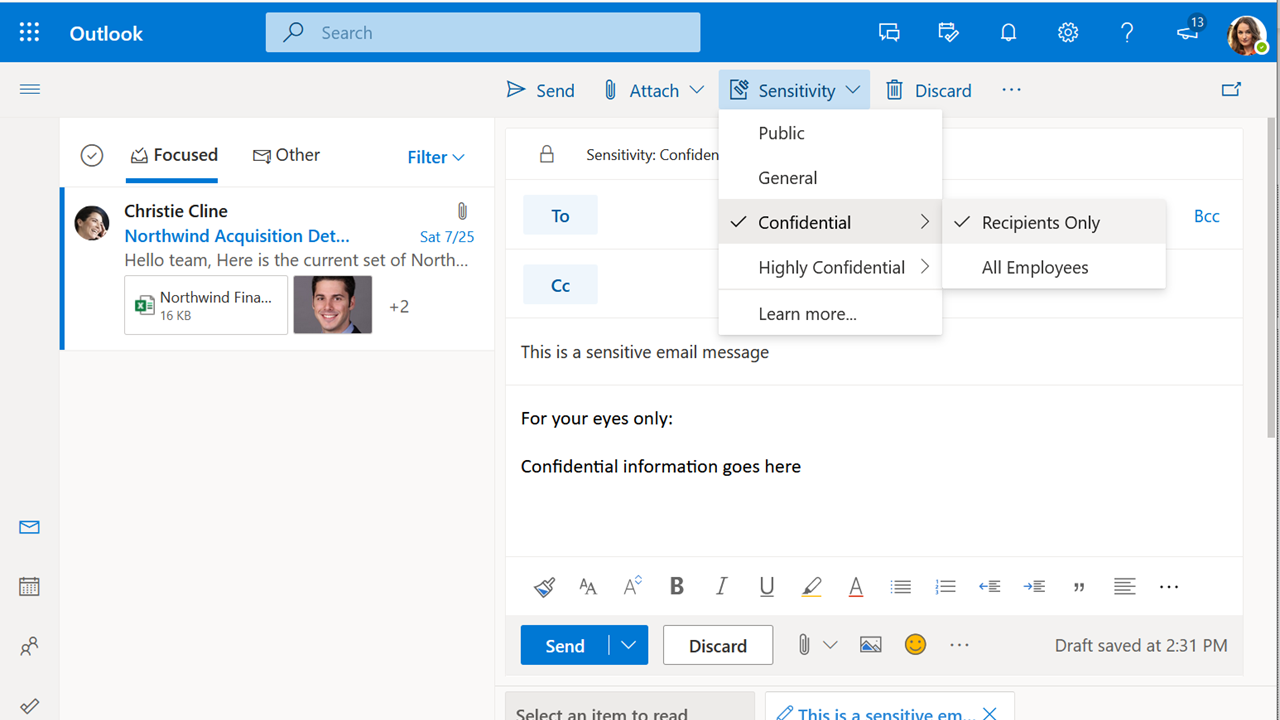
Sensitivity labels appear in Office applications within 24 hours of publishing.
SharePoint and OneDrive
Configure sharing settings to balance collaboration needs with data security.
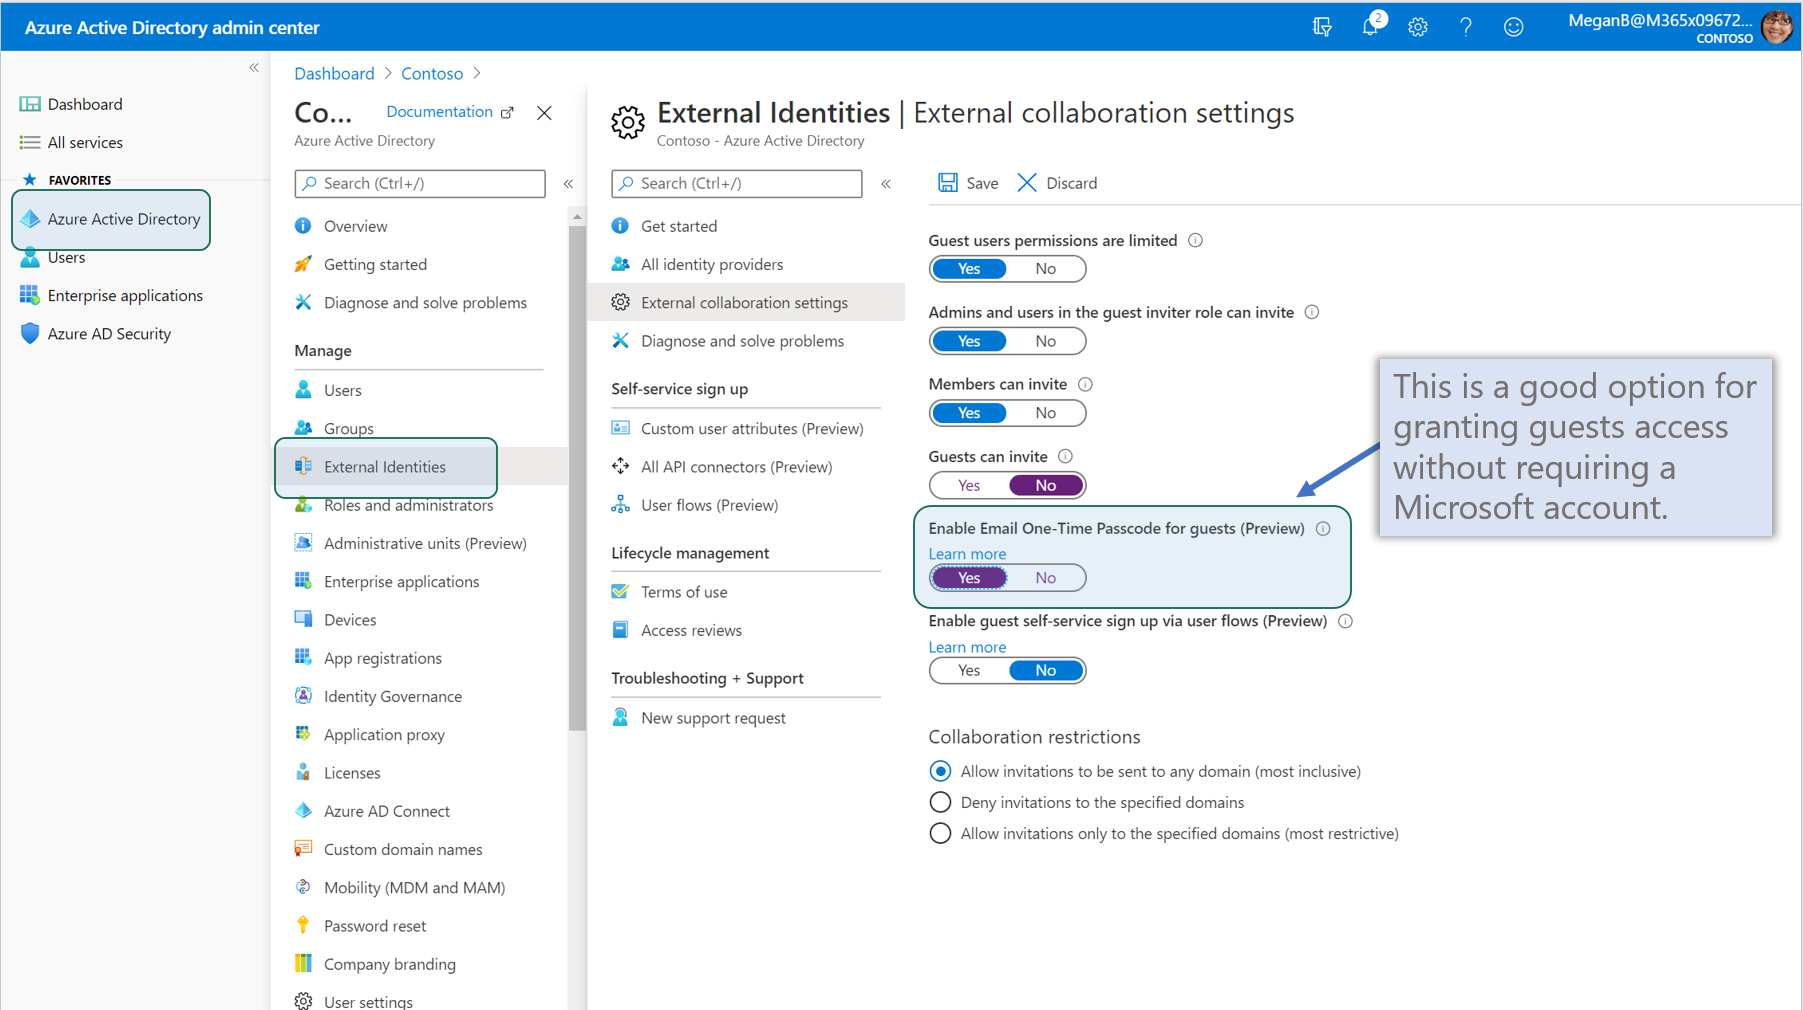
Step 1 — Configure External Collaboration Settings in Azure AD
- Navigate to Azure AD admin center > External identities > External collaboration settings
-
Recommended: Enable Email One-Time Passcode → Yes
Step 2 — Configure Sharing Settings
-
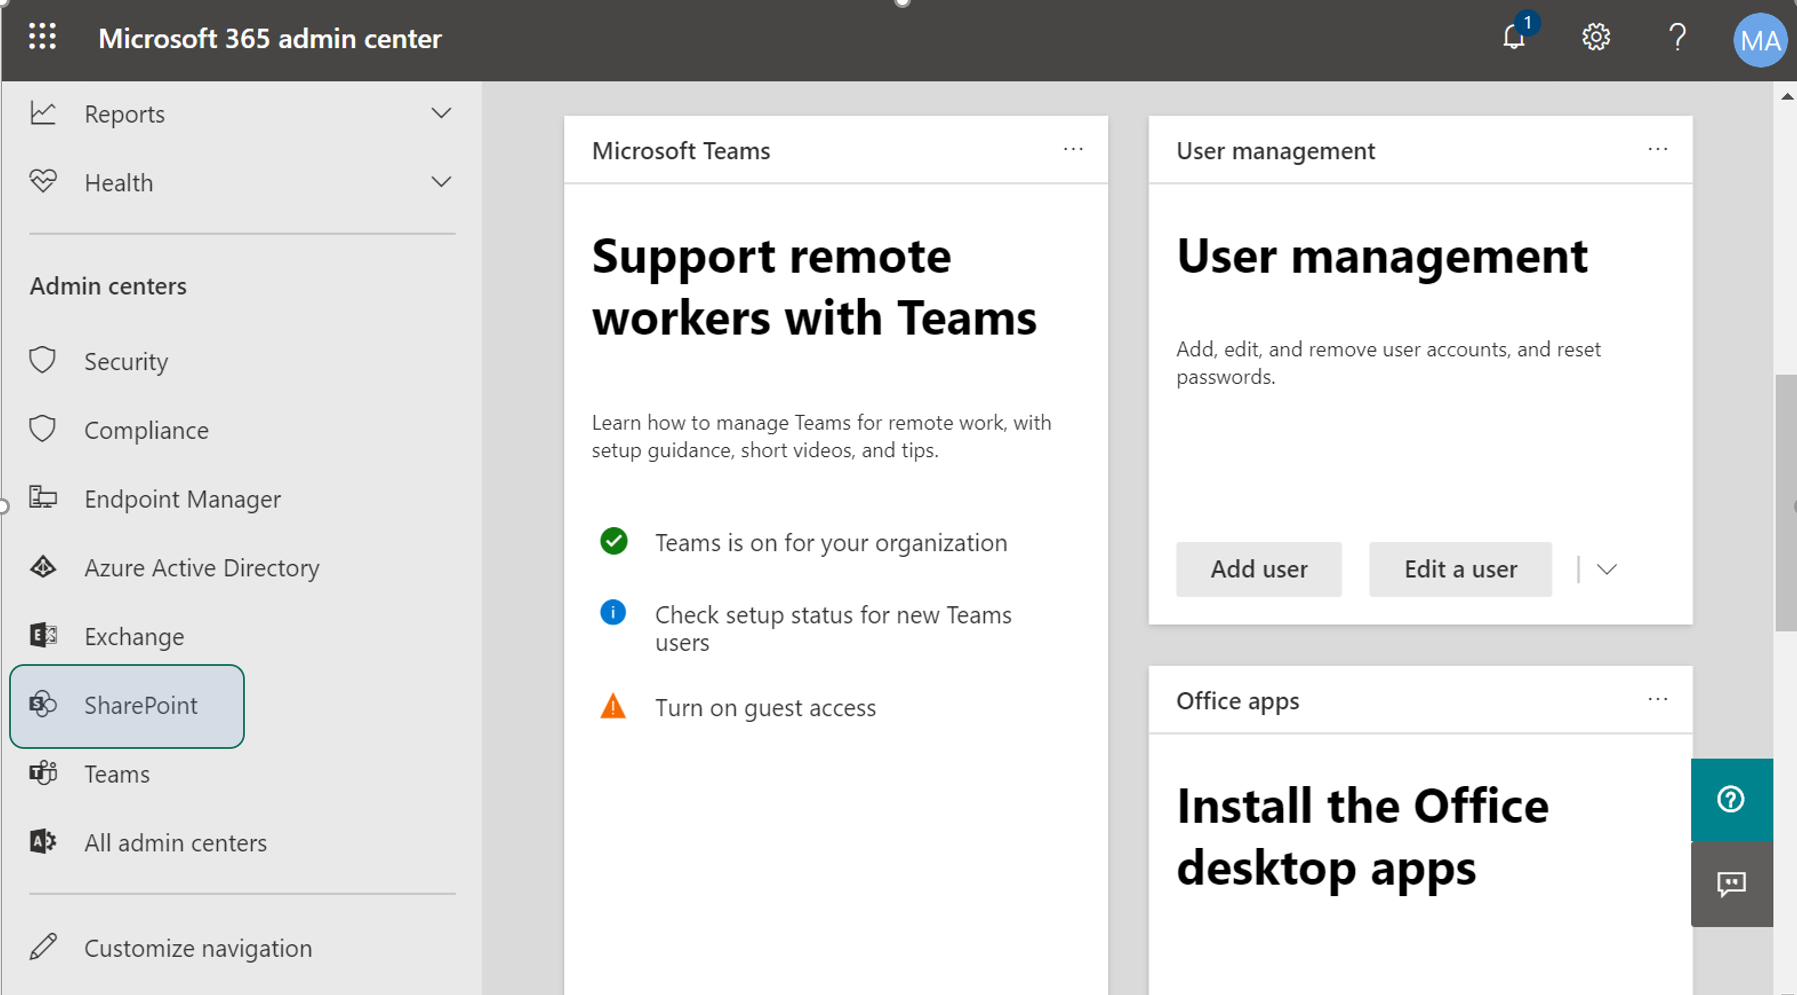
Navigate to the SharePoint admin center
-
Click Policies > Sharing and configure the sharing sliders
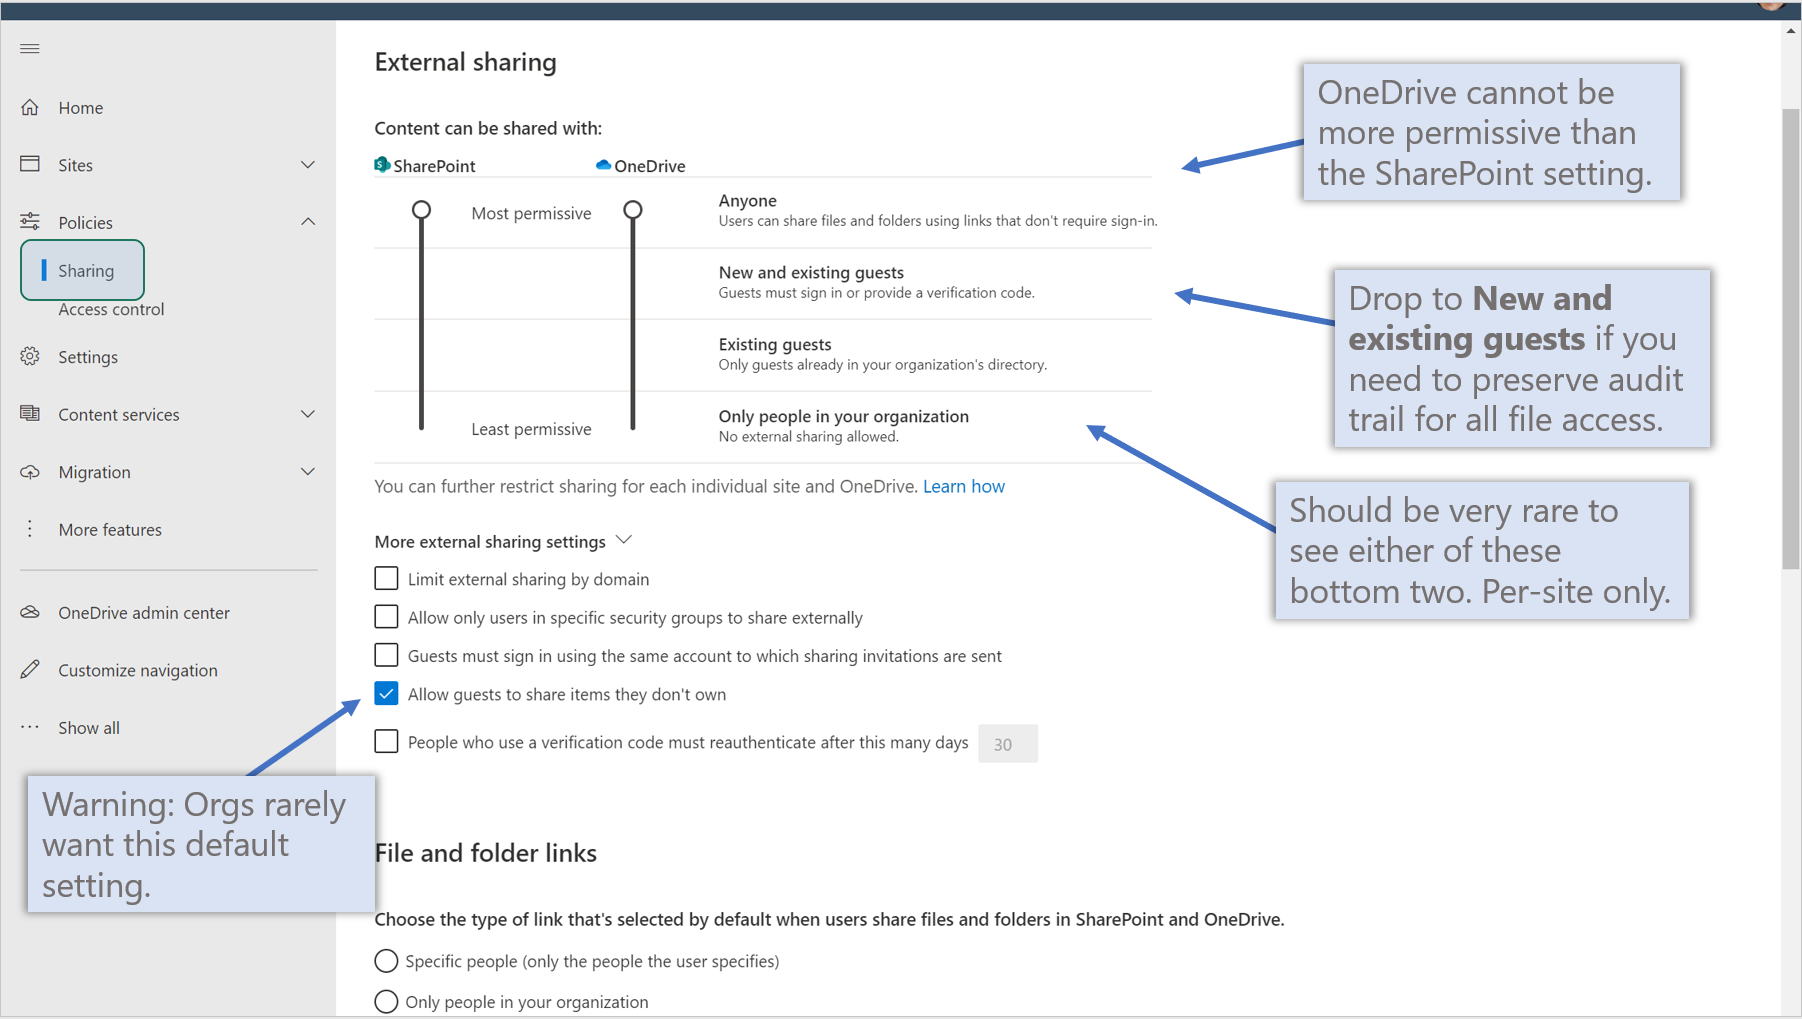
Sharing Level Use Case Anyone (no sign-in) Most permissive — anonymous links New and existing guests Requires sign-in — recommended for most orgs Existing guests only Only pre-invited guests Only people in org No external sharing -
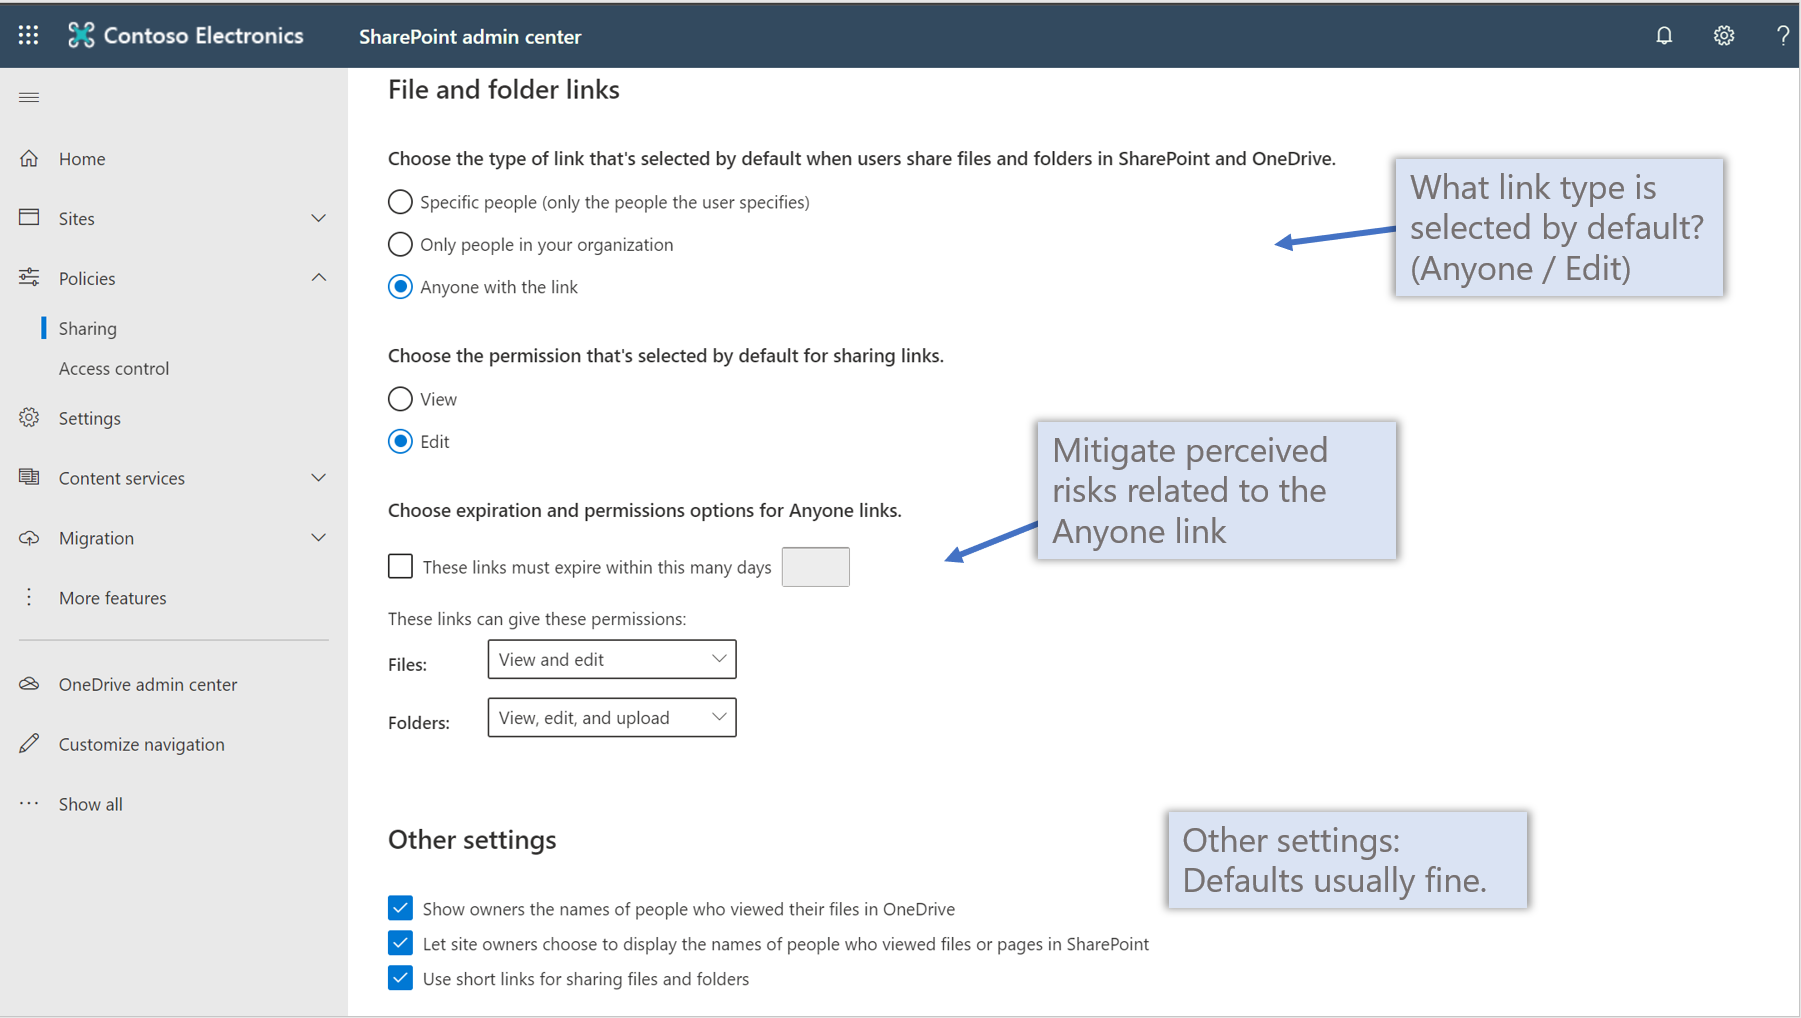
Scroll down for additional settings:
- Default link type: Change from “Anyone” to Specific people
- Anyone link expiration: Set an expiration (e.g., 30 days) if Anyone links are enabled
- Allow guests to share items they don’t own: Disable (recommended)
Groups and Teams
Govern Microsoft Teams and Microsoft 365 Groups settings.
External Access (Federated Chat)
- Navigate to Teams admin center > Org-wide settings > External access
-
Keep Allow users to communicate with other Teams users → On

Guest Access
- Navigate to Teams admin center > Org-wide settings > Guest access
-
Set Allow guest access in Teams → On
Third-Party File Storage
- Navigate to Teams admin center > Org-wide settings > Teams settings > Files
-
Set all third-party storage providers to Off
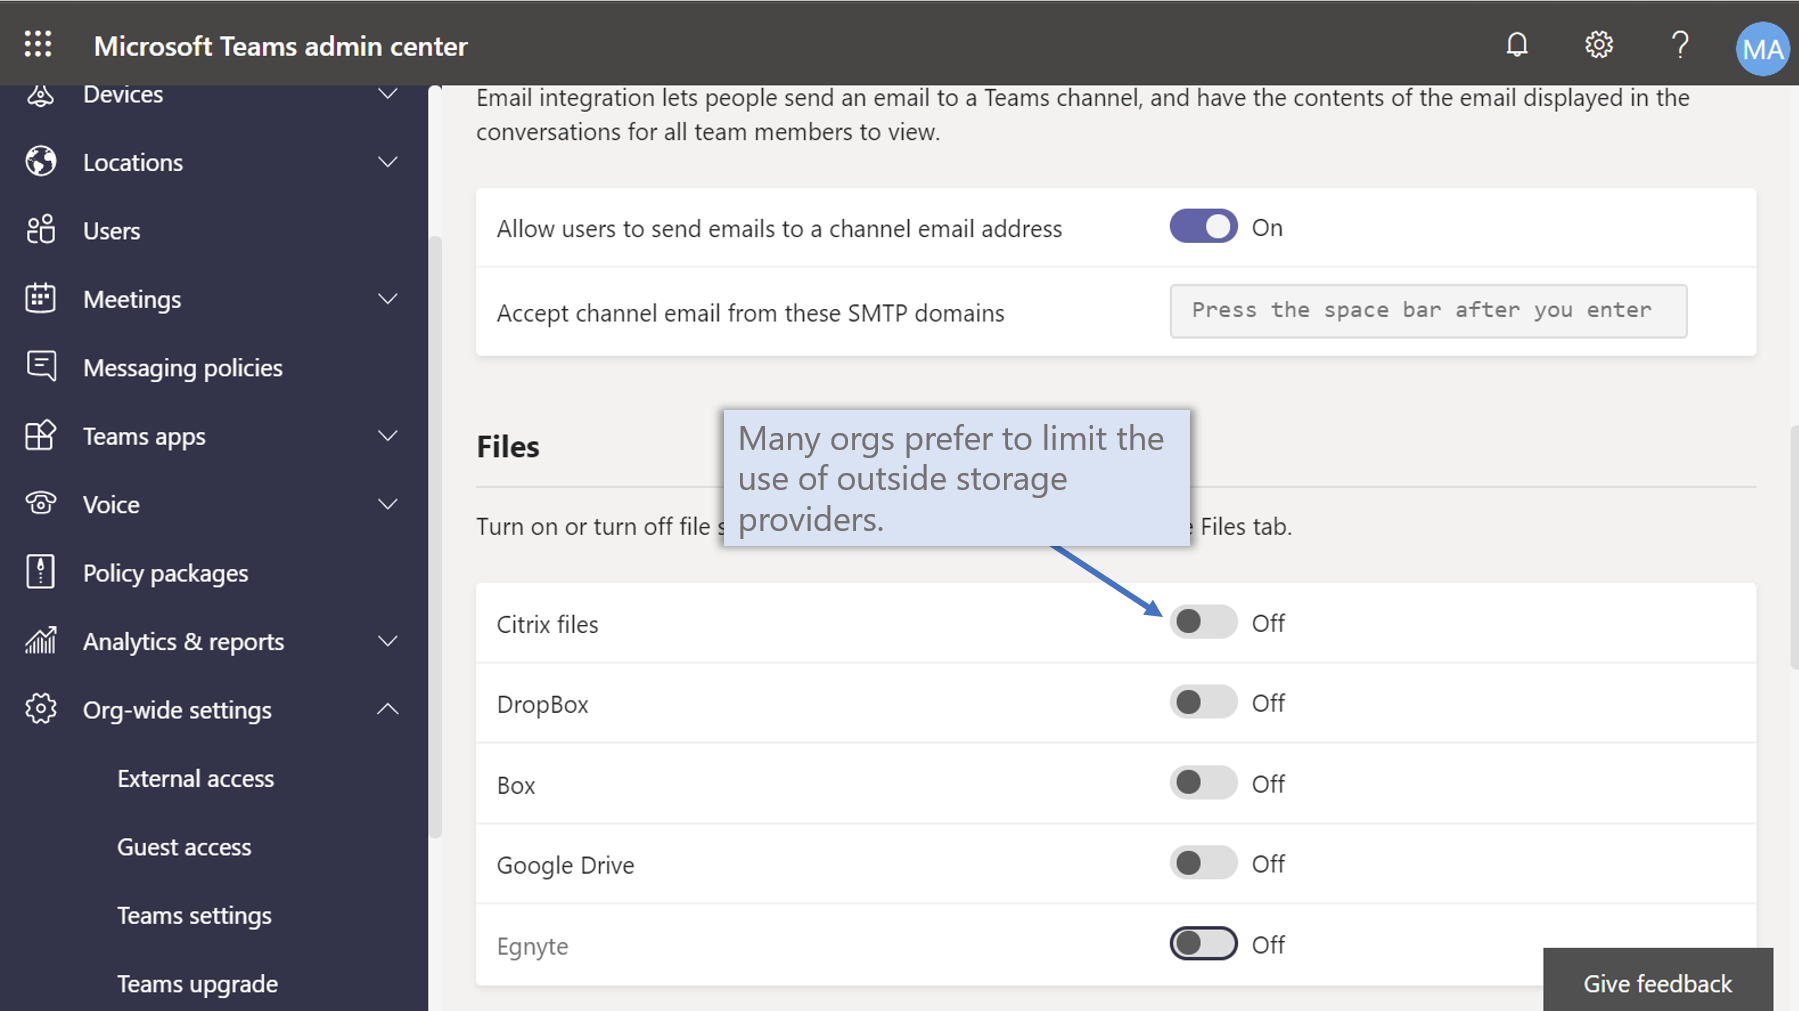
Disabling third-party storage encourages users to store files in OneDrive and SharePoint, where they are governed by your Microsoft 365 policies.
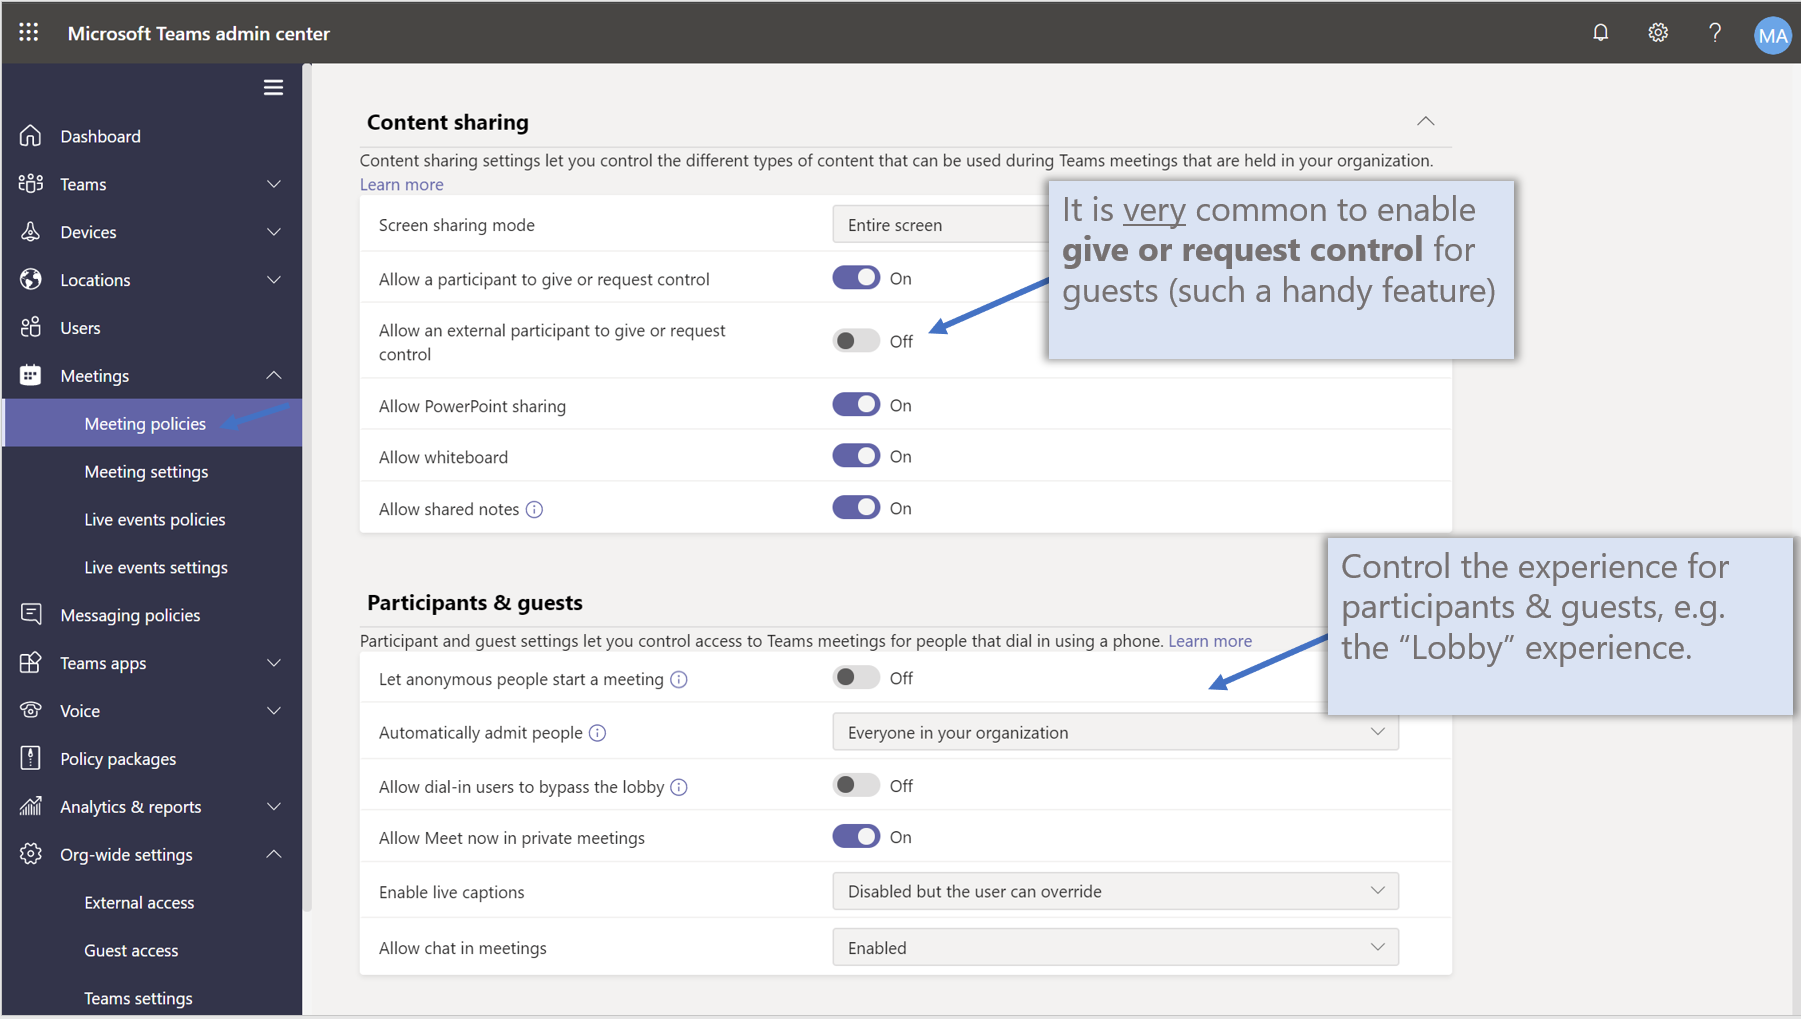
Meetings Policy
- Navigate to Teams admin center > Meetings > Meeting policies
- Modify the Global (Org-wide default) policy:
- Allow guests to give or request control: On
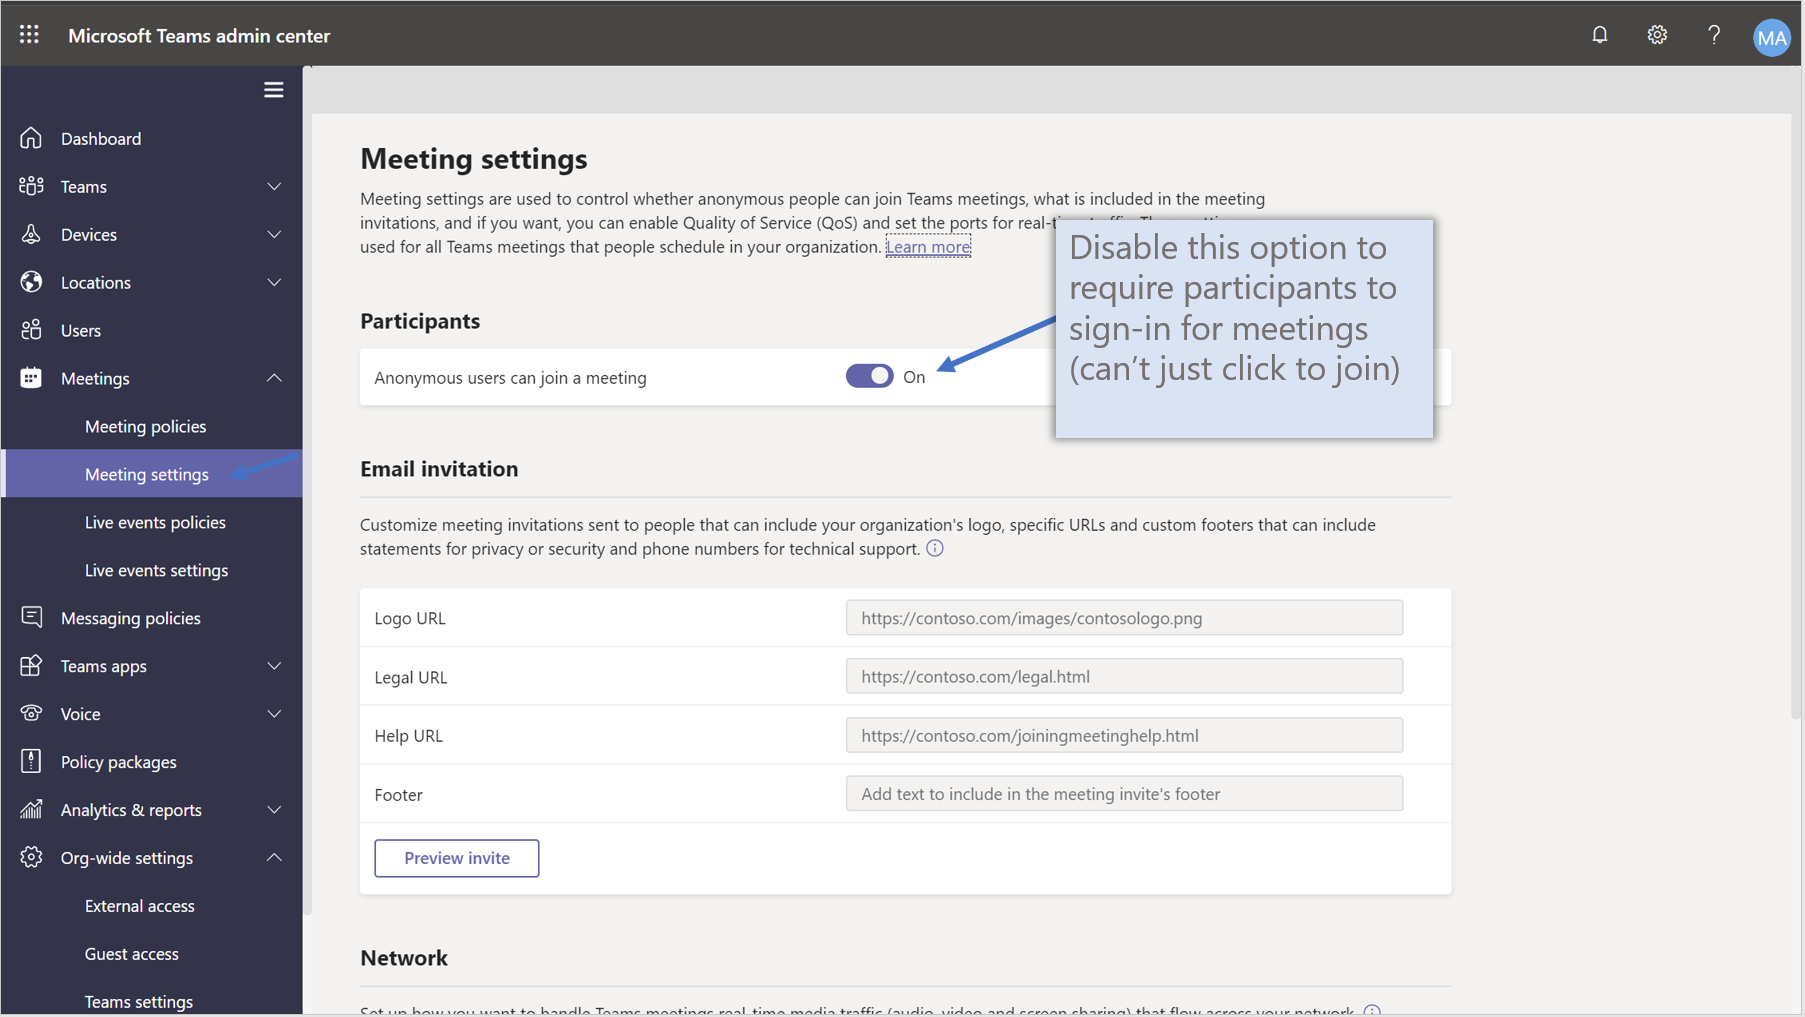
Meeting Settings
- Navigate to Teams admin center > Meetings > Meeting settings
- Review Anonymous users can join a meeting:
- Disabled = more secure (all external participants must sign in)
- Enabled = more convenient (anyone with a link can join)
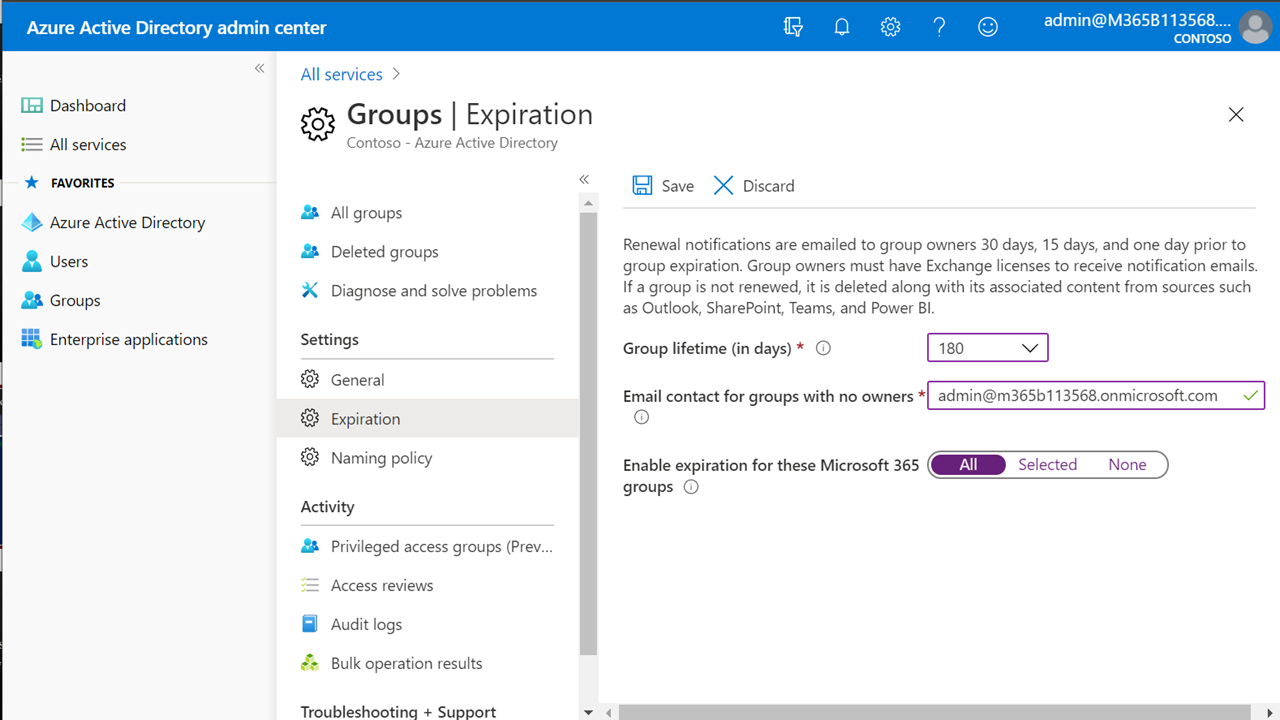
Groups Expiration Policy
Automatically expire and delete stale, inactive Groups to keep your tenant clean.
- Navigate to Azure AD admin center > Groups > Expiration
- Configure:
- Group lifetime: 180 days
- Email contact for groups with no owners: Enter a monitored email address
- Enable expiration for: All
-
Click Save
Restrict Who Can Create Groups/Teams (Optional)
This is an advanced option that significantly impacts user experience. Only implement in strict environments.
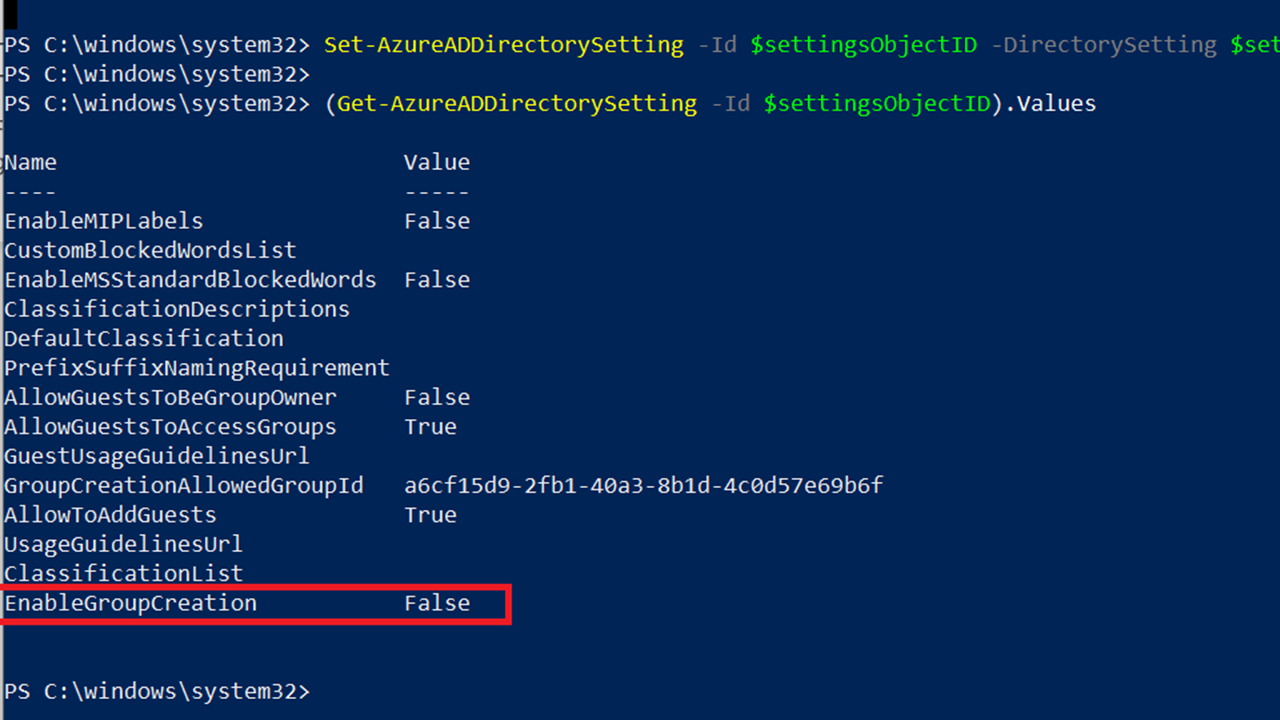
If required, limit Teams/Groups creation using PowerShell:
# Connect to Azure AD
Connect-AzureAD

# Fetch the unified group template
$Template = Get-AzureADDirectorySettingTemplate | Where-Object {$_.DisplayName -eq "Group.Unified"}
$Settings = $Template.CreateDirectorySetting()

# Set the group creators group
$Settings["EnableGroupCreation"] = "false"
$Settings["GroupCreationAllowedGroupId"] = "<Security Group Object ID>"

# Apply settings
New-AzureADDirectorySetting -DirectorySetting $Settings
Microsoft does not recommend restricting Group creation for most organizations. Open creation with expiration policies is the preferred approach.