Azure AD Configuration
Secure your identity and access management layer by enabling combined registration, self-service password reset, configuring user settings, and deploying Conditional Access baseline policies.
Overview
| Section | Description |
|---|---|
| Combined Registration | Enable simultaneous MFA + SSPR registration |
| Self-Service Password Reset | Allow users to reset passwords via second factor |
| User Settings | Edit default user and guest collaboration settings |
| Admin Consent Requests | Prevent users from consenting to external app requests |
| Device Settings | Enforce MFA for device join and enable Enterprise State Roaming |
| Conditional Access Baseline | Block legacy auth and require MFA |
Combined Registration
Enable the combined security information registration experience so users can register for both MFA and SSPR in a single flow.
Steps
- Go to Azure AD admin center > Users > User settings
- Click Manage user feature preview settings
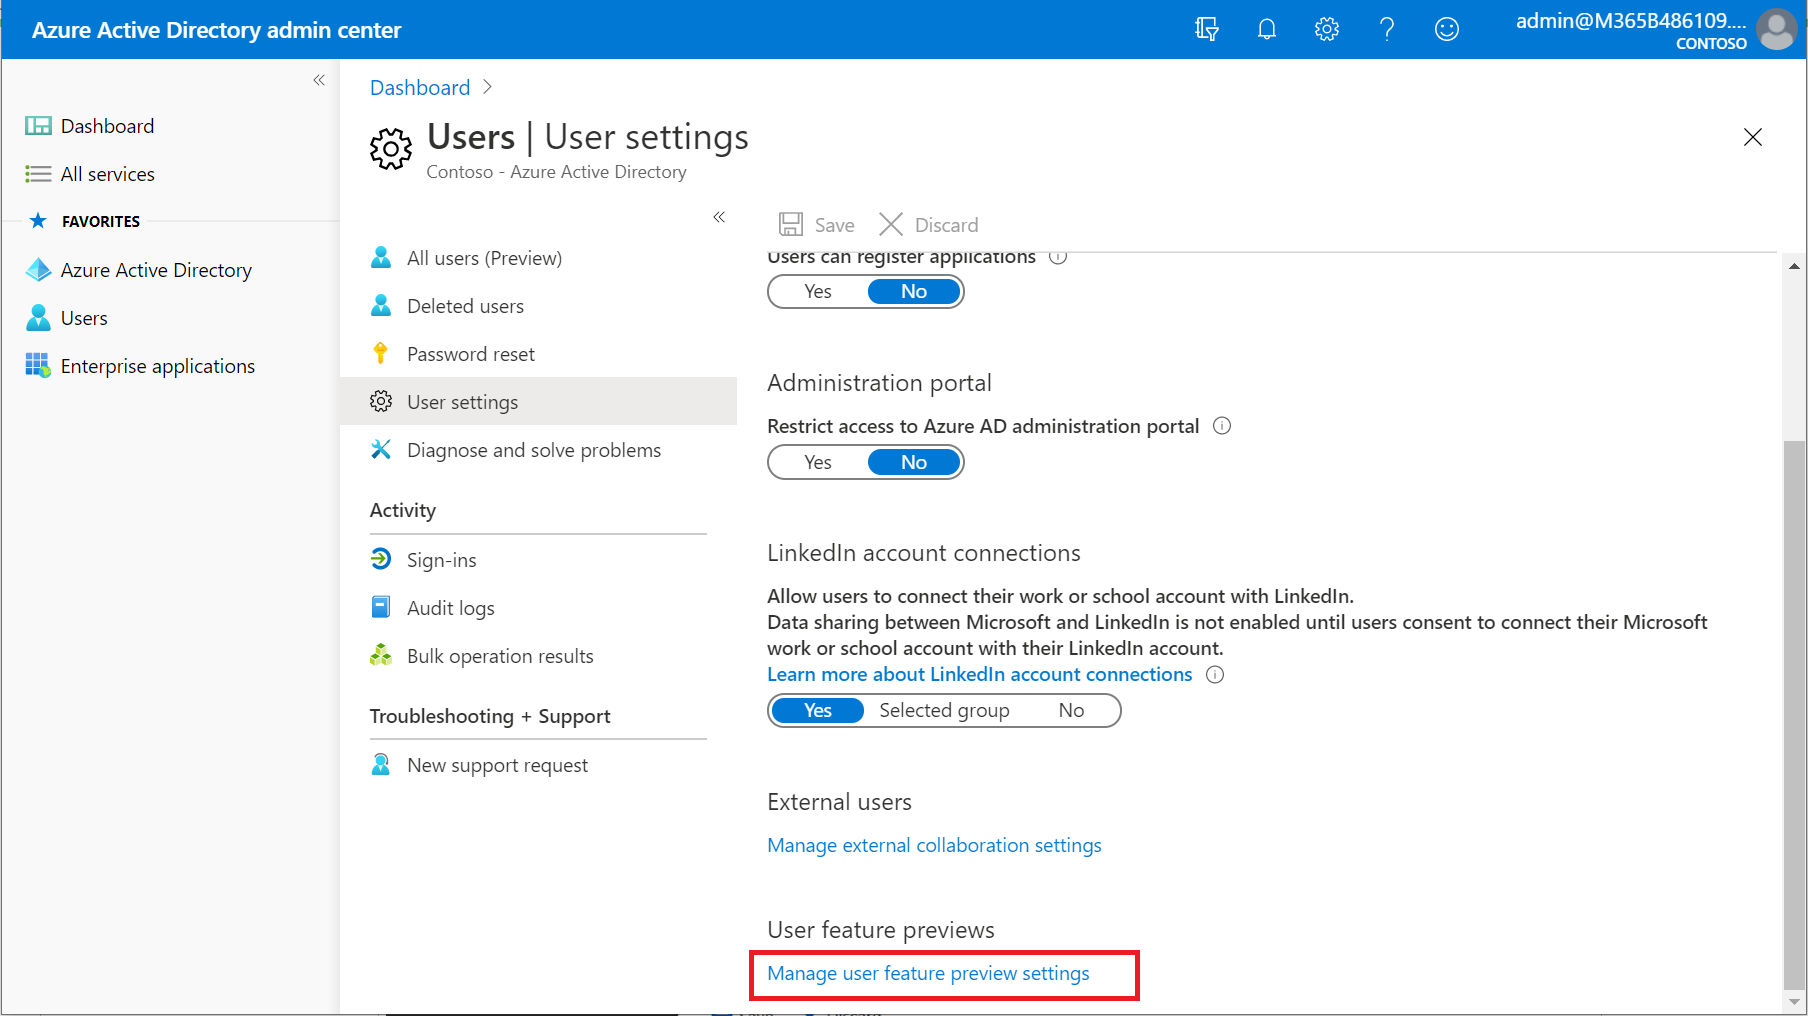
- Under Users can use the combined security information registration experience, select All
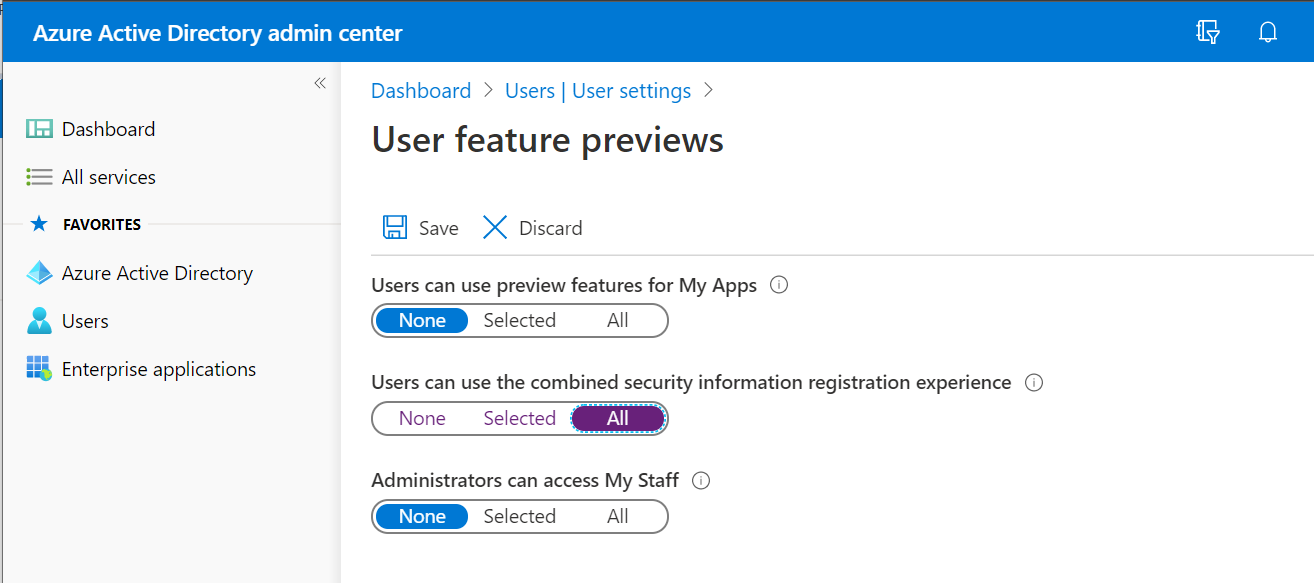
- Click Save
This unified registration experience reduces friction for end users and is the recommended approach for new deployments.
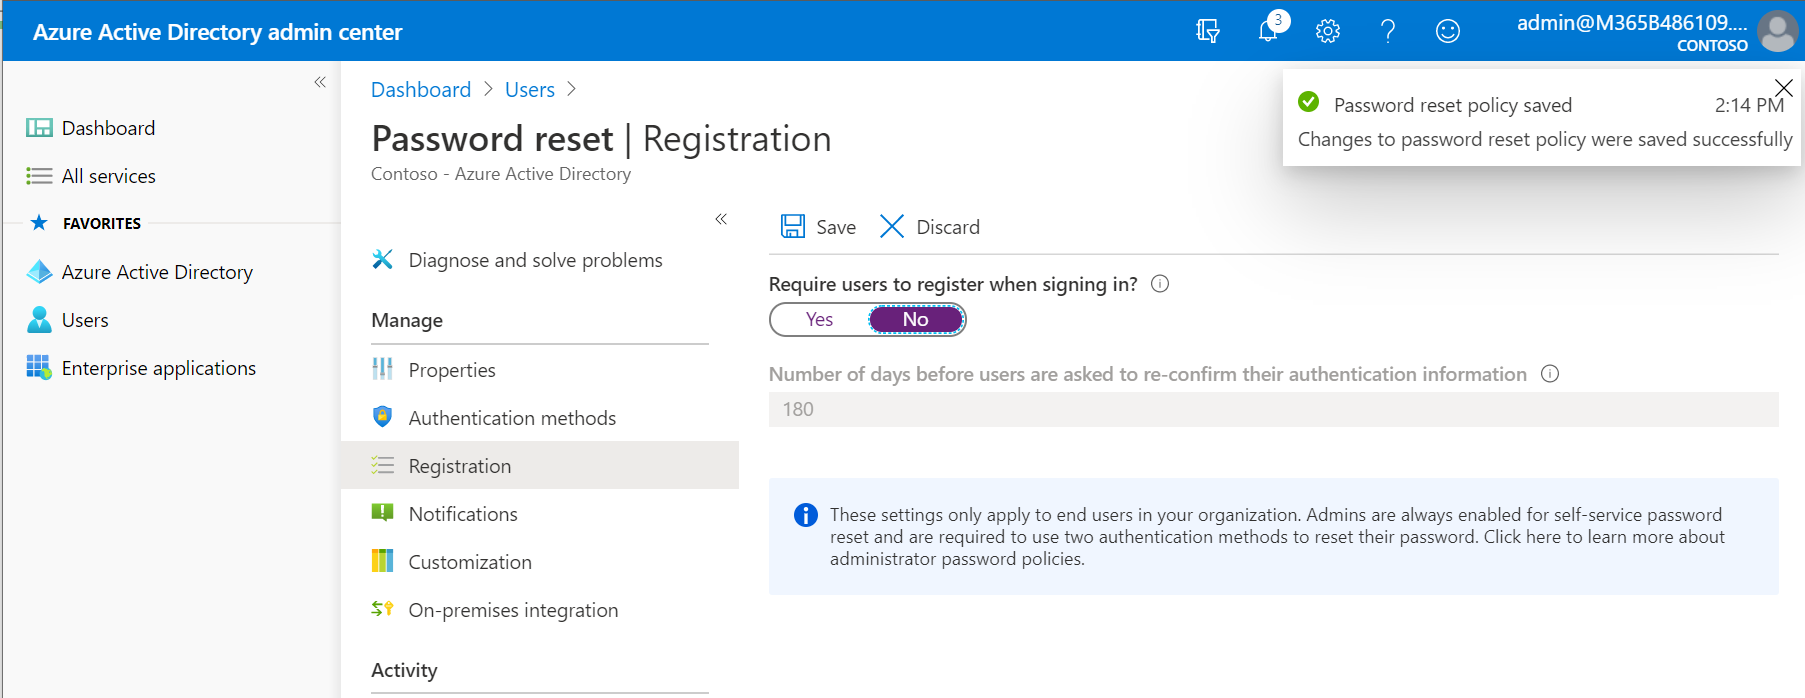
Self-Service Password Reset
Allow users to reset their own passwords using their registered second factor of authentication.
SSPR as configured here applies to cloud-only accounts. For synced (hybrid) accounts, you must also configure password writeback in Azure AD Connect.
Steps
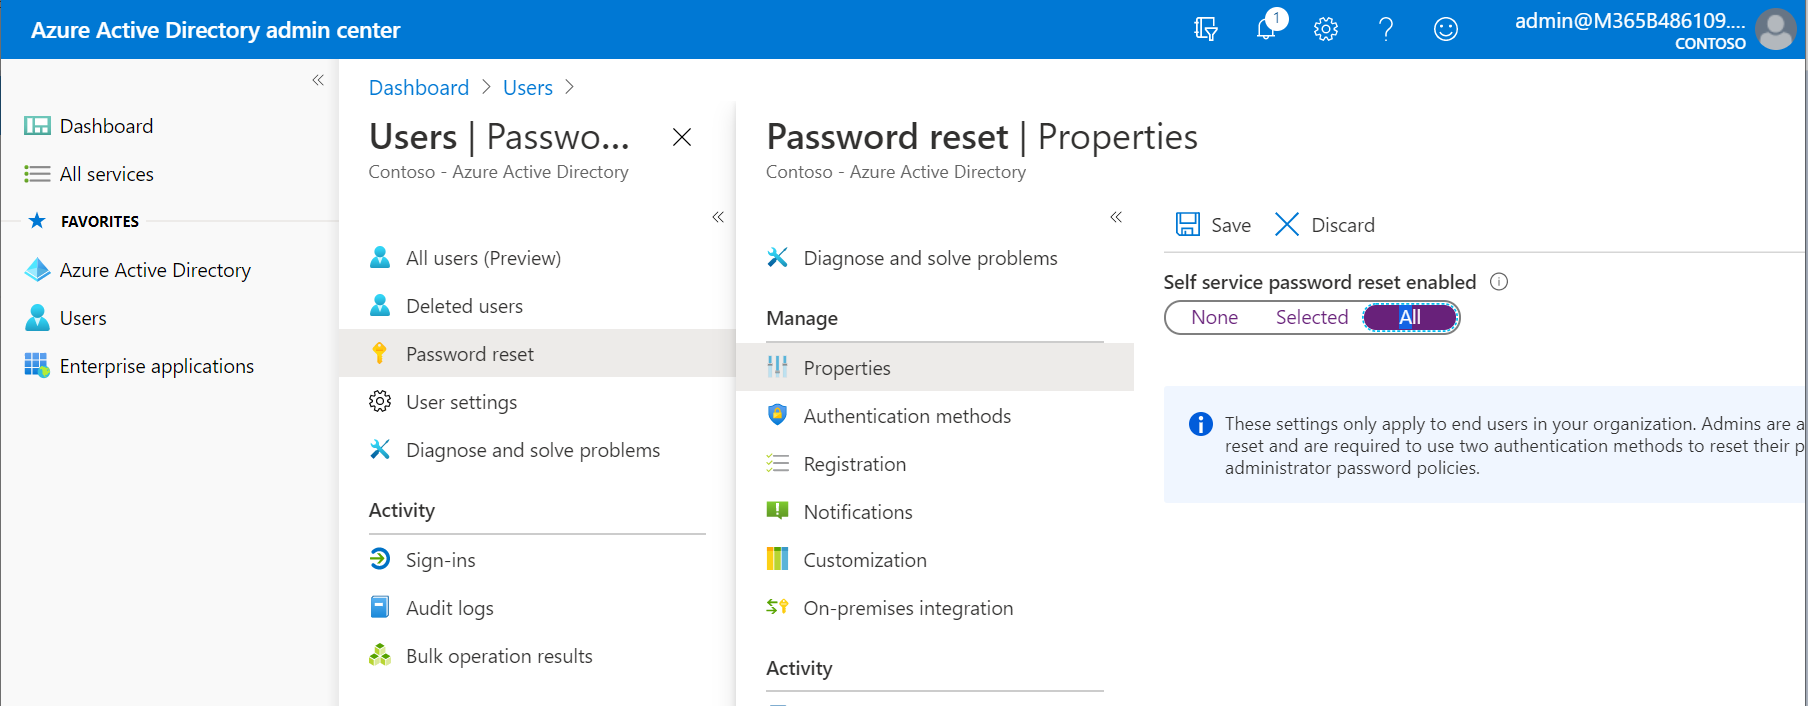
- Go to Azure AD admin center > Users > Password reset
-
Configure the following:
Properties tab — Set Self service password reset enabled to All
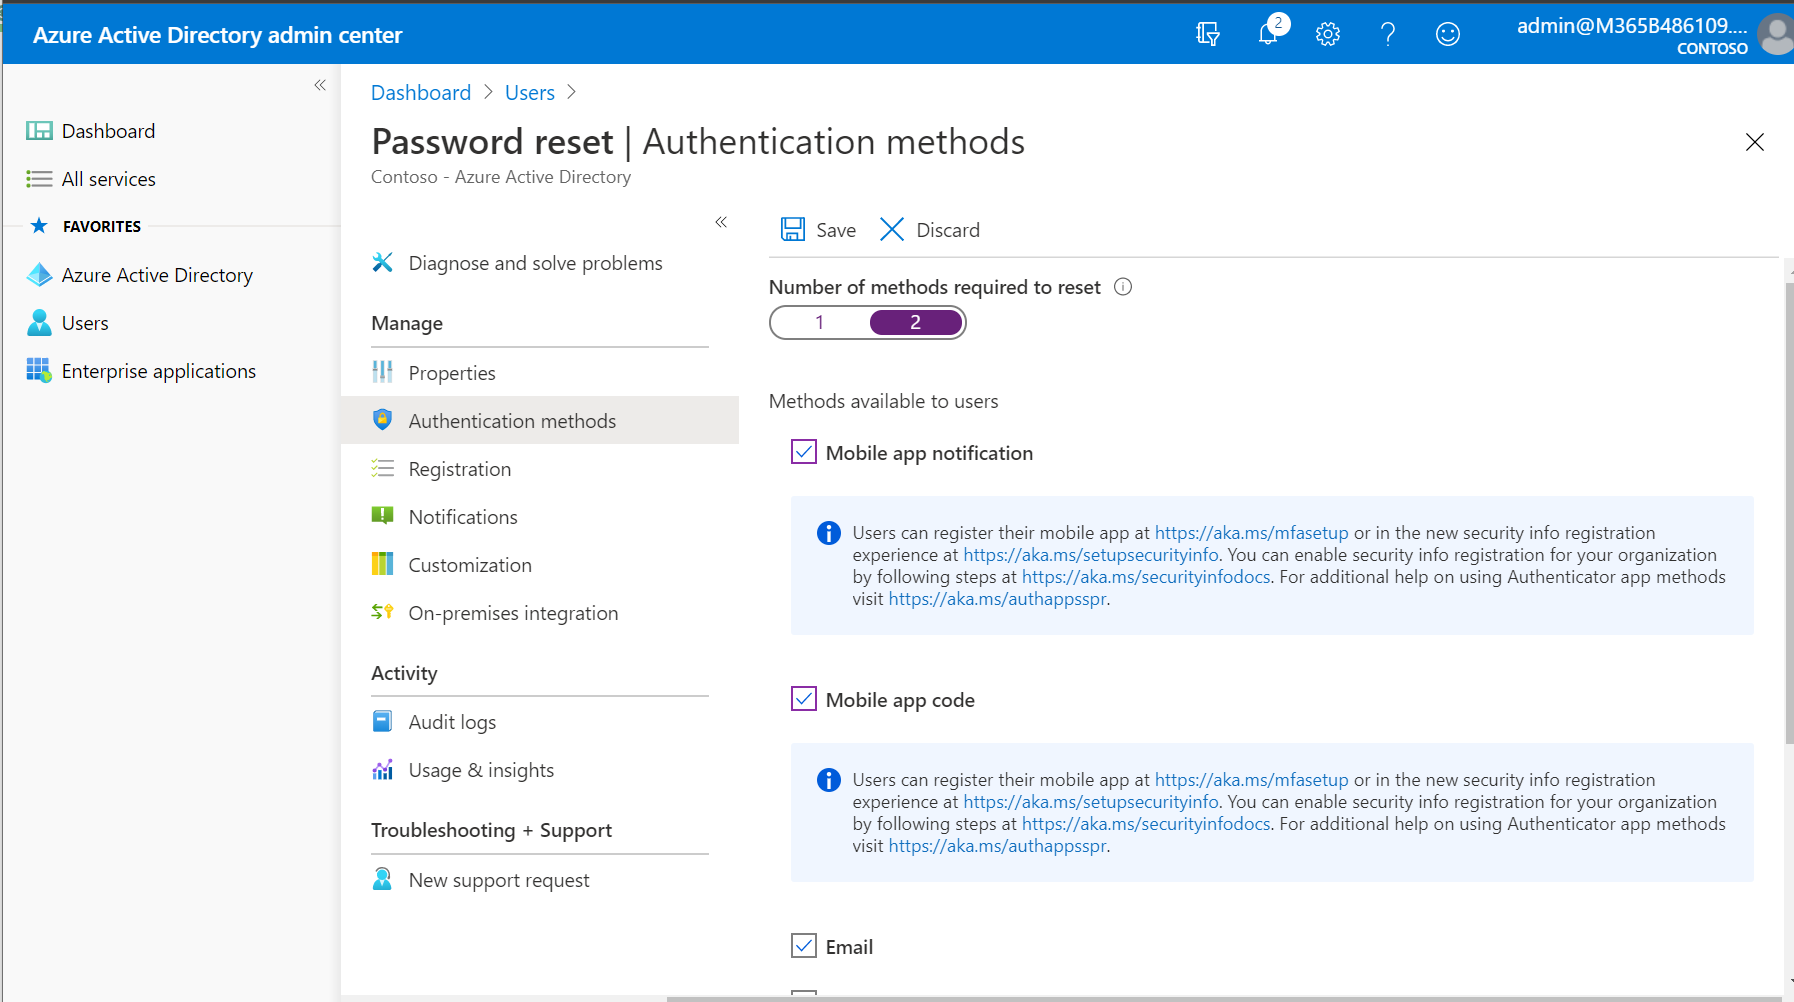
Authentication methods tab — Require 2 methods, enable: Mobile app notification, Mobile app code, Mobile phone, Email
Registration tab — Set Require users to register when signing in? to No
Notifications tab — Set both user and admin notifications to Yes

- Click Save
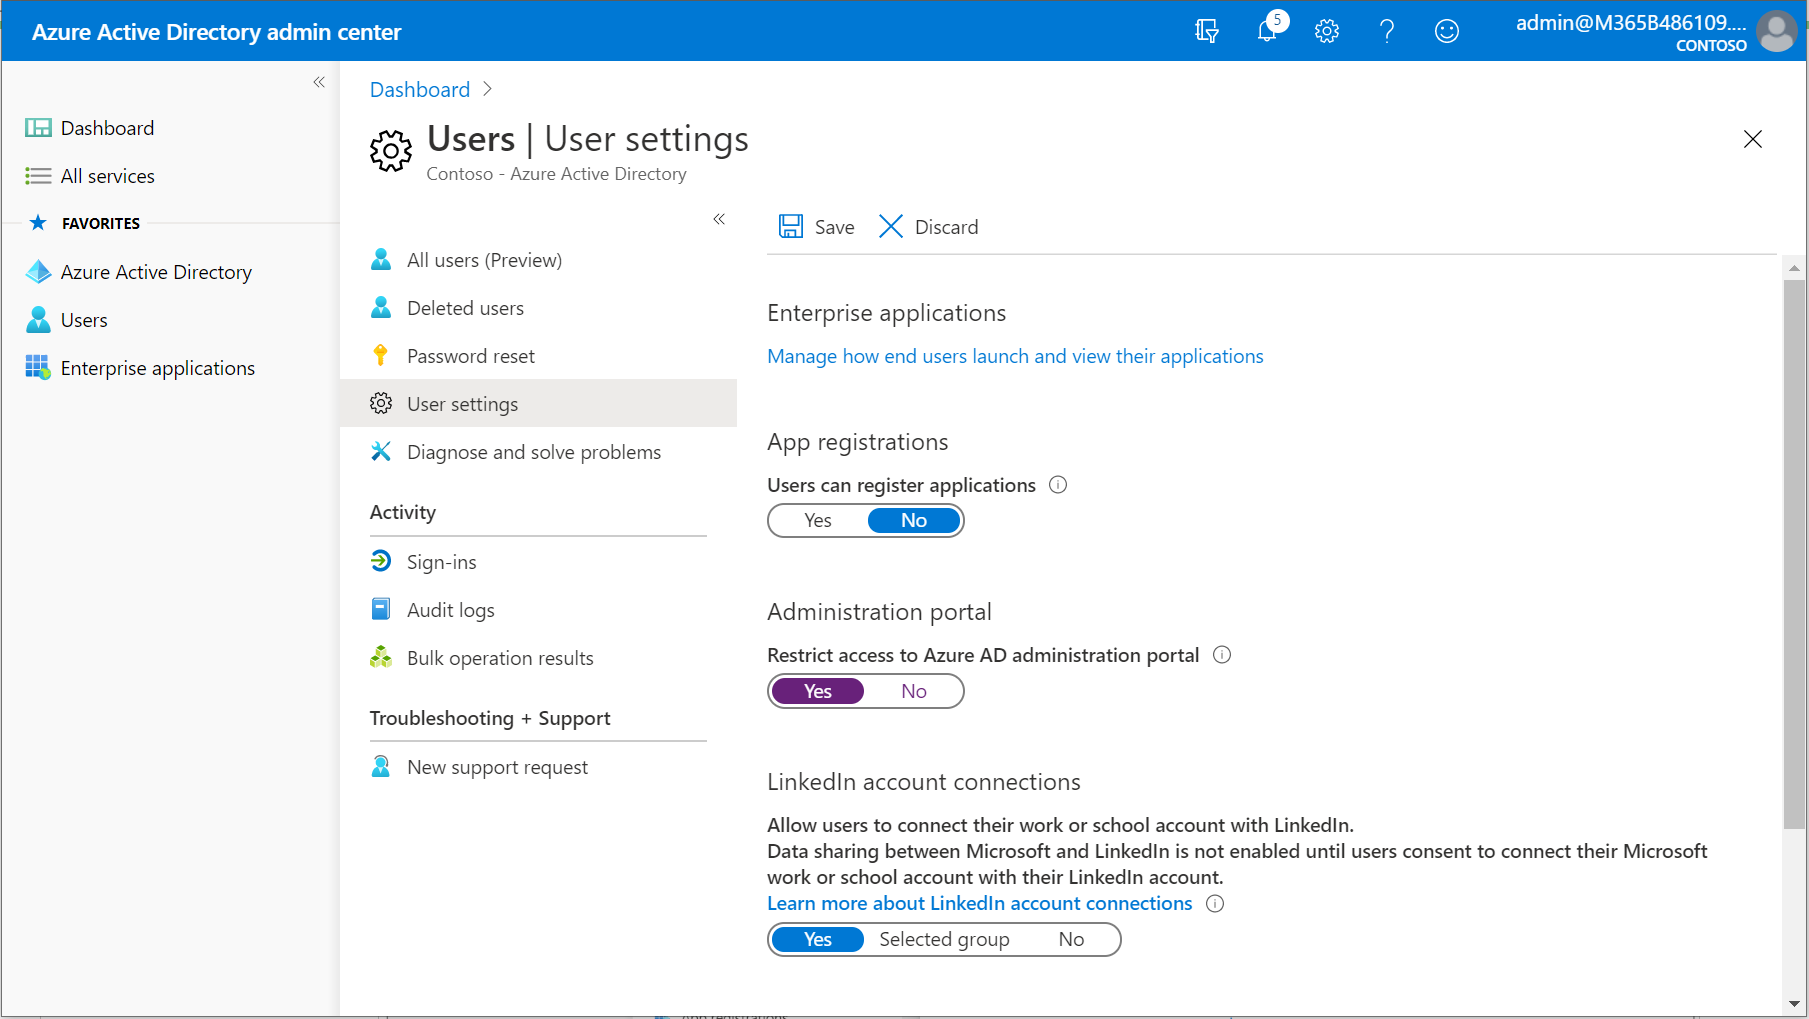
User Settings
Configure default user and guest collaboration settings in Azure AD.
Default User Settings
- Go to Azure AD admin center > Users > User settings
- Make the following recommended selections:
- Users can register applications → No
- Restrict access to Azure AD administration portal → Yes
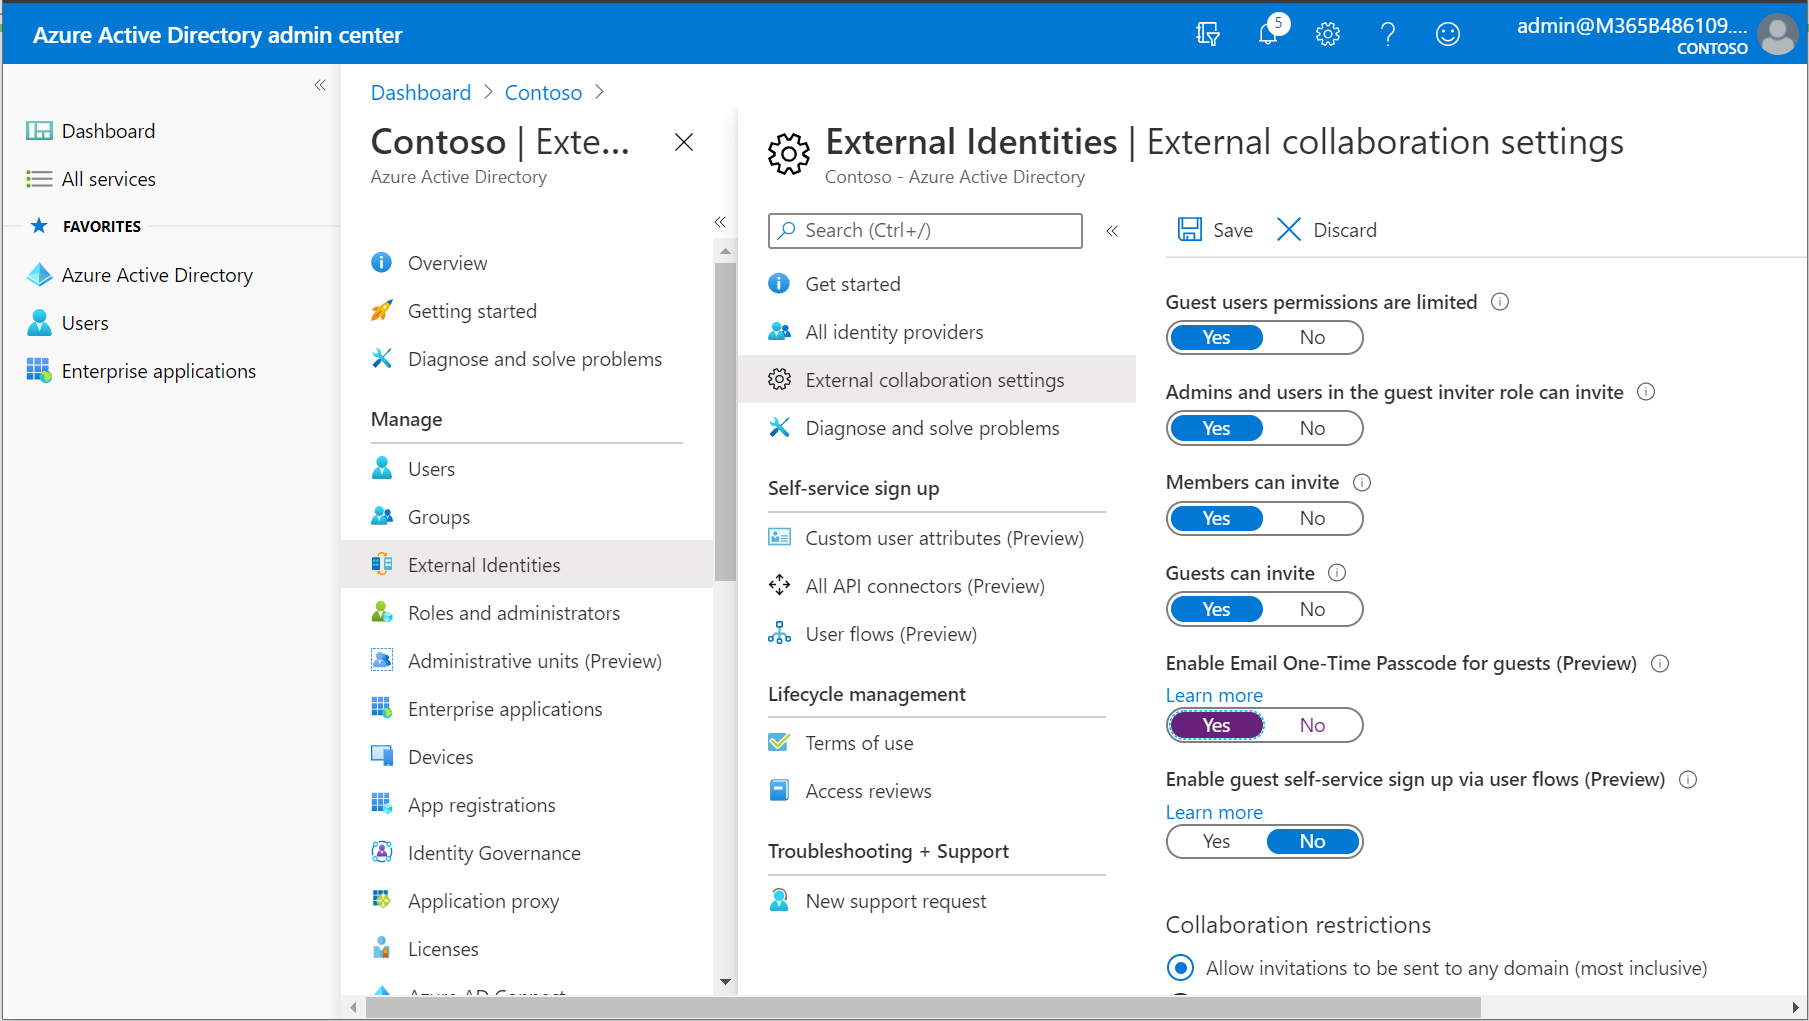
External Collaboration Settings (Guest Users)
- Scroll down and click Manage external collaboration settings
(Also accessible via Azure AD > External identities > External collaboration settings) - Recommended settings:
- Enable Email One-Time Passcode → Yes
- Guests can invite → No (recommended for most organizations)
Admin Consent Requests
Prevent users from independently consenting to third-party application permission requests.
Steps
- Navigate to Azure AD > Enterprise Applications > User settings
- Set Users can consent to apps accessing company data on their behalf → No
- Set Users can request admin consent to apps they are unable to consent to → Yes
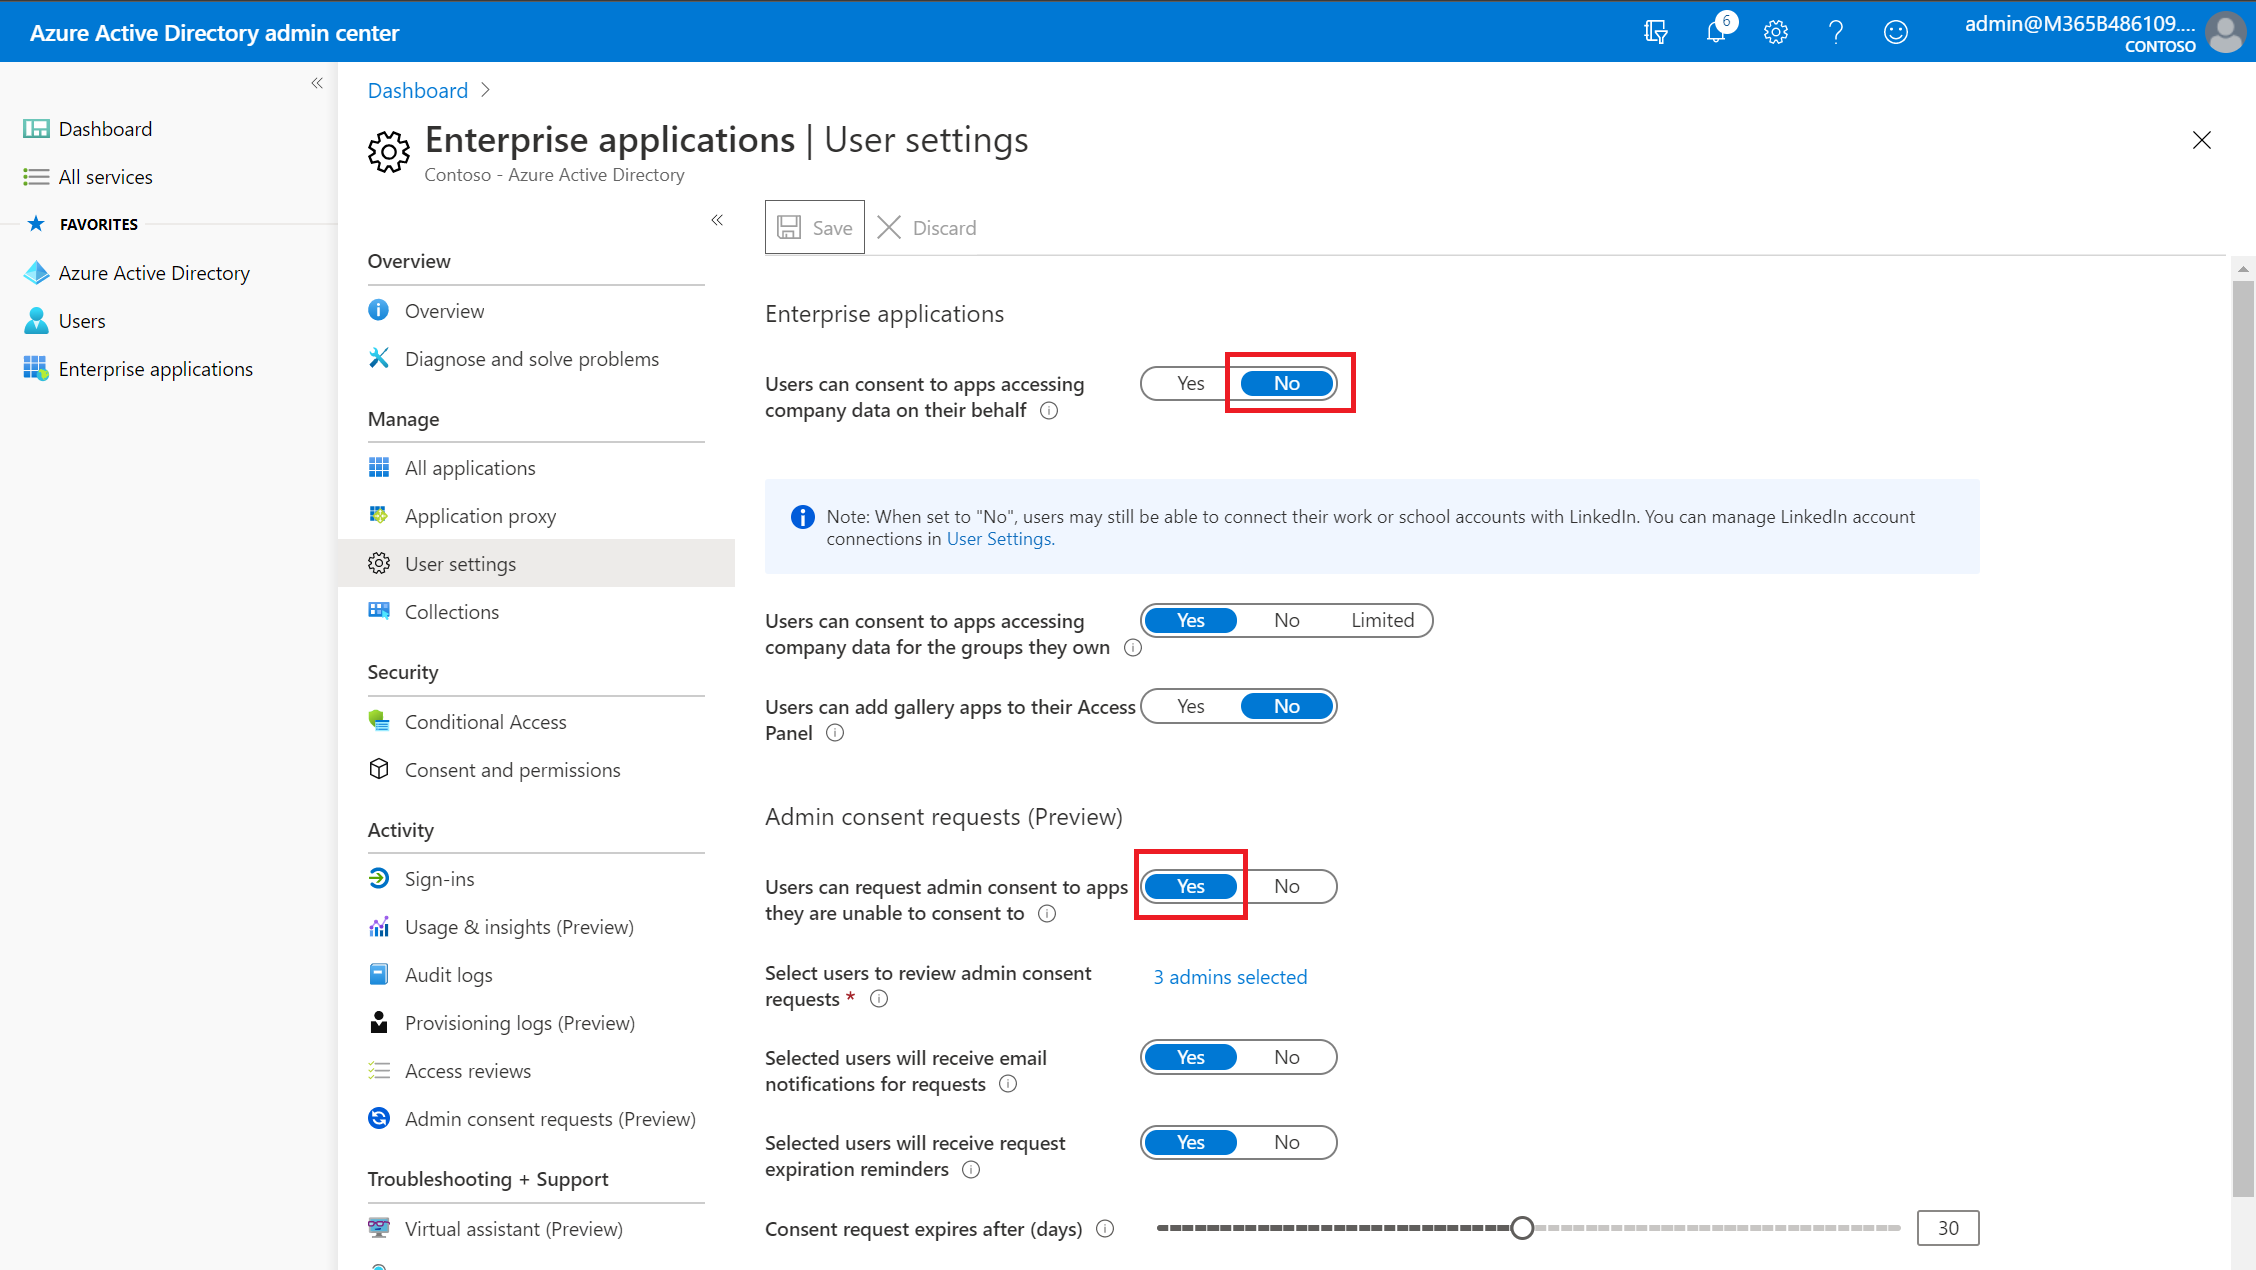
- Configure the admin consent request settings and expiration
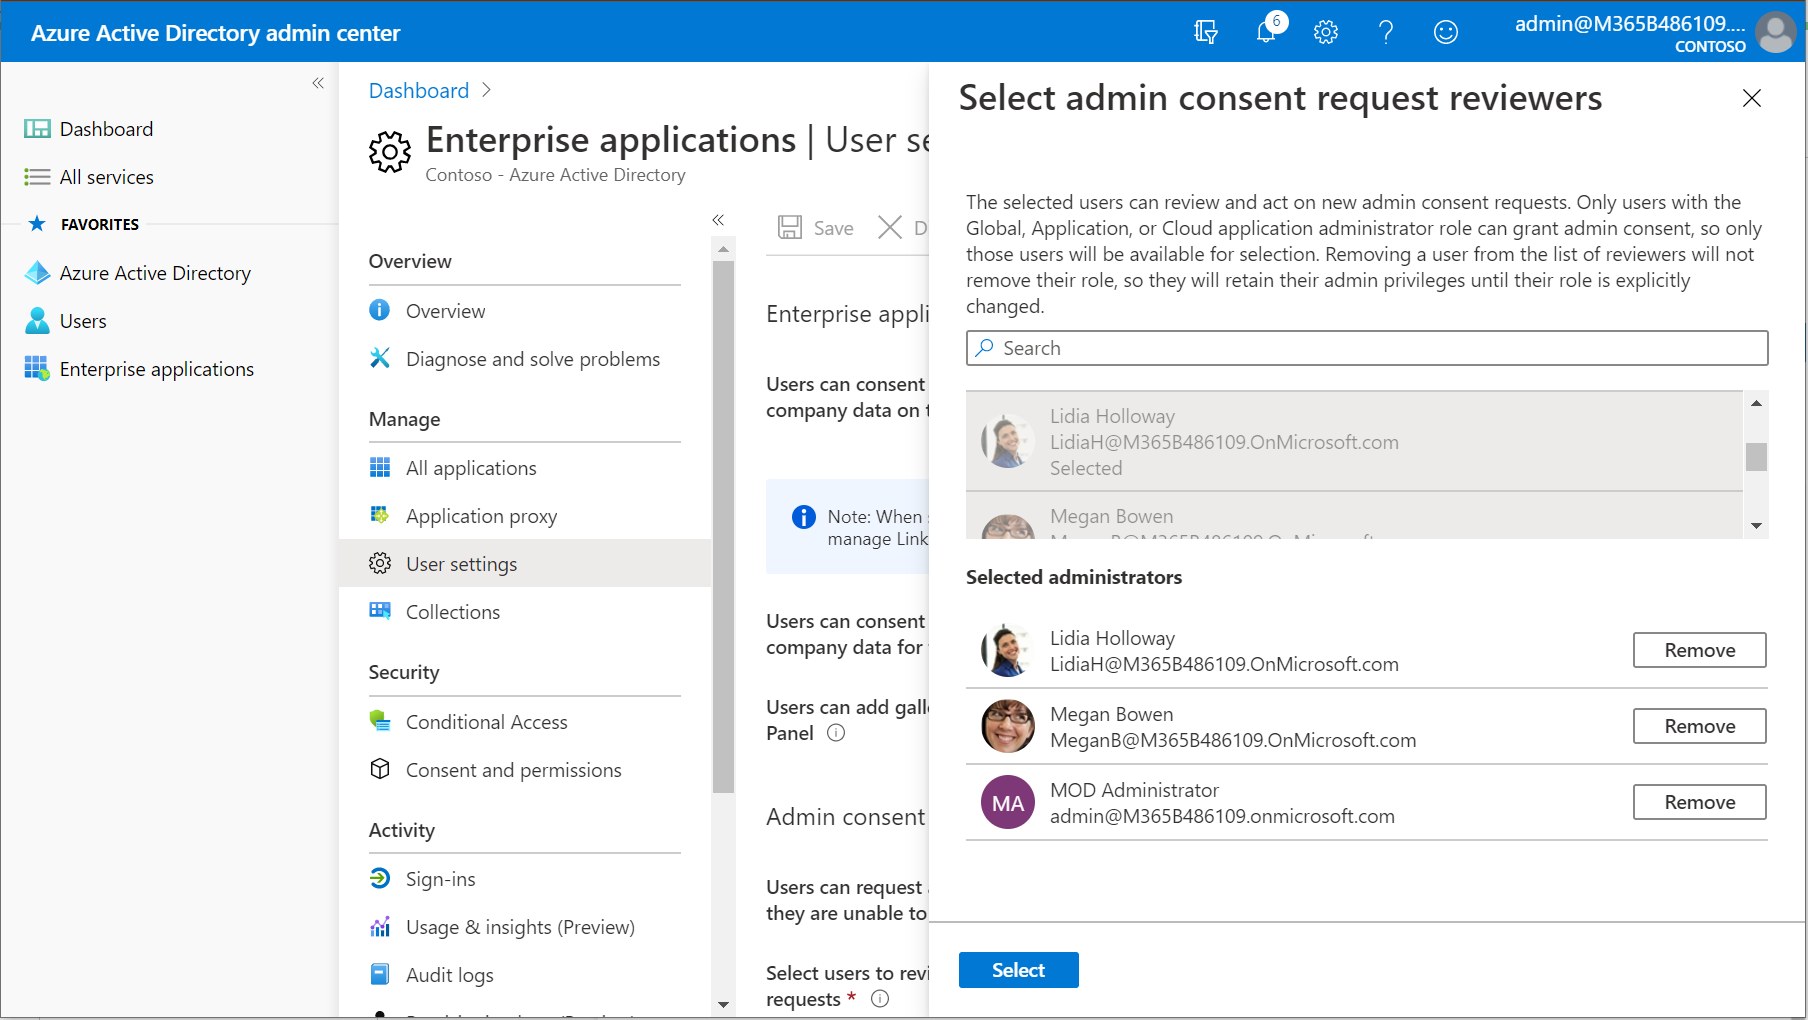
- Select approvers — choose admins who will review and approve consent requests
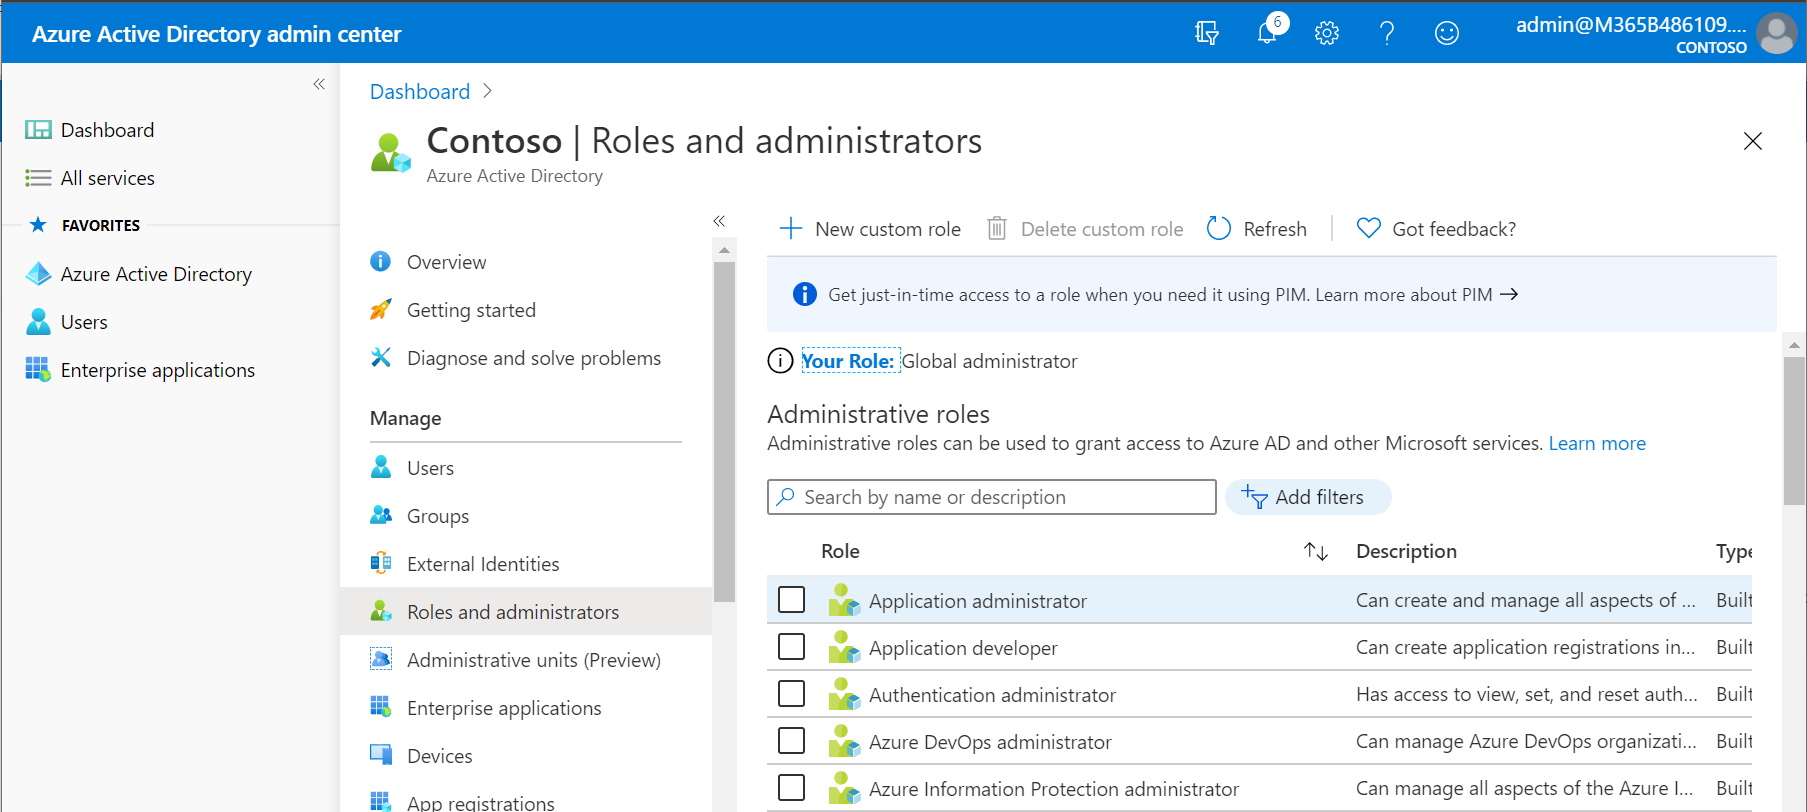
Delegating to Non-Admin Approvers
If you need to delegate consent approval to non-admin users:
- Navigate to Azure Active Directory > Roles and administrators
- Assign the Application administrator role to the designated approvers
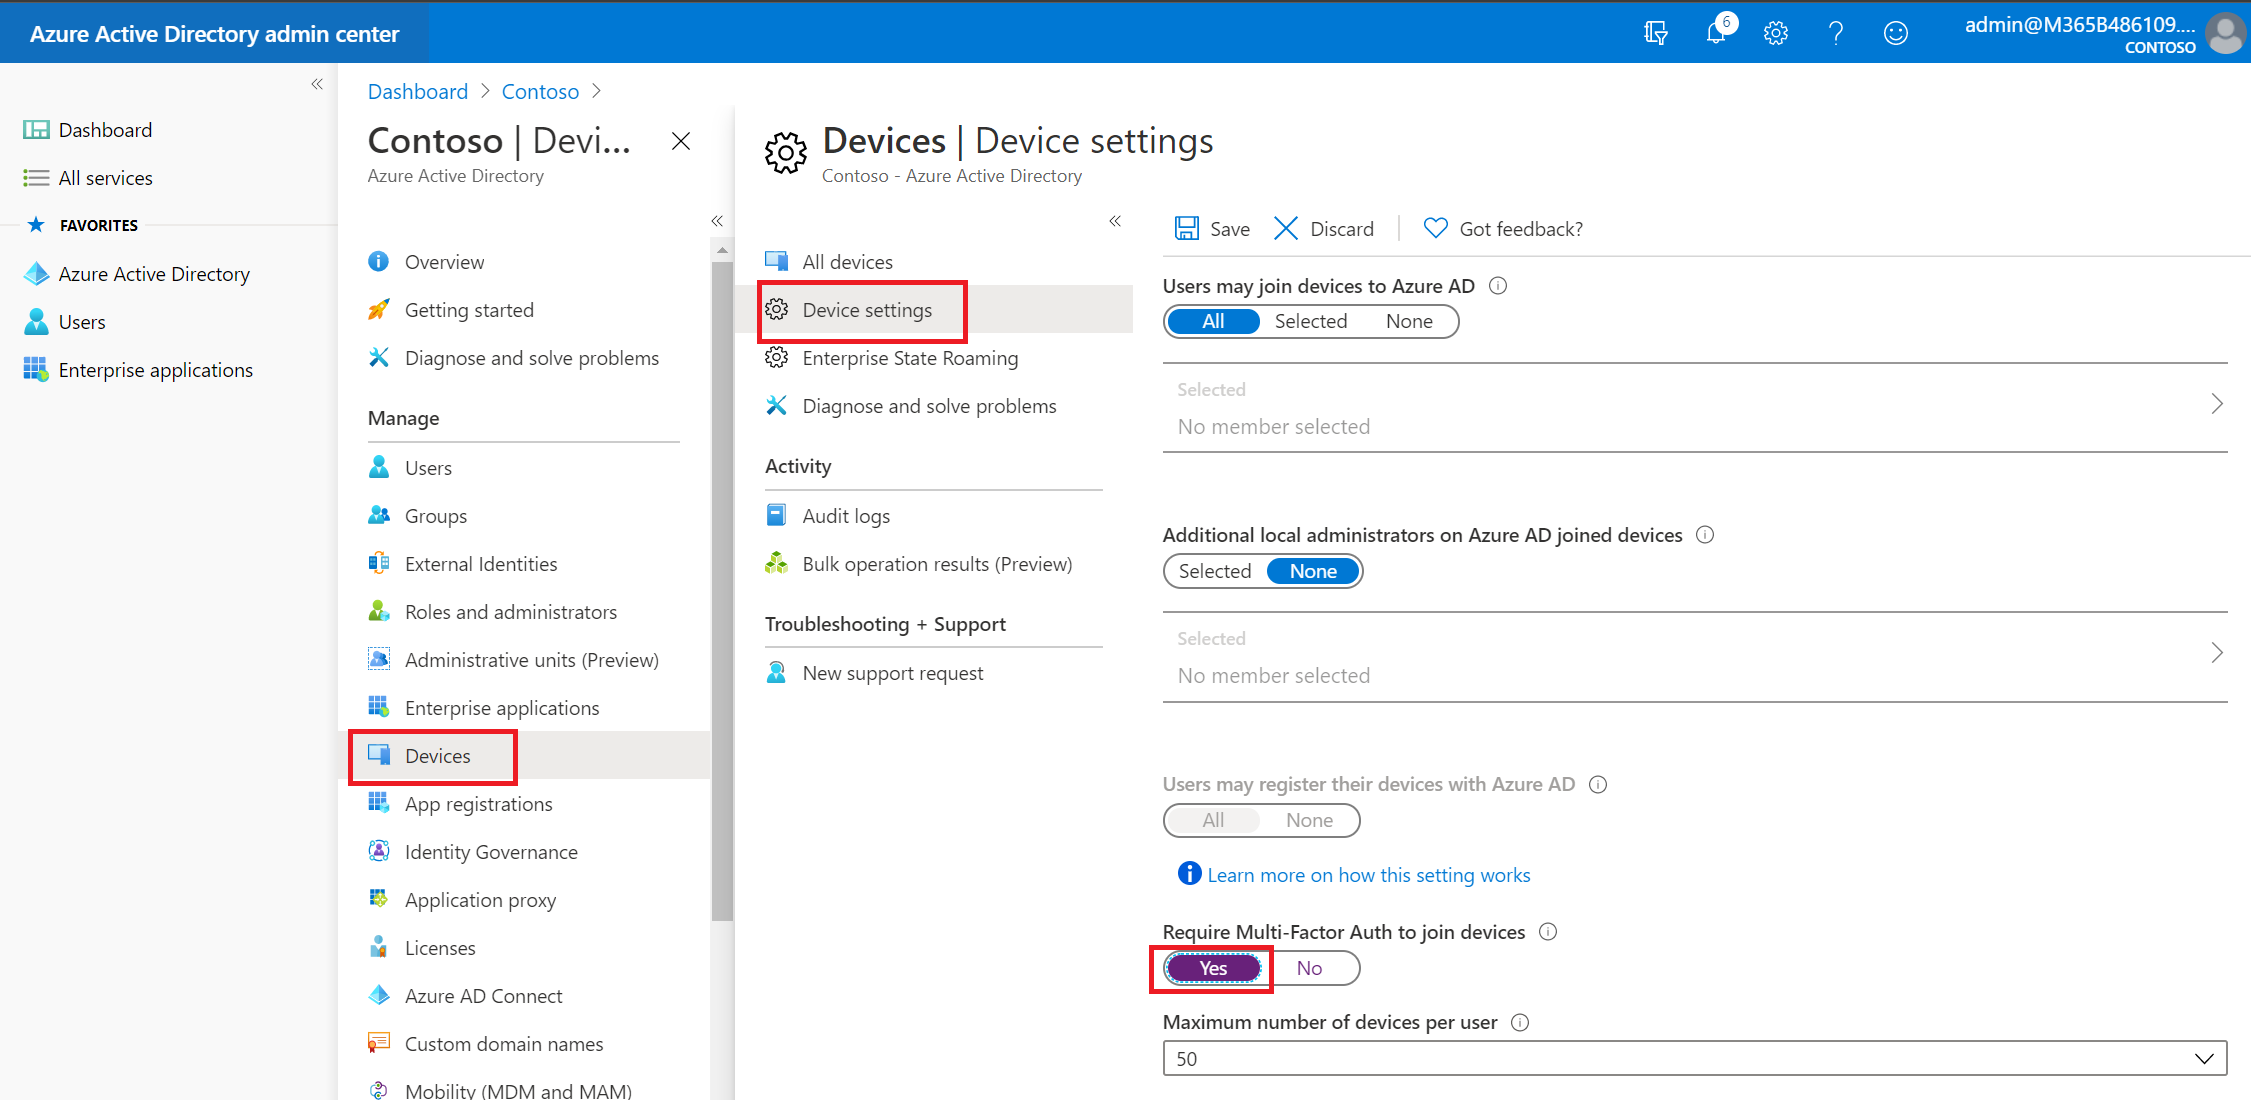
Device Settings
Configure how devices can join Azure AD and enable Enterprise State Roaming.
Default Device Settings
- Go to Azure AD admin center > Users > Device settings
- Set Require Multi-factor Auth to join devices → Yes
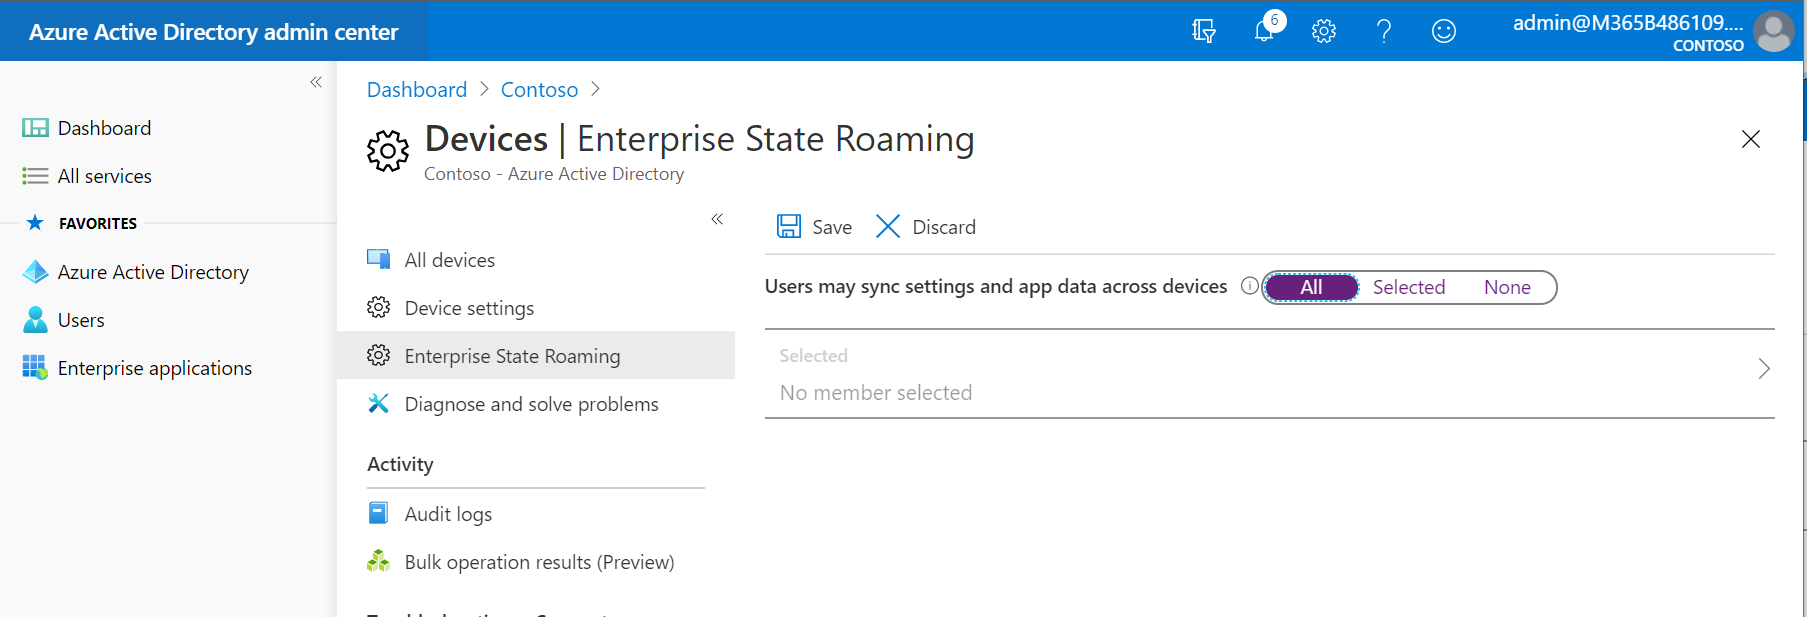
Enterprise State Roaming
- Navigate to Azure AD > Devices > Enterprise state roaming
- Under Users may sync settings and app data across devices, select All
Conditional Access Baseline
Create the foundational Conditional Access policies to protect your tenant.
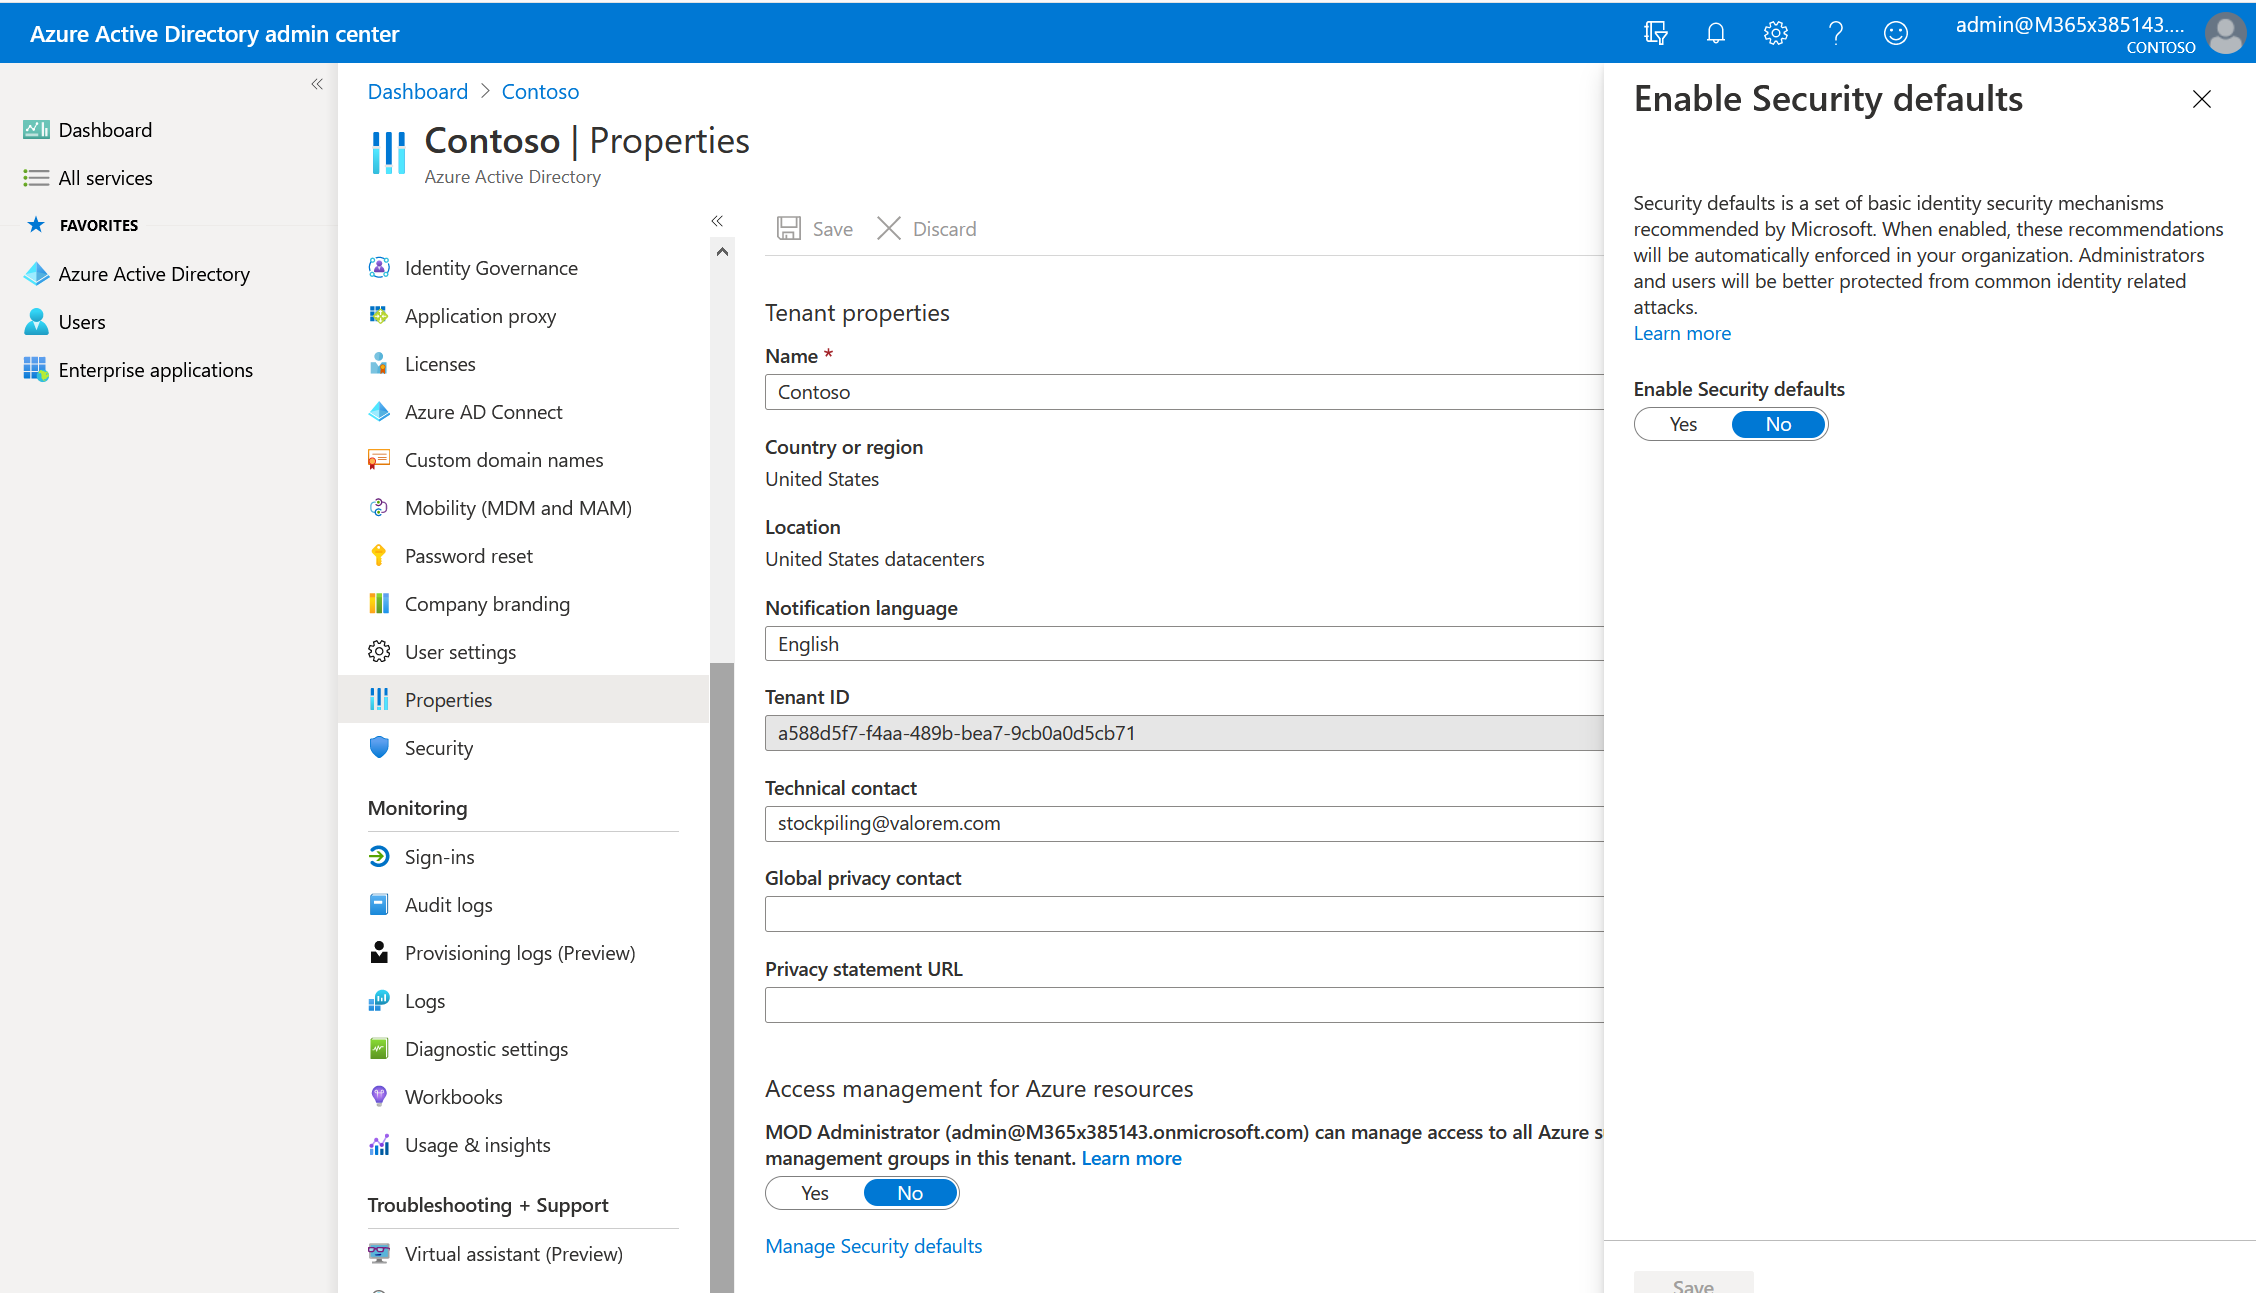
Before configuring Conditional Access policies, you must disable Security Defaults if it is currently enabled. Security Defaults and Conditional Access cannot be used simultaneously.
Step 1 — Disable Security Defaults
- Go to Azure AD > Properties
- Click Manage Security Defaults at the bottom
- Set Enable Security Defaults to No and click Save
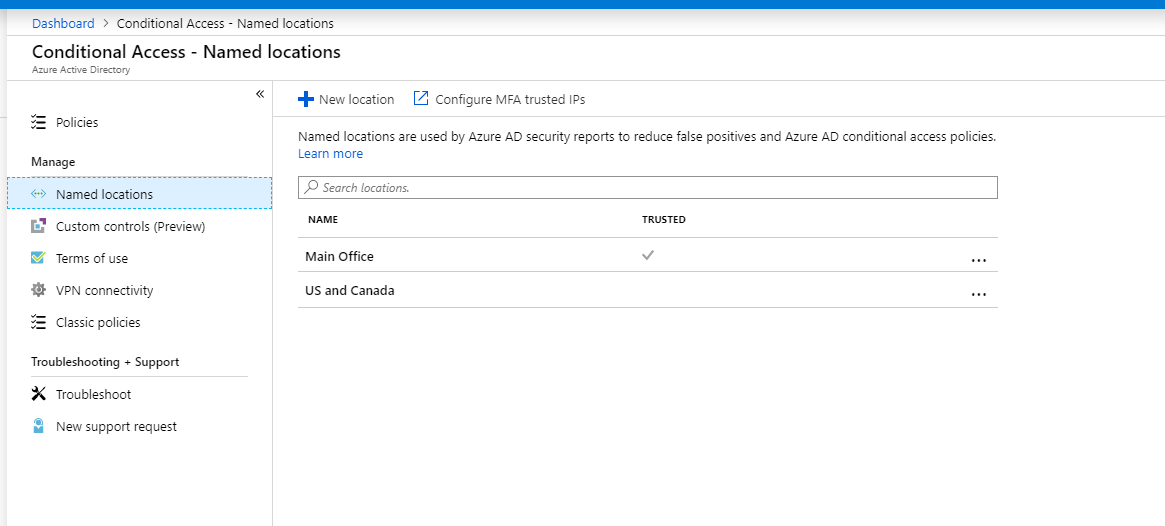
Step 2 — Configure Named Locations (Optional but Recommended)
- Navigate to Azure AD > Security > Conditional Access > Named locations
- Create locations for Corporate Offices (IP-based) and allowed countries (country-based)
| Automate Conditional Access deployment with PowerShell — Install-BaselineCAPolicies.ps1 | Install-DataProtectionCAPolicies.ps1 | Install-GuestCAPolicies.ps1 |
Policy 1 — BLOCK: Legacy Authentication
Block legacy authentication protocols (Basic Auth, Exchange ActiveSync) that cannot enforce MFA.
- Navigate to Azure AD > Security > Conditional Access > New policy
-
Configure Assignments — name the policy and include All users, exclude
Excluded from CAgroup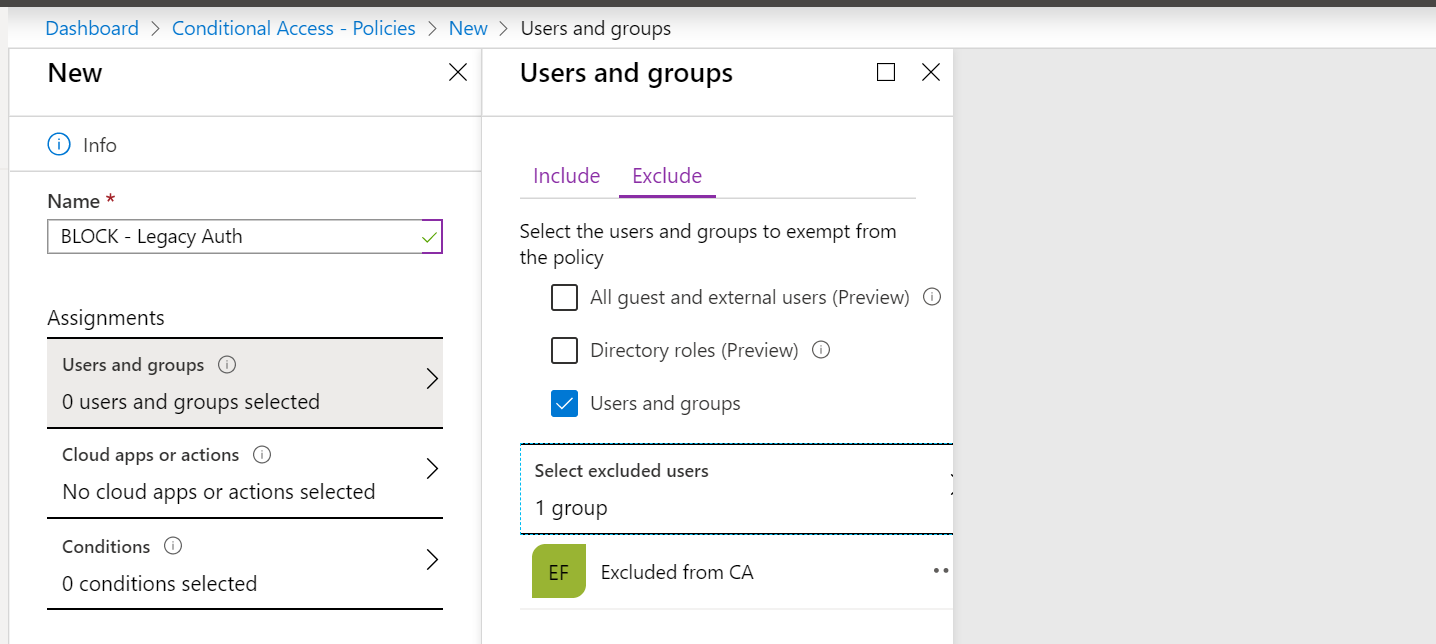
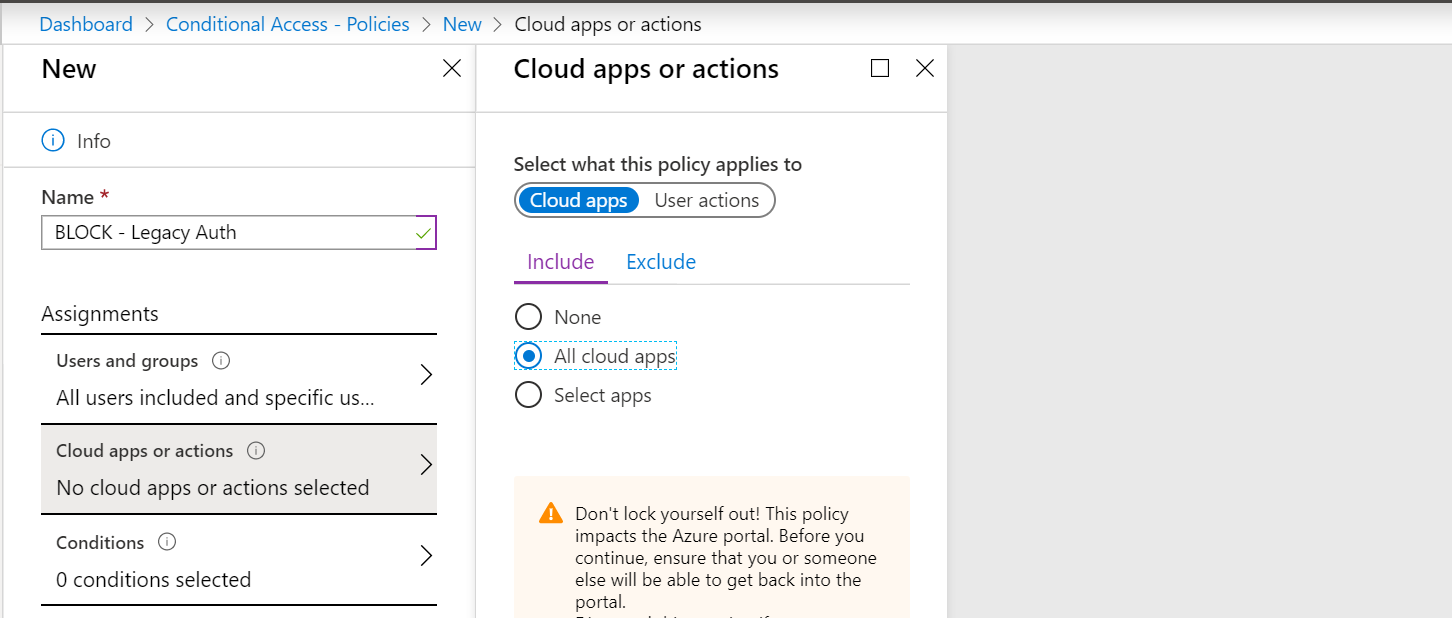
-
Cloud apps or actions — select All cloud apps
-
Conditions > Client apps — select Exchange ActiveSync clients and Other clients
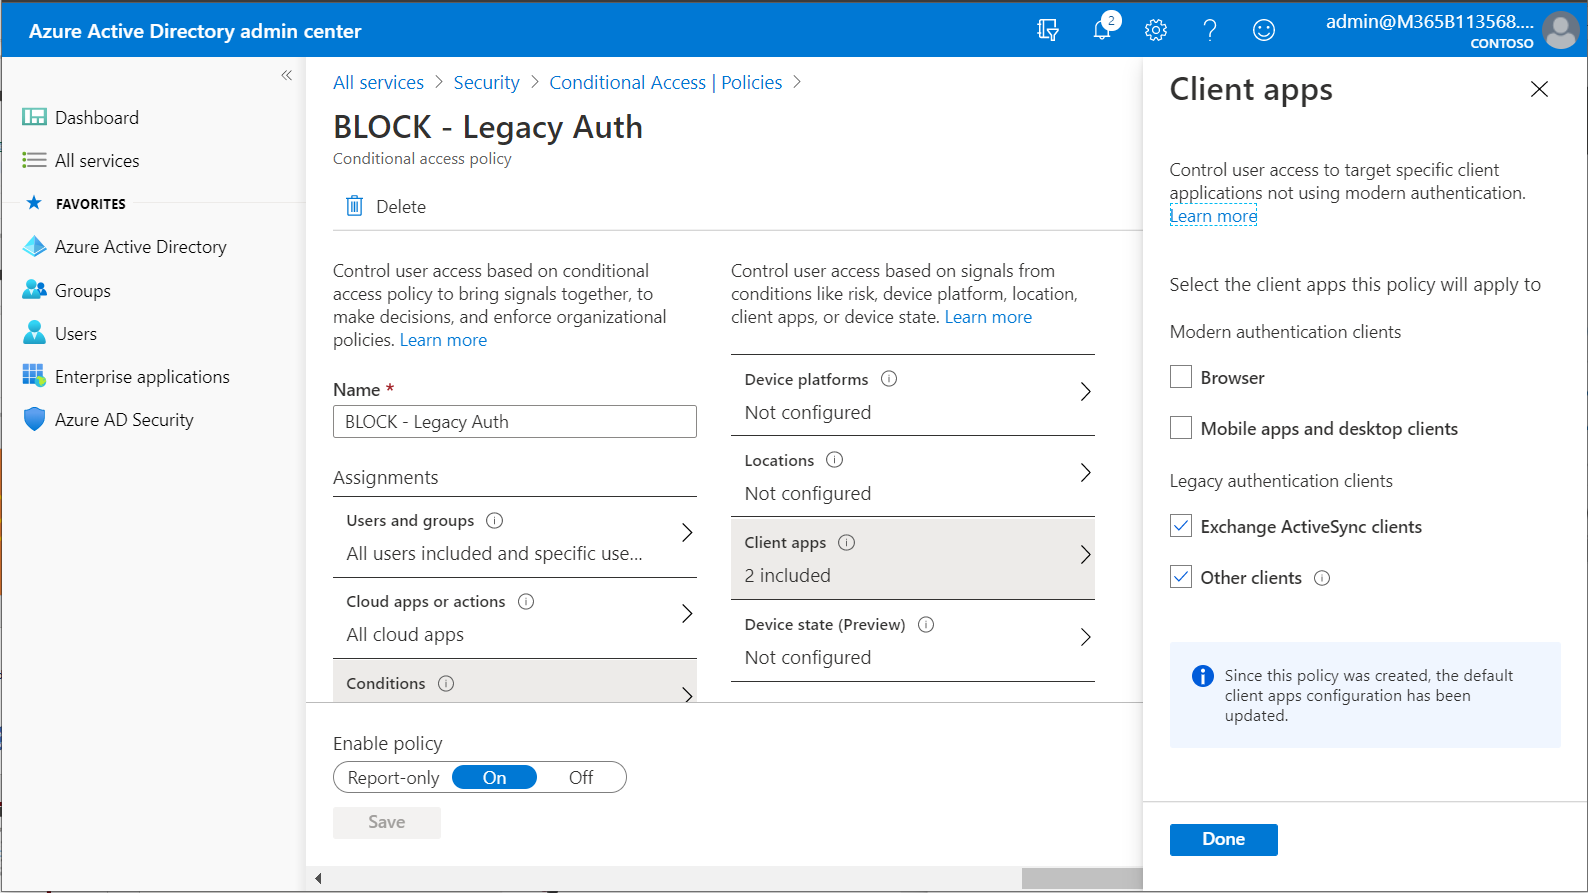
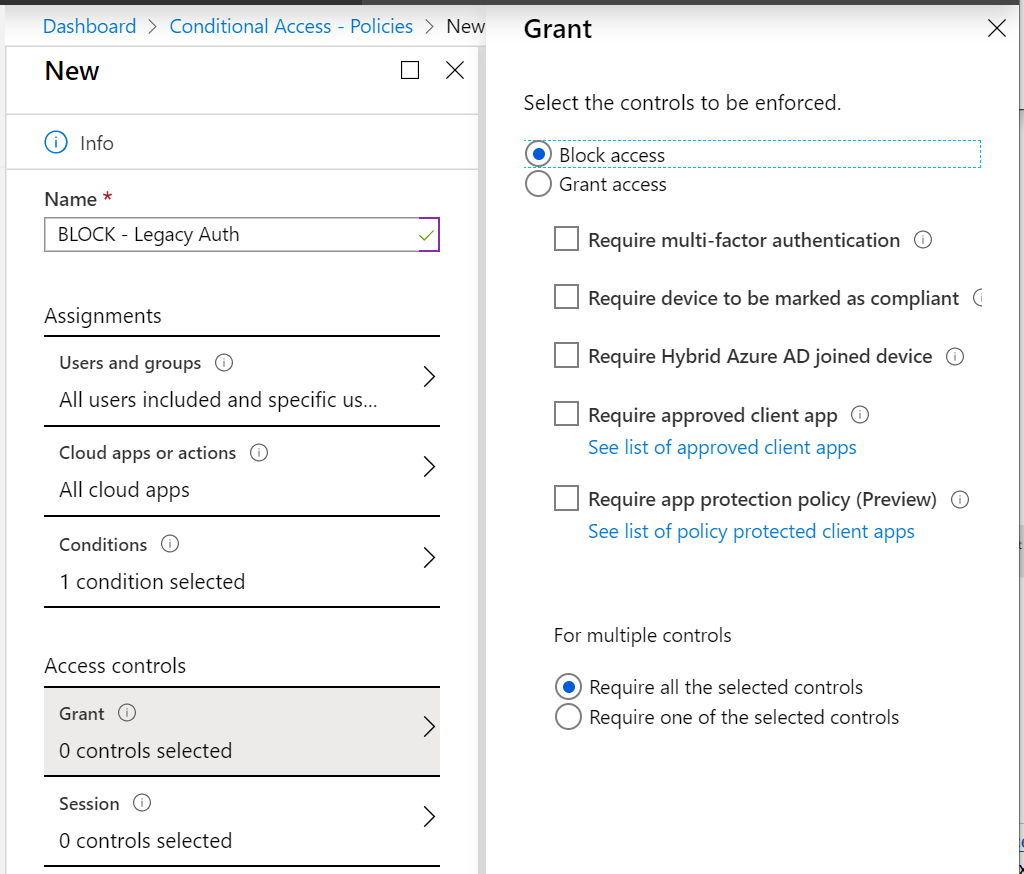
-
Access controls — select Block access, then Save and Enable
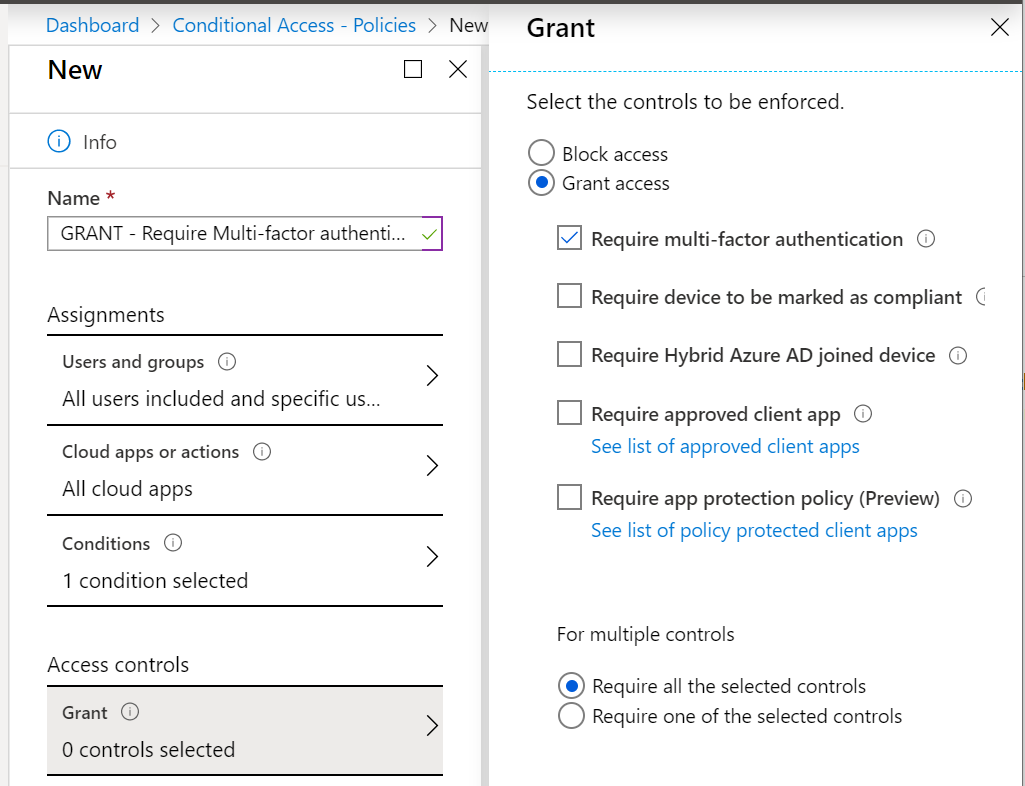
Policy 2 — GRANT: Require Multi-Factor Authentication
Require MFA for all users on all cloud apps.
- Navigate to Azure AD > Security > Conditional Access > New policy
-
Configure Assignments — include All users, exclude guests and
Excluded from CAgroup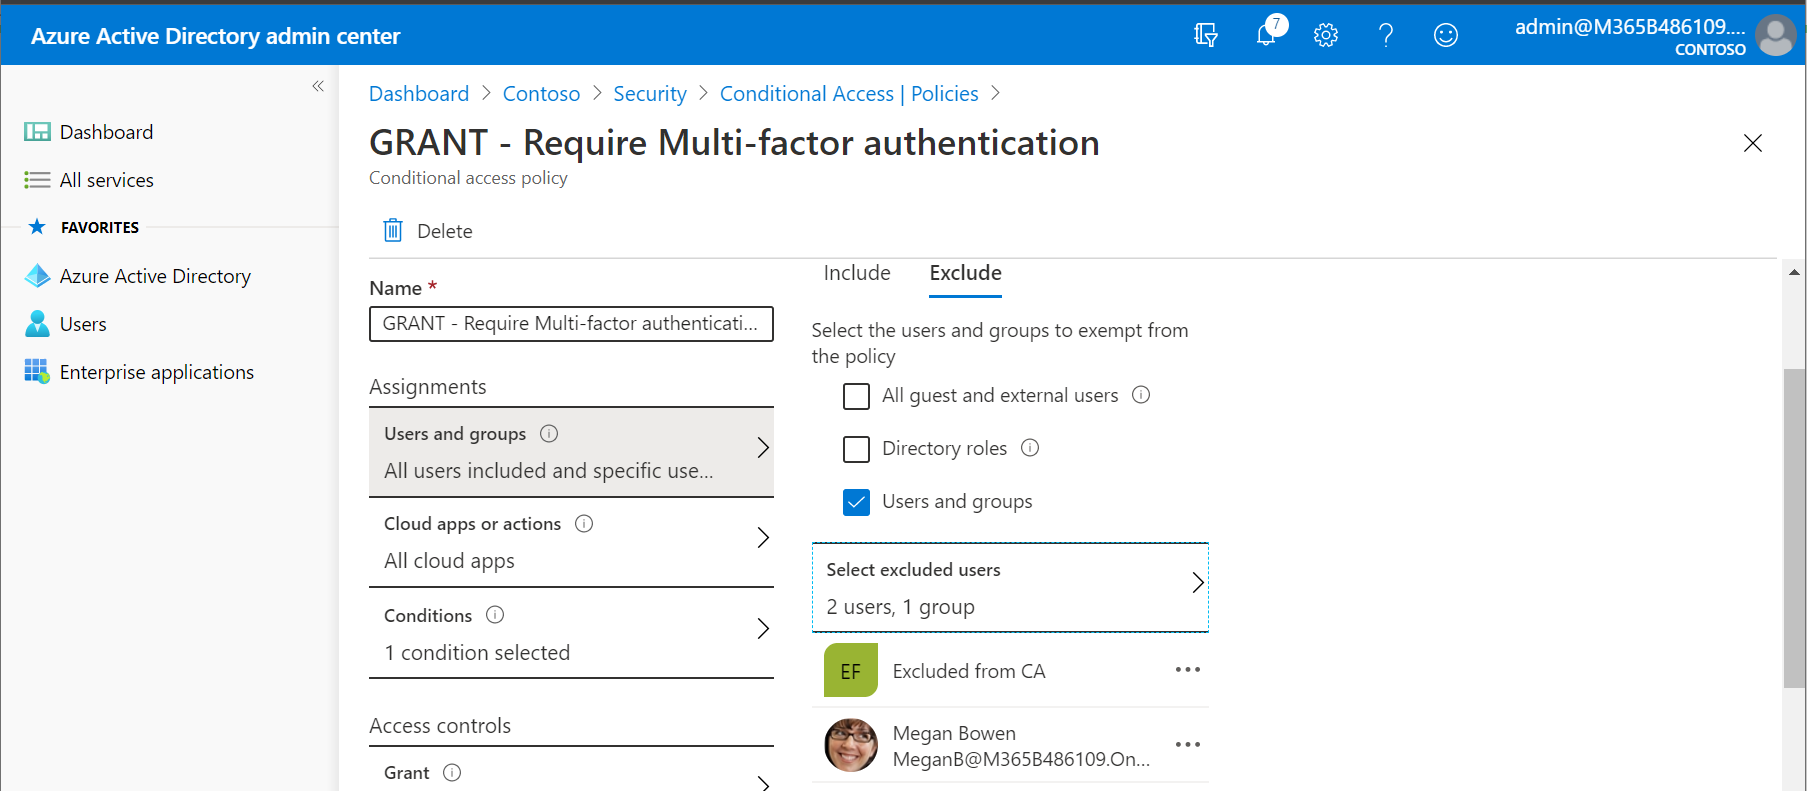
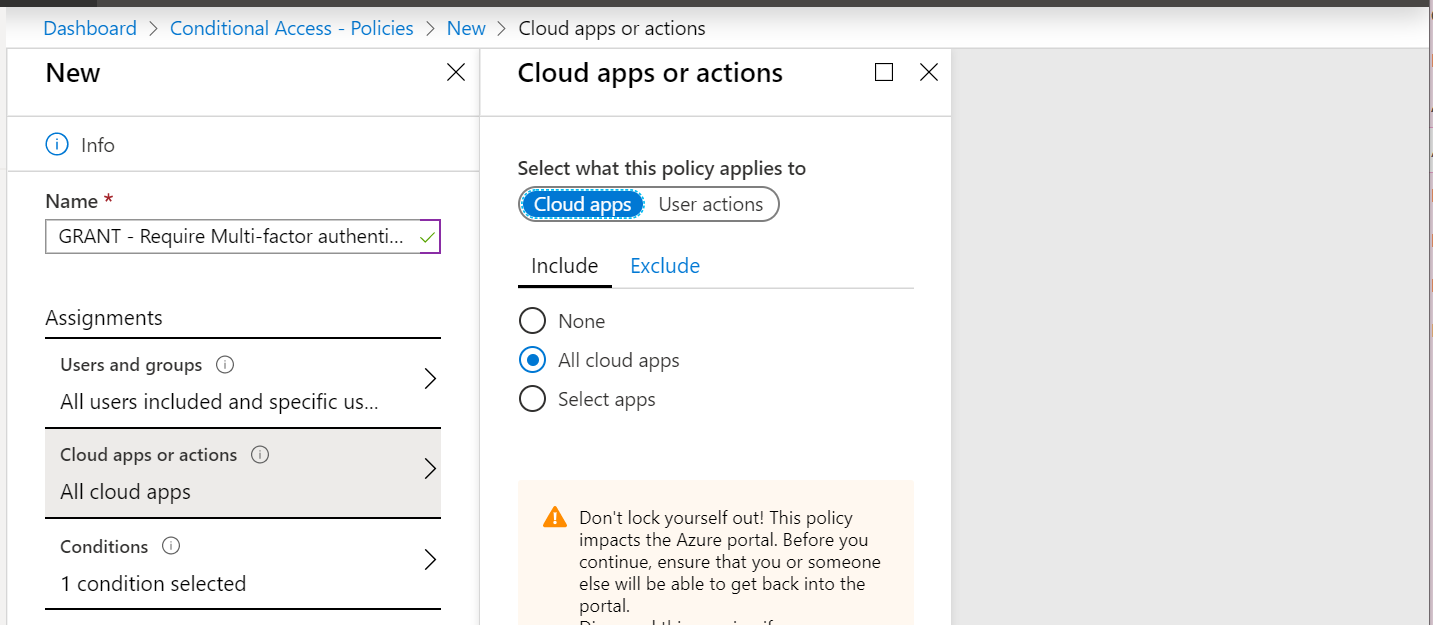
-
Cloud apps or actions — select All cloud apps
-
Conditions > Client apps — select Browsers and Modern authentication clients
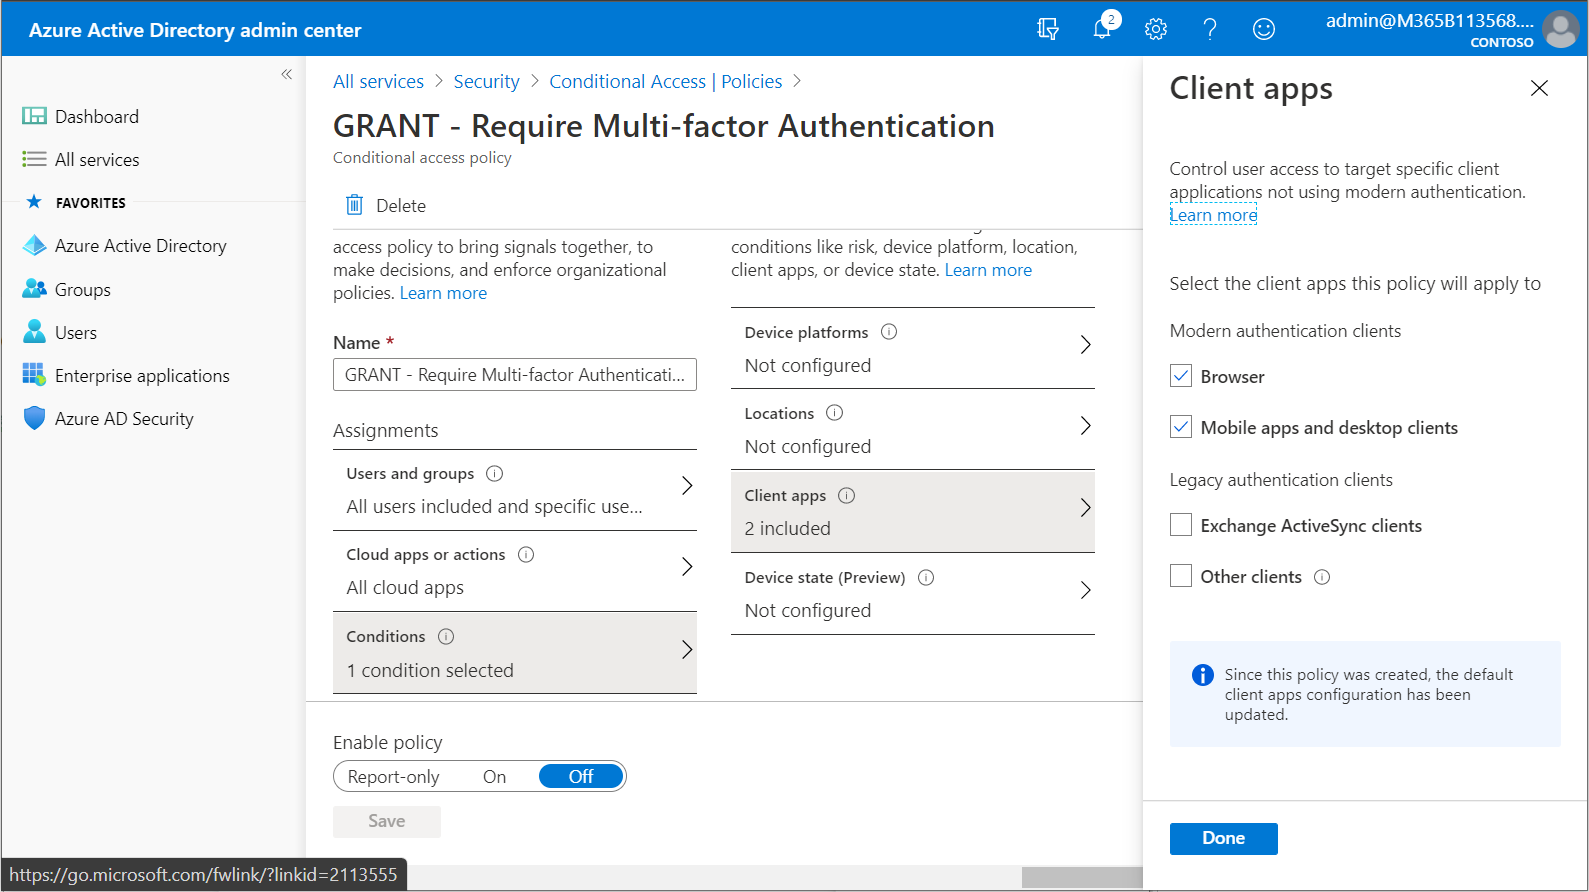
-
Access controls — Grant access, tick Require multi-factor authentication
Test this policy in Report-only mode first before enabling it to avoid locking out users.
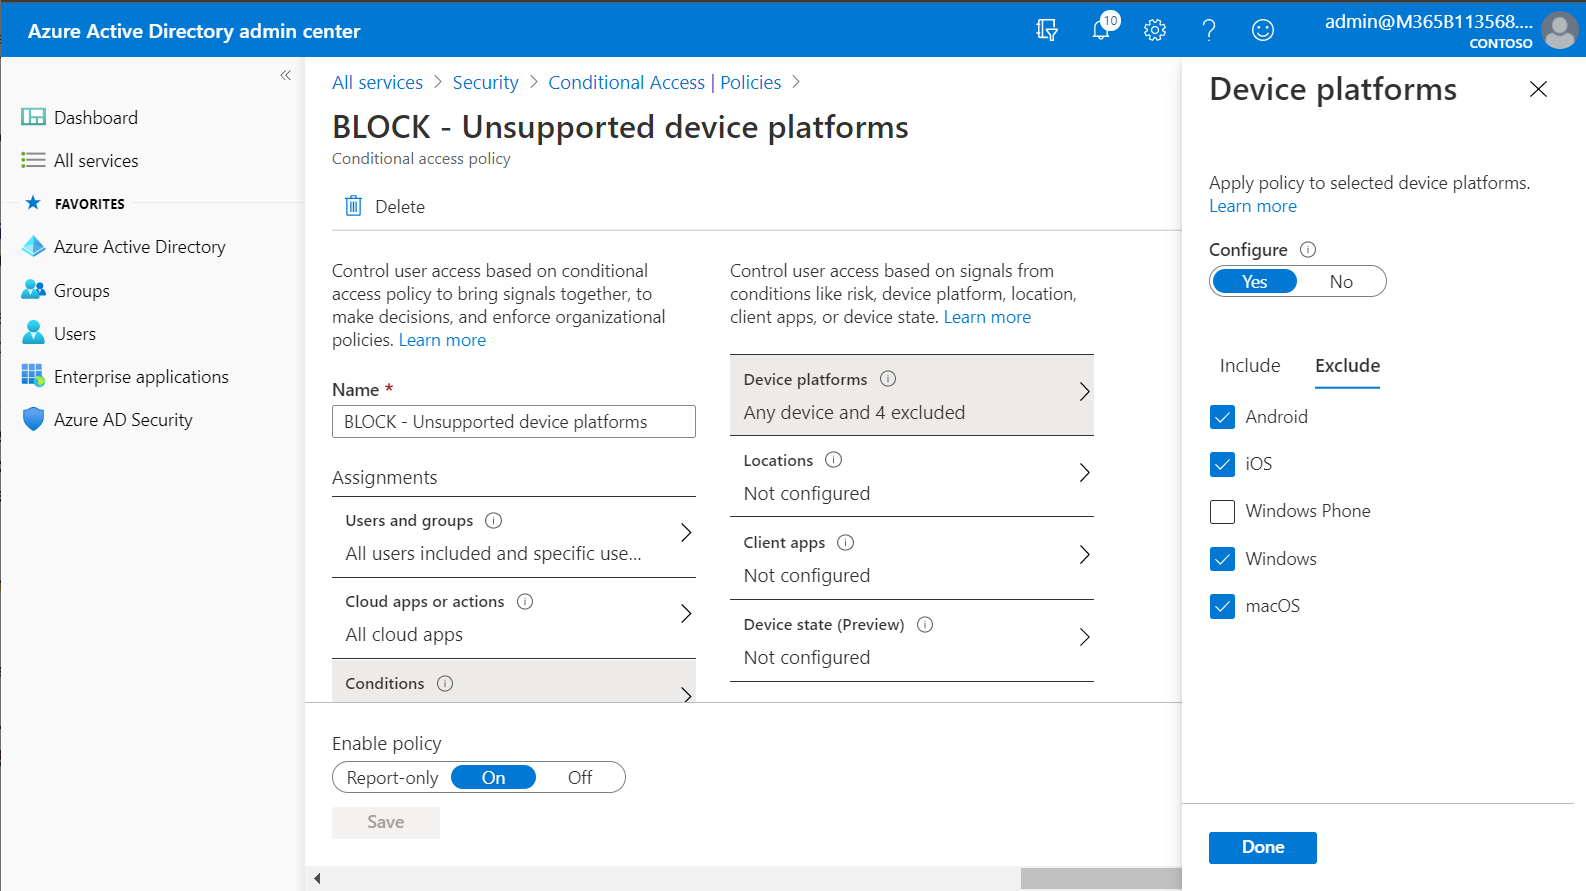
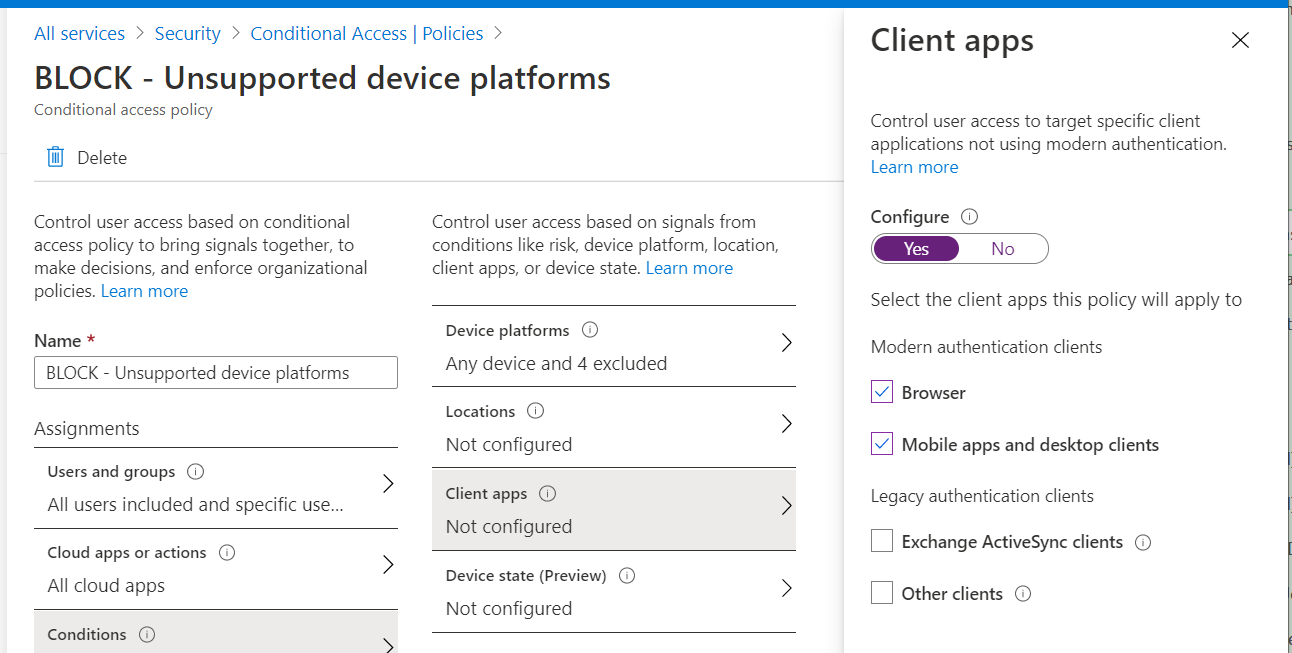
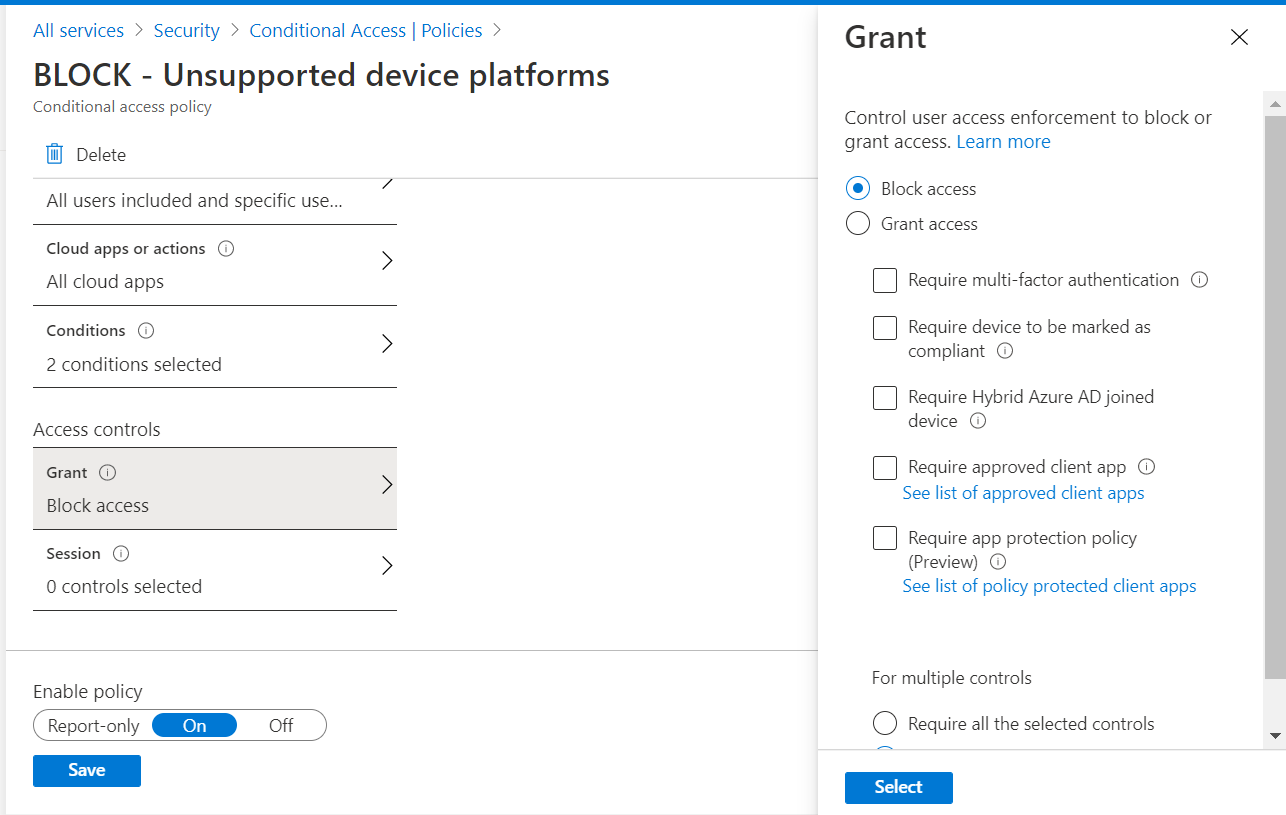
Policy 3 — BLOCK: Unsupported Device Platforms
Block access from unsupported operating systems (e.g., Linux) to prevent circumvention of device-based policies.
- Navigate to Azure AD > Security > Conditional Access > New policy
- Configure Assignments and Cloud apps as above, then under Conditions:
- Device platforms > Include: Any device / Exclude: Android, iOS, macOS, Windows
- Client apps: Browsers and Modern authentication clients
-
Access controls — Block access, then Save and Enable
Optional Advanced Policies
Only enable these additional policies after completing the prerequisites listed for each:
| Policy | Prerequisite |
|---|---|
| Require compliant device | Complete Endpoint Manager setup + enroll all devices |
| Require Hybrid Azure AD joined device | Complete Hybrid Azure AD Join setup + verify all devices registered |
| Require approved client app (MAM) | Complete App Protection Policies setup + deploy them |